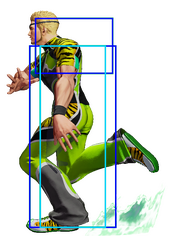
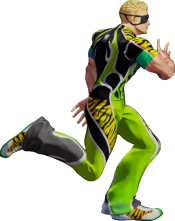
-Happy New Year 2025!
The King of Fighters XV/Ramón: Difference between revisions
Franck Frost (talk | contribs) Created page with "{{CharNavbox_XV}} <section begin="image"/>thumb|Ramón is an influential luchador (Mexican pro-wrestler) who has been called the "strongest human alive". Though he always wears a bright smile, Ramón isn't afraid to tell people how it is.<br/>Although small for a fighter, he toys with his opponents by utilizing his agility and skillful throws. He joins G.A.W. where he fights alongside Antonov.<section end="image"/> {{TOClimit|3}} ==Movel..." |
EMRaistlin (talk | contribs) No edit summary |
||
| (28 intermediate revisions by 7 users not shown) | |||
| Line 1: | Line 1: | ||
{{CharNavbox_XV}} | {{CharNavbox_XV}} | ||
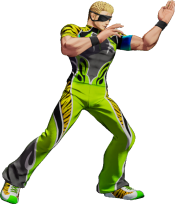
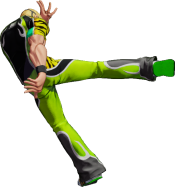
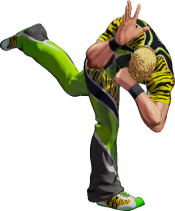
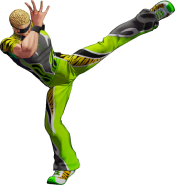
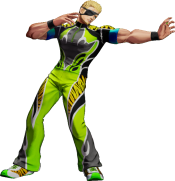
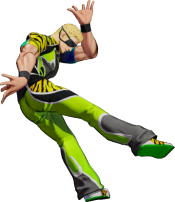
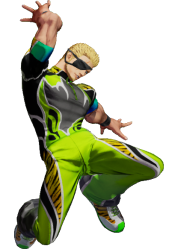
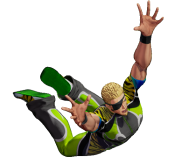
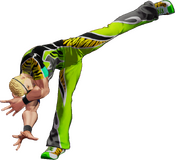
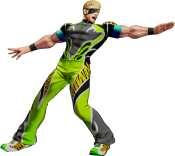
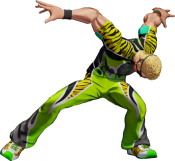
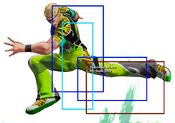
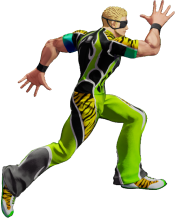
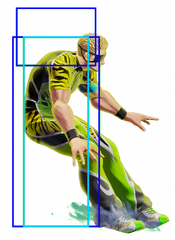
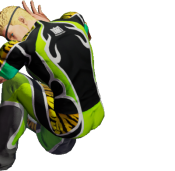
<section begin="image"/>[[File:KOFXV Ramon Profile.png|thumb|Ramón is an influential luchador (Mexican pro-wrestler) who has been called the "strongest human alive". Though he always wears a bright smile, Ramón isn't afraid to tell people how it is.<br/>Although small for a fighter, he toys with his opponents by utilizing his agility and skillful throws. He joins G.A.W. where he fights alongside Antonov.]]<section end="image"/> | <section begin="image"/>[[File:KOFXV Ramon Profile.png|thumb|Ramón is an influential luchador (Mexican pro-wrestler) who has been called the "strongest human alive". Though he always wears a bright smile, Ramón isn't afraid to tell people how it is.<br/>Although small for a fighter, he toys with his opponents by utilizing his agility and skillful throws. He joins G.A.W. where he fights alongside Antonov. | ||
<div class="center" style="width: auto; margin-left: auto; margin-right: auto;"> | |||
<big>'''Jump:''' 41f | |||
<br>'''Hop:''' 33f | |||
<br>'''Backdash:''' 22f | |||
<br>'''Run Speed Ranking:''' 5 | |||
<br>'''Can triangle jump''' | |||
</big></div>]]<section end="image"/> | |||
{{TOClimit|3}} | {{TOClimit|3}} | ||
==Movelist== | ==Movelist== | ||
| Line 24: | Line 31: | ||
Drop Kick - [[image:df.gif]] + [[image:d.gif]] | Drop Kick - [[image:df.gif]] + [[image:d.gif]] | ||
Head Butt - [[image:fd.gif]] + [[image: | Head Butt - [[image:fd.gif]] + [[image:a.gif]] | ||
:┗Hoist 1 - [[image:dn.gif]] [[image:dn.gif]] + [[image:a.gif]] | :┗Hoist 1 - [[image:dn.gif]] [[image:dn.gif]] + [[image:a.gif]] | ||
:┗Hoist 2 - [[image:dn.gif]] [[image:dn.gif]] + [[image:c.gif]] | :┗Hoist 2 - [[image:dn.gif]] [[image:dn.gif]] + [[image:c.gif]] | ||
| Line 73: | Line 80: | ||
| '''0 Meter''' | | '''0 Meter''' | ||
| | | | ||
Far Cnfirm<br/> | |||
Anywhere<br/> | Anywhere<br/> | ||
Corner | Corner Reset<br/> | ||
| | | | ||
f.5B > 214A = 165 dmg<br/> | |||
cl.C/2C > 3D > 623B > 623K > 22C = 257 dmg<br/> | cl.C/2C > 3D > 623B > 623K > 22C = 257 dmg<br/> | ||
cl.C/cl.D > 3D > | cl.C/cl.D > 3D > 623B > 623K > 22C > cl.5C > 214C = 306/316 dmg<br/> | ||
|- | |- | ||
| '''0.5 Meters''' | | '''0.5 Meters''' | ||
| | | | ||
Low<br/> | Low<br/> | ||
Corner Reset<br/> | |||
| | | | ||
2B > 2A > 623BD | 2B > 2A > 623BD > 623D > 623K > 22C = 273 dmg<br/> | ||
cl.C/2C > 3D > 623BD > 214B, AB > 623B > 623K > 22C > cl.5C > 214C = 428 dmg<br/> | |||
cl.C/2C > 3D > 623BD, | |||
|- | |- | ||
| '''1 Meter''' | | '''1 Meter''' | ||
| Line 95: | Line 100: | ||
Anywhere<br/> | Anywhere<br/> | ||
| | | | ||
cl.C/2C > 3D > | cl.C/2C > 3D > 623BD > 623D > 623K > 22A > 41236AC > 22AC = 453 dmg<br/> | ||
|- | |- | ||
| '''2 Meters''' | | '''2 Meters''' | ||
| | | | ||
Anywhere<br/> | |||
| | | | ||
cl.C/2C > 3D > 623B | cl.C/2C > 3D > 623B > 21441236BD = 463 dmg<br/> | ||
|- | |- | ||
|} | |} | ||
==Gameplay Overview== | ==Gameplay Overview== | ||
Ramón is a fast, tricky character with plenty of extra mobility options and the range on key normals to back it up, most of which can lead to very important knockdowns. Once he's in, Ramón not only has crossups, command grabs and fake moves at his disposal, but unique pressure involving Feint Step which lets him frame trap, extend pressure and position himself for more mixups. From these, Ramón either gets hard knockdowns, corner resets or a way to further mix the opponent up, and the damage he gets for his meter is fantastic. | Ramón is a fast, tricky character with plenty of extra mobility options and the range on key normals to back it up, most of which can lead to very important knockdowns. Once he's in, Ramón not only has crossups, command grabs and fake moves at his disposal, but unique pressure involving Feint Step which lets him frame trap, extend pressure and position himself for more mixups. From these, Ramón either gets hard knockdowns, corner resets or a way to further mix the opponent up, and the damage he gets for his meter is fantastic. All of this comes at the cost of just how weird Ramon is. He has very high whiff recovery on specials and heavies. He has horrible light confirms, awful lights outside of stand A, is very susceptible to guard cancel roll, and he can easily be jumped in on at the right angles. All of this means Ramon has difficulty playing a classic KoF low stagger game, and can't convert off a quick run up low into something good. | ||
The gist of Feint Step pressure is this; after doing Feint Step, Ramón is left at +3. Although he can continue pressuring with another cr.C, the opponent can very easily mash jab to beat it and potentially get a combo. Ramón's solution, then, is to delay cr.C (either by holding Feint Step a little longer or delaying it manually) so it catches the recovery of the jab | The gist of Feint Step pressure is this; after doing Feint Step, Ramón is left at +3. Although he can continue pressuring with another cr.C, the opponent can very easily mash jab or a quick heavy to beat it and potentially get a combo. Ramón's solution, then, is to either move to catch a whiff, press 5A, press 5C, or delay cr.C (either by holding Feint Step a little longer or delaying it manually) so it catches the recovery of the jab. To further crack open the opponent's defense, Ramón can use his running grab (41236K), run in for an EX TNC, hop in for standard KOF mixups, or use Feint Step to position himself for anything under the sun. Finally, he can simply block or roll to bait reversals or Shatter Strike, then melt the opponent's life bar from there. Although Ramón's pressure can be fake, its high reward and overall ambiguity grants Ramon a very healthy amount of mental plus frames. Once you get a solid hit, however, ending a combo with Hoist 2 > 5C > 214C in the corner or Hoist 1 > 41236AC > 22AC anywhere is the start of your vortex and the start of victory. | ||
{{StrengthsAndWeaknesses | {{StrengthsAndWeaknesses | ||
| intro = '''''{{SUBPAGENAME}} is a mobile grappler who plays footsies using his long-ranged tools and fast movement options, then uses Feint Step in pressure to facilitate staggers and mixups.''''' | | intro = '''''{{SUBPAGENAME}} is a mobile grappler who plays footsies using his long-ranged tools and fast movement options, then uses Feint Step in pressure to facilitate staggers and mixups.''''' | ||
| Line 114: | Line 119: | ||
* '''Good Movement''': Ramón is quite mobile overall, with high jumps, fast ground speeds, a triangle jump and Feint Step for positioning. His running EX moves facilitate even better movement, boosting his speed considerably. | * '''Good Movement''': Ramón is quite mobile overall, with high jumps, fast ground speeds, a triangle jump and Feint Step for positioning. His running EX moves facilitate even better movement, boosting his speed considerably. | ||
* '''Massive Damage''': Ramón has absolutely ridiculous damage across the board no matter how much meter he uses, making up for his lack of light confirms. | * '''Massive Damage''': Ramón has absolutely ridiculous damage across the board no matter how much meter he uses, making up for his lack of light confirms. | ||
* '''Powerful Vortex''': With the array of his combo routes, resets, and all of his command throws, high/lows, and crossups, all of which are hard to punish when utilized correctly or outright safe and hard to react to, Ramón has a buffet of tools to keep opponents knocked down. | * '''Incredibly Powerful Vortex''': With the array of his combo routes, resets, and all of his command throws, high/lows, and crossups, all of which are hard to punish when utilized correctly or outright safe and hard to react to, Ramón has a buffet of tools to keep opponents knocked down while converting into extreme damage if they hit. | ||
* '''Strong Pressure''': Feint Step gives Ramón a great way to remain plus, and puts him in an optimal range to utilize and even frametrap with 5C. If he's getting mashed on without meter, Ramon's delay cancels can help him out at midscreen, and Bird of Paradise is an evasive tool that can both mix, catch jumps, and avoid abare. | * '''Strong Pressure''': Feint Step gives Ramón a great way to remain plus, and puts him in an optimal range to utilize and even frametrap certain buttons with 5C. If he's getting mashed on without meter, Ramon's delay cancels can help him out at midscreen, and Bird of Paradise is an evasive tool that can both mix, catch jumps, and avoid abare. In general, people will try not to mash on Ramon, which lets him do whatever the hell he wants and set up all of his command grabs and 5050s. | ||
* '''Great Pokes''': Ramón may not have MANY great pokes, but the ones he does have are fantastic. 5A is one of the largest, most active, most quickly recovering 4f buttons in the game, and it covers a great range. His 5C is a large elbow with very, very stupid reward, his 5D is a very active (albeit slow) anti air, his 2D is whiff cancelable and has great range, and his j.CD is among the best in the game. | * '''Great Pokes''': Ramón may not have MANY great pokes, but the ones he does have are fantastic. 5A is one of the largest, most active, most quickly recovering 4f buttons in the game, and it covers a great range. It works as an anti air, an anti hop, a general check. It is the best 5A in the game in almost every single way. His 5C is a large elbow with very, very stupid reward, his 5D is a very active (albeit slow) anti air, his 2D is whiff cancelable and has great range, and his j.CD is among the best in the game. The high reward off his heavy pokes grant him an extremely strong whiff punishment game, which allows him to often steal rounds off one good hit. | ||
* '''Neutral Skipping''': With meter, Ramon has some of the best neutral skips in the entire game. EX Somersault is a stupidly fast run grab with nuclear range, allowing him to jumpscare turtling players with ease. On the other hand, if a player is super button happy, EX Feint Step (Dropkick) is not only safe when spaced, but is fast, has an ignorant hitbox, leads to an HKD, and on counterhit grants him a combo. | |||
* '''Position Versatility''': Due to Ramon's toolkit he can generally fit anywhere on a team. His high damage gives him great utility wherever he is, and the overwhelming utility of his EX moves allows him to be terrifying no matter if he is ran mid or anchor. | |||
| cons= | | cons= | ||
* '''Awful Lights''': Other than 5A, Ramón's lights are stubby and have horrendous pushback, starving him of any confirms unless he is quite literally in their face. | * '''Awful Lights Otherwise''': Other than 5A, Ramón's lights are stubby and have horrendous pushback, starving him of any confirms unless he is quite literally in their face. His DDG 2B also makes catching landings much harder than it is for other characters. | ||
* '''Horrible Lows''': Ramón's close B has almost no range, and his 2B is stubby and laggy. His sweep, though long, is also very slow. This leaves Ramón with good overheads but bad lows, making a lot of his mixups during pressure have very lopsided reward. | * '''Very Difficult Light Confirms''': Coupling onto his lights being stubby with large pushback, Ramon's only conversion tool from lights is EX Rolling Sobat. At frame 13, this means you must cancel into it immediately to get a combo off. Considering the input, this is much harder said than done, and will require greater dexterity than it would otherwise seem. | ||
* ''' | * '''Laggy''': Many of Ramon's key tools have ridiculously high recovery. A harsh reality is that if he attempts to convert into a hit off an airborne opponent, they will be able to get a heavy combo starter on him. Essentially, this means that he can sometimes die to something somewhat 'random', and his overall consistency and safety are far below other characters. | ||
* ''' | * '''Horrible Lows''': Ramón's close B has almost no range, and his 2B is stubby and laggy and can't self chain. His sweep, though long, is also very slow. This leaves Ramón with good overheads but bad lows, making a lot of his mixups during pressure have very lopsided reward. | ||
* ''' | * '''Middling Anti-Air''': Not a single one of Ramón's grounded buttons function as a reactive anti air to close targets. This means if someone is at the range where clA will get triggered, Ramon either has to luck out with a roll or just take the pressure. | ||
* '''Precise''': Ramon's left/right tools have very thin hitboxes, meaning they are susceptible to whiffing outside of his specific setups. | |||
* '''Very Susceptible to GC Roll''': Due to the extreme recovery on Ramon's heavies and specials, a good guard cancel roll can result in him being fully punished with a 100% guarantee. Ramon must play around this fact at all times. | |||
}} | }} | ||
| Line 279: | Line 288: | ||
|description= | |description= | ||
*Much faster startup than st.CD with otherwise the same qualities that make it good. Very useful as an anti-air if you have the meter to burn. | *Much faster startup than st.CD with otherwise the same qualities that make it good. Very useful as an anti-air if you have the meter to burn. | ||
}} | |||
====AdvanceStrike==== | |||
{{FrameDataCargo-KOFXV | |||
|moveId=ramon_qcb+cd | |||
|description= | |||
*Same animation and range as his CD. | |||
* The throw counter is at the feet. | |||
}} | }} | ||
| Line 313: | Line 332: | ||
{{FrameDataCargo-KOFXV | {{FrameDataCargo-KOFXV | ||
|moveId=ramon_df+d,ramon_df+dcancel | |moveId=ramon_df+d,ramon_df+dcancel | ||
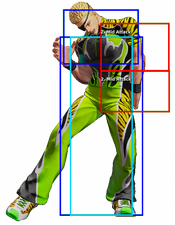
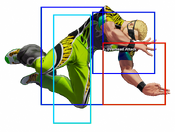
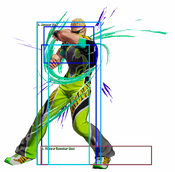
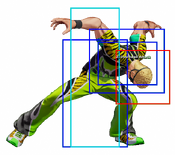
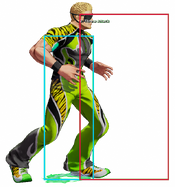
|captions= Raw Version (Hitbox), Cancel Version | |||
|description2= | |description2= | ||
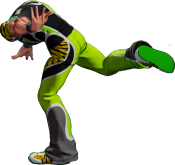
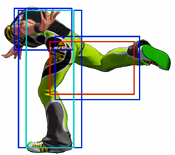
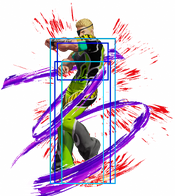
* New input. A low attack which low profiles and travels deceptively far. It is quite slow, though. Super cancellable when done raw, but if you're using this in neutral it's best to cancel into Maxmode instead for the confirm. Combo glue otherwise, but you absolutely must cancel it for it is unsafe on hit. Can be kara cancelled from cr.D to move forward and be cancellable, but given its not-so-great priority and the existence of hops you may not want to do that. | * New input. A low attack which low profiles and travels deceptively far. It is quite slow, though. Super cancellable when done raw, but if you're using this in neutral it's best to cancel into Maxmode instead for the confirm. Combo glue otherwise, but you absolutely must cancel it for it is unsafe on hit. Can be kara cancelled from cr.D to move forward and be cancellable, but given its not-so-great priority and the existence of hops you may not want to do that. | ||
| Line 320: | Line 340: | ||
{{FrameDataCargo-KOFXV | {{FrameDataCargo-KOFXV | ||
|moveId=ramon_f+a,ramon_f+acancel | |moveId=ramon_f+a,ramon_f+acancel | ||
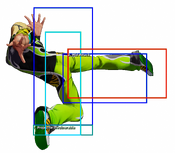
|captions= Raw Version (Hitbox), Cancel Version | |||
|description2= | |description2= | ||
* A stubby overhead which sees some use in Ramon's pressure game when he's up close, but it is less rewarding than heavy Rolling Sobat which is slower but has better damage and range. Hard knockdown on its own. You won't be able to Hoist if you combo into this move, but you are able to special cancel. This seems useful for pressure, but you get the exact same frame advantage that you get from everything else (+3) while also being pushed back way further. | * A stubby overhead which sees some use in Ramon's pressure game when he's up close, but it is less rewarding than heavy Rolling Sobat which is slower but has better damage and range. Hard knockdown on its own. You won't be able to Hoist if you combo into this move, but you are able to special cancel. This seems useful for pressure, but you get the exact same frame advantage that you get from everything else (+3) while also being pushed back way further. | ||
| Line 343: | Line 364: | ||
{{FrameDataCargo-KOFXV | {{FrameDataCargo-KOFXV | ||
|moveId=ramon_hcf+A,ramon_hcf+C,ramon_hcf+AC | |moveId=ramon_hcf+A,ramon_hcf+C,ramon_hcf+AC | ||
|input= 41236A/C/AC | |||
|captions= A Version (Hitbox),, C Version,, EX Version | |||
|description2= | |description2= | ||
* Ramón's command grab, but it has a bit more nuance here than usual. 41236A is the standard version of this move you see in other games: comes out on frame 5 and has strike invulnerability, but curiously can be thrown. 41236C, however, is slower and only has throw invincibility. Its slower startup is actually optimal for tick throw setups: Ramón can do cr.B 41236C as an option select where he either gets a low mixup on hit, or a tick throw which catches rolls every time if they blocked cr.B. Both versions can end combos with a sideswitch and a hard knockdown, with perfect spacing for a hyper hop safejump. | * Ramón's command grab, but it has a bit more nuance here than usual. 41236A is the standard version of this move you see in other games: comes out on frame 5 and has strike invulnerability, but curiously can be thrown. 41236C, however, is slower and only has throw invincibility. Its slower startup is actually optimal for tick throw setups: Ramón can do cr.B 41236C as an option select where he either gets a low mixup on hit, or a tick throw which catches rolls every time if they blocked cr.B. Both versions can end combos with a sideswitch and a hard knockdown, with perfect spacing for a hyper hop safejump. | ||
| Line 352: | Line 375: | ||
{{FrameDataCargo-KOFXV | {{FrameDataCargo-KOFXV | ||
|moveId=ramon_dp+B,ramon_dp+D,ramon_dp+BD | |moveId=ramon_dp+B,ramon_dp+D,ramon_dp+BD | ||
|captions=D version is a lose button. | |input= 623B/D/BD | ||
|captions=D version is a lose button. / B Version (Hitbox), D Version, D Version Hit State Only, EX Version | |||
|description2= | |description2= | ||
* The light version is a combo tool which is somewhat safe on block given its pushback, as Ramón kicks in place. The heavy version is slower, less safe and moves Ramón forward, but it's an overhead. Both versions result in a hard knockdown. The heavy version can easily be stuffed with a jab if not timed meaty, and will receive a small punish most of the time. | * The light version is a combo tool which is somewhat safe on block given its pushback, as Ramón kicks in place. The heavy version is slower, less safe and moves Ramón forward, but it's an overhead. Both versions result in a hard knockdown. The heavy version can easily be stuffed with a jab if not timed meaty, and will receive a small punish most of the time. | ||
| Line 369: | Line 393: | ||
{{FrameDataCargo-KOFXV | {{FrameDataCargo-KOFXV | ||
|moveId=ramon_hcf+K,ramon_hcf+BD | |moveId=ramon_hcf+K,ramon_hcf+BD | ||
|input= 42136B/D/BD | |||
|captions= Normal Version (Hitbox), EX Version | |||
|description= | |description= | ||
* A running command grab. Like most moves of its type it has a high profile, allowing it to move through low attacks while it is active. This travels slightly faster than Ramón's actual run, so it can be spotted. On hit it causes a hard knockdown, but you don't get much okizeme from it because Ramón lunges back to midscreen on hit. | * A running command grab. Like most moves of its type it has a high profile, allowing it to move through low attacks while it is active. This travels slightly faster than Ramón's actual run, so it can be spotted. On hit it causes a hard knockdown, but you don't get much okizeme from it because Ramón lunges back to midscreen on hit. | ||
| Line 378: | Line 404: | ||
{{FrameDataCargo-KOFXV | {{FrameDataCargo-KOFXV | ||
|moveId=ramon_hcf+K~AB | |moveId=ramon_hcf+K~AB | ||
|input= AB during 41236K/BD | |||
|description= | |description= | ||
* What makes Ramón's running grab unique is its ability to be cancelled. You can use this to bait a reaction from the opponent and get a punish rather than fully commit to the grab itself. | * What makes Ramón's running grab unique is its ability to be cancelled. You can use this to bait a reaction from the opponent and get a punish rather than fully commit to the grab itself. | ||
| Line 385: | Line 412: | ||
{{FrameDataCargo-KOFXV | {{FrameDataCargo-KOFXV | ||
|moveId=ramon_qcb+K,ramon_qcb+BD | |moveId=ramon_qcb+K,ramon_qcb+BD | ||
|captions=TAIGAH ROADAH, You'll probably die if you input this. | |input= 214B/D/BD | ||
|captions=TAIGAH ROADAH / Normal Version (Hitbox), You'll probably die if you input this.,, EX Version | |||
|description= | |description= | ||
* Ramón runs to the wall and... faceplants. This is an overhead which results in a hard knockdown, but it is extremely bad on block. Tiger Road is a series of various walldives, none of which are particularly good. The followups don't travel very far, and if you see Ramón running towards the wall you don't even need to try and anti-air any of them (although you certainly can). You can just downback and get a free punish because Cross Chop hits mid and Force of Will whiffs on crouchers, and Ramón will be lying right in front of you. | * Ramón runs to the wall and... faceplants. This is an overhead which results in a hard knockdown, but it is extremely bad on block. Tiger Road is a series of various walldives, none of which are particularly good. The followups don't travel very far, and if you see Ramón running towards the wall you don't even need to try and anti-air any of them (although you certainly can). You can just downback and get a free punish because Cross Chop hits mid and Force of Will whiffs on crouchers, and Ramón will be lying right in front of you. | ||
| Line 411: | Line 439: | ||
{{FrameDataCargo-KOFXV | {{FrameDataCargo-KOFXV | ||
|moveId=ramon_qcb+k~k,ramon_qcb+bd~k | |moveId=ramon_qcb+k~k,ramon_qcb+bd~k | ||
|input= B/D during Tiger Road during Wall Cling | |||
|captions= Normal Version (Hitbox), EX Version | |||
|description= | |description= | ||
* An air-to-air strike. Both this and Force of Will track the opponent's position, but this does a better job at actually reaching them. Regardless, since both calculate where Ramón will go based on where he is at the split second he touches the wall, they can be both avoided by backdashing or super jumping away from them. Or by downbacking, as mentioned earlier, but this move deals chip damage if you're worried about that. | * An air-to-air strike. Both this and Force of Will track the opponent's position, but this does a better job at actually reaching them. Regardless, since both calculate where Ramón will go based on where he is at the split second he touches the wall, they can be both avoided by backdashing or super jumping away from them. Or by downbacking, as mentioned earlier, but this move deals chip damage if you're worried about that. | ||
| Line 420: | Line 450: | ||
{{FrameDataCargo-KOFXV | {{FrameDataCargo-KOFXV | ||
|moveId=ramon_qcb+k~qcf+p,ramon_qcb+bd~qcf+p | |moveId=ramon_qcb+k~qcf+p,ramon_qcb+bd~qcf+p | ||
|input= 236A/C during Tiger Road during Wall Cling | |||
|captions= Normal Version (Hitbox), EX Version | |||
|description= | |description= | ||
* The most rewarding of the Tiger Road followups, and possibly the most annoying knowledge check Ramón has up his sleeve, even though it's not good. Reason being, you can crouch this and have it miss every time, then punish Ramón dearly. What is appealing about this move is that it is an unblockable (NB: it is a strike, which means you can roll through it; it is an unblockable hitgrab as opposed to actually being a throw) and it leads to Hoist followups for even more damage, which is why it sometimes sees use as an air-to-air. | * The most rewarding of the Tiger Road followups, and possibly the most annoying knowledge check Ramón has up his sleeve, even though it's not good. Reason being, you can crouch this and have it miss every time, then punish Ramón dearly. What is appealing about this move is that it is an unblockable (NB: it is a strike, which means you can roll through it; it is an unblockable hitgrab as opposed to actually being a throw) and it leads to Hoist followups for even more damage, which is why it sometimes sees use as an air-to-air. | ||
|description2= | |description2= | ||
* The EX version can hit crouchers and goes fullscreen, making it much more effective as a panic move. Be mindful that it can miss even on some standing opponents if they are too close to the wall, considering the height at which Ramón starts to fly. Ideally you should use this move as an air-to-air only, or not at all. | * The EX version can hit crouchers and goes fullscreen, making it much more effective as a panic move. This version can hit rolls. Be mindful that it can miss even on some standing opponents if they are too close to the wall, considering the height at which Ramón starts to fly. Ideally you should use this move as an air-to-air only, or not at all. | ||
}} | }} | ||
| Line 436: | Line 468: | ||
{{FrameDataCargo-KOFXV | {{FrameDataCargo-KOFXV | ||
|moveId=ramon_qcb+A,ramon_qcb+C,ramon_qcb+AC | |moveId=ramon_qcb+A,ramon_qcb+C,ramon_qcb+AC | ||
|input= 214A/C/AC | |||
|captions= Normal Version Step (Hitbox), A Version Attack,, EX Version | |||
|description= | |description= | ||
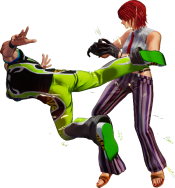
* 214A is a dropkick which results in good corner carry while granting a hard knockdown and a guaranteed Bird of Paradise in the corner. It is unsafe, and using it as a read in neutral will most likely get you killed. | * 214A is a dropkick which results in good corner carry while granting a hard knockdown and a guaranteed Bird of Paradise in the corner. It is unsafe, and using it as a read in neutral will most likely get you killed. | ||
| Line 443: | Line 477: | ||
* Will only leave you at +3 when canceling from heavies or command normals. This means that if you attempt to press crouch C afterwards, they can stuff it with a jab. The counter to this is to delay your crouch C, hitting their recovery and netting you a combo. This is heavily dependant on which button they press; if they press a slower button, you either have to delay crouch C more, or you could press it immediately if their button is 8f or slower. This makes staggering with Ramón quite a murky affair, which only gets more muddled when opponents start jumping back, forcing you to start thinking about anti-airs as well. It gets worse if they have far buttons that can hit you even if you do nothing but block. | * Will only leave you at +3 when canceling from heavies or command normals. This means that if you attempt to press crouch C afterwards, they can stuff it with a jab. The counter to this is to delay your crouch C, hitting their recovery and netting you a combo. This is heavily dependant on which button they press; if they press a slower button, you either have to delay crouch C more, or you could press it immediately if their button is 8f or slower. This makes staggering with Ramón quite a murky affair, which only gets more muddled when opponents start jumping back, forcing you to start thinking about anti-airs as well. It gets worse if they have far buttons that can hit you even if you do nothing but block. | ||
|description3= | |description3= | ||
* | * Much safer, and incredibly rewarding on counterhit. Think of it as a giant lariat. It's cheap, it's fun, it's probably one of the best EX moves in the game in terms of neutral use. | ||
}} | }} | ||
==Super Special Moves== | ==Super Special Moves== | ||
===Tiger Spin=== | |||
{{FrameDataCargo-KOFXV | {{FrameDataCargo-KOFXV | ||
|moveId=ramon_hcbhcb+p,ramon_hcbhcb+ac | |moveId=ramon_hcbhcb+p,ramon_hcbhcb+ac | ||
|input= 6321463214A/C/AC | |||
|captions= Normal Version (Hitbox), Max Version | |||
|description= | |description= | ||
* Faster than 41236A. Mostly invalidated by 41236AC, as this move does not grant much in the way of okizeme, but | * Faster than 41236A. Mostly invalidated by 41236AC, as this move does not grant much in the way of okizeme, but you do get some advantage. | ||
|description2= | |description2= | ||
* The EX version deals more damage but you still don't get oki from it. This is instant, but so is 41236AC. Only do this if you need an extremely fast punish, | * The EX version deals more damage but you still don't get much oki from it. This is instant, but so is 41236AC. Only do this if you need an extremely fast punish, or if you know it will kill. | ||
}} | }} | ||
===El • Diablo • Amarillo • Ramón • Volando=== | |||
{{FrameDataCargo-KOFXV | {{FrameDataCargo-KOFXV | ||
|moveId=ramon_qcbhcf+k,ramon_qcbhcf+bd | |moveId=ramon_qcbhcf+k,ramon_qcbhcf+bd | ||
|input= 2141236B/D/BD | |||
|captions= Normal Version (Hitbox),, Max Version | |||
|description= | |description= | ||
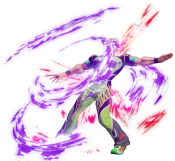
* Ramón leaps onto the wall behind him and dives quickly towards the opponent for a ranbu. The regular version sees this run happen in real time, making this move difficult for reversals, but happens during the flash when canceled from Rolling Sobat, making it a solid way to end combos. | * Ramón leaps onto the wall behind him and dives quickly towards the opponent for a ranbu. The regular version sees this run happen in real time, making this move difficult for reversals, but happens during the flash when canceled from Rolling Sobat, making it a solid way to end combos. | ||
| Line 466: | Line 504: | ||
}} | }} | ||
==Climax Super Special Moves== | |||
===Hyper Sonic • Ramón=== | |||
{{FrameDataCargo-KOFXV | {{FrameDataCargo-KOFXV | ||
| Line 476: | Line 516: | ||
After a Feint Step, you are +3 on block if you cancelled any heavy attack or command normal, but +7 if you cancelled from st.CD. Given the latter's 17f startup, it is especially difficult to land without getting mashed out of. As being +3 isn't much to work with, you will have to be aware of opponents mashing jabs, as they will stuff your attempts at frame trapping with anything slow such as cr.C. Quite a few characters can mash buttons that will both stop offensive jumps and cr.C, sadly leaving you forced to wait for an option and counter it accordingly. You will be minus if you Feint Cancel a light attack, but doing so is still useful strictly for positioning. | After a Feint Step, you are +3 on block if you cancelled any heavy attack or command normal, but +7 if you cancelled from st.CD. Given the latter's 17f startup, it is especially difficult to land without getting mashed out of. As being +3 isn't much to work with, you will have to be aware of opponents mashing jabs, as they will stuff your attempts at frame trapping with anything slow such as cr.C. Quite a few characters can mash buttons that will both stop offensive jumps and cr.C, sadly leaving you forced to wait for an option and counter it accordingly. You will be minus if you Feint Cancel a light attack, but doing so is still useful strictly for positioning. | ||
{{Colors-KOFXV}} | |||
==Videos== | ==Videos== | ||
{{#ev:youtube|P6w5BxaO1qk|||'''Ramón Reveal Trailer'''|frame}} | {{#ev:youtube|P6w5BxaO1qk|||'''Ramón Reveal Trailer'''|frame}} | ||
Latest revision as of 07:42, 8 November 2024
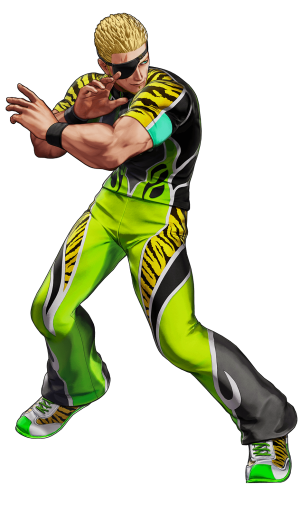
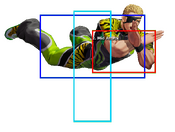
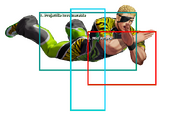
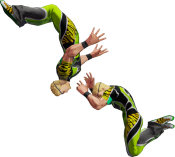
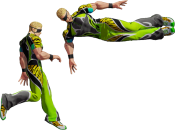
Although small for a fighter, he toys with his opponents by utilizing his agility and skillful throws. He joins G.A.W. where he fights alongside Antonov.
Hop: 33f
Backdash: 22f
Run Speed Ranking: 5
Can triangle jump
Movelist
(*) = EX OK
(!) = MAX OK
(Midair Only) = Can only be done in the air.
(Hold OK) = Can be held before releasing.
Throws
Command Normals
Sankaku-Tobi - ![]() (Near Wall) (Midair Only)
(Near Wall) (Midair Only)
Special Moves
Super Special Moves
El • Diablo • Amarillo • Ramón • Volando - ![]()
![]()
![]() +
+ ![]() /
/ ![]() !
!
Climax Super Special Moves
Quick Combo Reference
| 0 Meter |
Far Cnfirm |
f.5B > 214A = 165 dmg |
| 0.5 Meters |
Low |
2B > 2A > 623BD > 623D > 623K > 22C = 273 dmg |
| 1 Meter |
Anywhere |
cl.C/2C > 3D > 623BD > 623D > 623K > 22A > 41236AC > 22AC = 453 dmg |
| 2 Meters |
Anywhere |
cl.C/2C > 3D > 623B > 21441236BD = 463 dmg |
Gameplay Overview
Ramón is a fast, tricky character with plenty of extra mobility options and the range on key normals to back it up, most of which can lead to very important knockdowns. Once he's in, Ramón not only has crossups, command grabs and fake moves at his disposal, but unique pressure involving Feint Step which lets him frame trap, extend pressure and position himself for more mixups. From these, Ramón either gets hard knockdowns, corner resets or a way to further mix the opponent up, and the damage he gets for his meter is fantastic. All of this comes at the cost of just how weird Ramon is. He has very high whiff recovery on specials and heavies. He has horrible light confirms, awful lights outside of stand A, is very susceptible to guard cancel roll, and he can easily be jumped in on at the right angles. All of this means Ramon has difficulty playing a classic KoF low stagger game, and can't convert off a quick run up low into something good.
The gist of Feint Step pressure is this; after doing Feint Step, Ramón is left at +3. Although he can continue pressuring with another cr.C, the opponent can very easily mash jab or a quick heavy to beat it and potentially get a combo. Ramón's solution, then, is to either move to catch a whiff, press 5A, press 5C, or delay cr.C (either by holding Feint Step a little longer or delaying it manually) so it catches the recovery of the jab. To further crack open the opponent's defense, Ramón can use his running grab (41236K), run in for an EX TNC, hop in for standard KOF mixups, or use Feint Step to position himself for anything under the sun. Finally, he can simply block or roll to bait reversals or Shatter Strike, then melt the opponent's life bar from there. Although Ramón's pressure can be fake, its high reward and overall ambiguity grants Ramon a very healthy amount of mental plus frames. Once you get a solid hit, however, ending a combo with Hoist 2 > 5C > 214C in the corner or Hoist 1 > 41236AC > 22AC anywhere is the start of your vortex and the start of victory.
| Ramón is a mobile grappler who plays footsies using his long-ranged tools and fast movement options, then uses Feint Step in pressure to facilitate staggers and mixups. | |
| Pros | Cons |
|
|
Normals
Far Standing Normals
Far A
| stand A
st.A
st.A |
|---|
Far B
| stand B
st.B
st.B |
|---|
Far C
| stand C
st.C
st.C |
|---|
Far D
| stand D
st.D
st.D |
|---|
Close Standing Normals
Close A
| close A
cl.A
cl.A |
|---|
Close B
| close B
cl.B
cl.B |
|---|
Close C
| close C
cl.C
cl.C |
|---|
Close D
| close D
cl.D
cl.D |
|---|
Crouch Normals
Crouch A
| crouch A
cr.A
cr.A |
|---|
Crouch B
| crouch B
cr.B
cr.B |
|---|
Crouch C
| crouch C
cr.C
cr.C |
|---|
Crouch D
| crouch D
cr.D
cr.D |
|---|
Jump Normals
Jump A
| jump A
j.A
j.A |
|---|
Jump B
| jump B
j.B
j.B |
|---|
Jump C
| jump C
j.C
j.C |
|---|
Jump D
| jump D
j.D
j.D |
|---|
Rush
| rush
cl.AA
cl.AA |
|---|
Blowback
Blowback
| Blowback
st.CD
st.CD |
|---|
Shatter Strike
| Shatter Strike
236CD
236CD |
|---|
AdvanceStrike
| AdvanceStrike
214CD
214CD |
|---|
Jump CD
| jump CD
j.CD
j.CD |
|---|
Throws
| Arm Whip
(close) 4C or 6C
(close) 4C or 6C |
|---|
| Flying Mare
(close) 4D or 6D
(close) 4D or 6D |
|---|
Command Moves
| Sankaku-Tobi
j.9 near wall
j.9 near wall |
|---|
| Drop Kick
3D
3D |
|---|
| Head Butt
6A
6A |
|---|
| Hoist 1
22A
22A |
|---|
| Hoist 2
22C
22C |
|---|
Special Moves
Tiger Neck Chancery
| Tiger Neck Chancery
41236A/C/AC
41236A/C/AC |
|---|
Rolling Sobat
| Rolling Sobat
623B/D/BD
623B/D/BD |
|---|
Flying Body Attack
| Flying Body Attack
623K during Rolling Sobat
623K during Rolling Sobat |
|---|
Somersault
| Somersault
42136B/D/BD
42136B/D/BD |
|---|
Stop
| Stop
AB during 41236K/BD
AB during 41236K/BD |
|---|
Tiger Road
| Tiger Road
214B/D/BD
214B/D/BD |
|---|
Feint Dash
| Feint Dash
AB during Tiger Road
AB during Tiger Road |
|---|
Feint Jump
| Feint Jump
9 during Tiger Road
9 during Tiger Road |
|---|
Cross Chop
| Cross Chop
B/D during Tiger Road during Wall Cling
B/D during Tiger Road during Wall Cling |
|---|
Force of Will
| Force of Will
236A/C during Tiger Road during Wall Cling
236A/C during Tiger Road during Wall Cling |
|---|
Bird of Paradise
| Bird of Paradise
22AC
22AC |
|---|
Feint Step
| Feint Step
214A/C/AC
214A/C/AC |
|---|
Super Special Moves
Tiger Spin
| Tiger Spin
6321463214A/C/AC
6321463214A/C/AC |
|---|
El • Diablo • Amarillo • Ramón • Volando
| El • Diablo • Amarillo • Ramón • Volando
2141236B/D/BD
2141236B/D/BD |
|---|
Climax Super Special Moves
Hyper Sonic • Ramón
| Hyper Sonic • Ramón
2141236CD
2141236CD |
|---|
Misc
After a Feint Step, you are +3 on block if you cancelled any heavy attack or command normal, but +7 if you cancelled from st.CD. Given the latter's 17f startup, it is especially difficult to land without getting mashed out of. As being +3 isn't much to work with, you will have to be aware of opponents mashing jabs, as they will stuff your attempts at frame trapping with anything slow such as cr.C. Quite a few characters can mash buttons that will both stop offensive jumps and cr.C, sadly leaving you forced to wait for an option and counter it accordingly. You will be minus if you Feint Cancel a light attack, but doing so is still useful strictly for positioning.
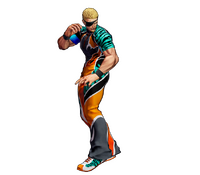
Alternate Colors
 |
 |
 |
 |
 |
 |
 |
 |
