-Happy New Year 2025!
The King of Fighters XV/Ramón: Difference between revisions
EMRaistlin (talk | contribs) No edit summary |
|||
| (18 intermediate revisions by 2 users not shown) | |||
| Line 6: | Line 6: | ||
<br>'''Backdash:''' 22f | <br>'''Backdash:''' 22f | ||
<br>'''Run Speed Ranking:''' 5 | <br>'''Run Speed Ranking:''' 5 | ||
<br>'''Can triangle jump''' | |||
</big></div>]]<section end="image"/> | </big></div>]]<section end="image"/> | ||
{{TOClimit|3}} | {{TOClimit|3}} | ||
| Line 287: | Line 288: | ||
|description= | |description= | ||
*Much faster startup than st.CD with otherwise the same qualities that make it good. Very useful as an anti-air if you have the meter to burn. | *Much faster startup than st.CD with otherwise the same qualities that make it good. Very useful as an anti-air if you have the meter to burn. | ||
}} | |||
====AdvanceStrike==== | |||
{{FrameDataCargo-KOFXV | |||
|moveId=ramon_qcb+cd | |||
|description= | |||
*Same animation and range as his CD. | |||
* The throw counter is at the feet. | |||
}} | }} | ||
| Line 353: | Line 364: | ||
{{FrameDataCargo-KOFXV | {{FrameDataCargo-KOFXV | ||
|moveId=ramon_hcf+A,ramon_hcf+C,ramon_hcf+AC | |moveId=ramon_hcf+A,ramon_hcf+C,ramon_hcf+AC | ||
|input= 41236A/C/AC | |||
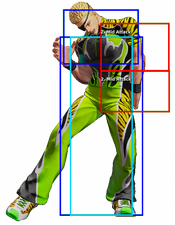
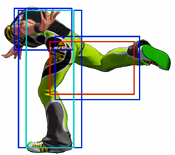
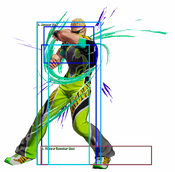
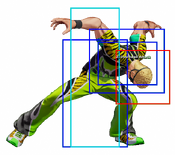
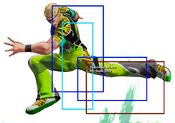
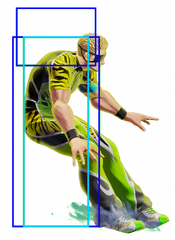
|captions= A Version (Hitbox),, C Version,, EX Version | |captions= A Version (Hitbox),, C Version,, EX Version | ||
|description2= | |description2= | ||
| Line 363: | Line 375: | ||
{{FrameDataCargo-KOFXV | {{FrameDataCargo-KOFXV | ||
|moveId=ramon_dp+B,ramon_dp+D,ramon_dp+BD | |moveId=ramon_dp+B,ramon_dp+D,ramon_dp+BD | ||
|captions=D version is a lose button. | |input= 623B/D/BD | ||
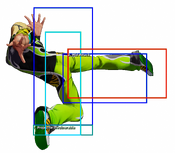
|captions=D version is a lose button. / B Version (Hitbox), D Version, D Version Hit State Only, EX Version | |||
|description2= | |description2= | ||
* The light version is a combo tool which is somewhat safe on block given its pushback, as Ramón kicks in place. The heavy version is slower, less safe and moves Ramón forward, but it's an overhead. Both versions result in a hard knockdown. The heavy version can easily be stuffed with a jab if not timed meaty, and will receive a small punish most of the time. | * The light version is a combo tool which is somewhat safe on block given its pushback, as Ramón kicks in place. The heavy version is slower, less safe and moves Ramón forward, but it's an overhead. Both versions result in a hard knockdown. The heavy version can easily be stuffed with a jab if not timed meaty, and will receive a small punish most of the time. | ||
| Line 380: | Line 393: | ||
{{FrameDataCargo-KOFXV | {{FrameDataCargo-KOFXV | ||
|moveId=ramon_hcf+K,ramon_hcf+BD | |moveId=ramon_hcf+K,ramon_hcf+BD | ||
|input= 42136B/D/BD | |||
|captions= Normal Version (Hitbox), EX Version | |||
|description= | |description= | ||
* A running command grab. Like most moves of its type it has a high profile, allowing it to move through low attacks while it is active. This travels slightly faster than Ramón's actual run, so it can be spotted. On hit it causes a hard knockdown, but you don't get much okizeme from it because Ramón lunges back to midscreen on hit. | * A running command grab. Like most moves of its type it has a high profile, allowing it to move through low attacks while it is active. This travels slightly faster than Ramón's actual run, so it can be spotted. On hit it causes a hard knockdown, but you don't get much okizeme from it because Ramón lunges back to midscreen on hit. | ||
| Line 389: | Line 404: | ||
{{FrameDataCargo-KOFXV | {{FrameDataCargo-KOFXV | ||
|moveId=ramon_hcf+K~AB | |moveId=ramon_hcf+K~AB | ||
|input= AB during 41236K/BD | |||
|description= | |description= | ||
* What makes Ramón's running grab unique is its ability to be cancelled. You can use this to bait a reaction from the opponent and get a punish rather than fully commit to the grab itself. | * What makes Ramón's running grab unique is its ability to be cancelled. You can use this to bait a reaction from the opponent and get a punish rather than fully commit to the grab itself. | ||
| Line 396: | Line 412: | ||
{{FrameDataCargo-KOFXV | {{FrameDataCargo-KOFXV | ||
|moveId=ramon_qcb+K,ramon_qcb+BD | |moveId=ramon_qcb+K,ramon_qcb+BD | ||
|captions=TAIGAH ROADAH, You'll probably die if you input this. | |input= 214B/D/BD | ||
|captions=TAIGAH ROADAH / Normal Version (Hitbox), You'll probably die if you input this.,, EX Version | |||
|description= | |description= | ||
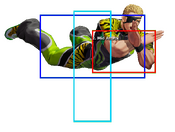
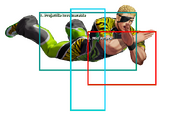
* Ramón runs to the wall and... faceplants. This is an overhead which results in a hard knockdown, but it is extremely bad on block. Tiger Road is a series of various walldives, none of which are particularly good. The followups don't travel very far, and if you see Ramón running towards the wall you don't even need to try and anti-air any of them (although you certainly can). You can just downback and get a free punish because Cross Chop hits mid and Force of Will whiffs on crouchers, and Ramón will be lying right in front of you. | * Ramón runs to the wall and... faceplants. This is an overhead which results in a hard knockdown, but it is extremely bad on block. Tiger Road is a series of various walldives, none of which are particularly good. The followups don't travel very far, and if you see Ramón running towards the wall you don't even need to try and anti-air any of them (although you certainly can). You can just downback and get a free punish because Cross Chop hits mid and Force of Will whiffs on crouchers, and Ramón will be lying right in front of you. | ||
| Line 422: | Line 439: | ||
{{FrameDataCargo-KOFXV | {{FrameDataCargo-KOFXV | ||
|moveId=ramon_qcb+k~k,ramon_qcb+bd~k | |moveId=ramon_qcb+k~k,ramon_qcb+bd~k | ||
|input= B/D during Tiger Road during Wall Cling | |||
|captions= Normal Version (Hitbox), EX Version | |||
|description= | |description= | ||
* An air-to-air strike. Both this and Force of Will track the opponent's position, but this does a better job at actually reaching them. Regardless, since both calculate where Ramón will go based on where he is at the split second he touches the wall, they can be both avoided by backdashing or super jumping away from them. Or by downbacking, as mentioned earlier, but this move deals chip damage if you're worried about that. | * An air-to-air strike. Both this and Force of Will track the opponent's position, but this does a better job at actually reaching them. Regardless, since both calculate where Ramón will go based on where he is at the split second he touches the wall, they can be both avoided by backdashing or super jumping away from them. Or by downbacking, as mentioned earlier, but this move deals chip damage if you're worried about that. | ||
| Line 431: | Line 450: | ||
{{FrameDataCargo-KOFXV | {{FrameDataCargo-KOFXV | ||
|moveId=ramon_qcb+k~qcf+p,ramon_qcb+bd~qcf+p | |moveId=ramon_qcb+k~qcf+p,ramon_qcb+bd~qcf+p | ||
|input= 236A/C during Tiger Road during Wall Cling | |||
|captions= Normal Version (Hitbox), EX Version | |||
|description= | |description= | ||
* The most rewarding of the Tiger Road followups, and possibly the most annoying knowledge check Ramón has up his sleeve, even though it's not good. Reason being, you can crouch this and have it miss every time, then punish Ramón dearly. What is appealing about this move is that it is an unblockable (NB: it is a strike, which means you can roll through it; it is an unblockable hitgrab as opposed to actually being a throw) and it leads to Hoist followups for even more damage, which is why it sometimes sees use as an air-to-air. | * The most rewarding of the Tiger Road followups, and possibly the most annoying knowledge check Ramón has up his sleeve, even though it's not good. Reason being, you can crouch this and have it miss every time, then punish Ramón dearly. What is appealing about this move is that it is an unblockable (NB: it is a strike, which means you can roll through it; it is an unblockable hitgrab as opposed to actually being a throw) and it leads to Hoist followups for even more damage, which is why it sometimes sees use as an air-to-air. | ||
|description2= | |description2= | ||
* The EX version can hit crouchers and goes fullscreen, making it much more effective as a panic move. Be mindful that it can miss even on some standing opponents if they are too close to the wall, considering the height at which Ramón starts to fly. Ideally you should use this move as an air-to-air only, or not at all. | * The EX version can hit crouchers and goes fullscreen, making it much more effective as a panic move. This version can hit rolls. Be mindful that it can miss even on some standing opponents if they are too close to the wall, considering the height at which Ramón starts to fly. Ideally you should use this move as an air-to-air only, or not at all. | ||
}} | }} | ||
| Line 447: | Line 468: | ||
{{FrameDataCargo-KOFXV | {{FrameDataCargo-KOFXV | ||
|moveId=ramon_qcb+A,ramon_qcb+C,ramon_qcb+AC | |moveId=ramon_qcb+A,ramon_qcb+C,ramon_qcb+AC | ||
|input= 214A/C/AC | |||
|captions= Normal Version Step (Hitbox), A Version Attack,, EX Version | |||
|description= | |description= | ||
* 214A is a dropkick which results in good corner carry while granting a hard knockdown and a guaranteed Bird of Paradise in the corner. It is unsafe, and using it as a read in neutral will most likely get you killed. | * 214A is a dropkick which results in good corner carry while granting a hard knockdown and a guaranteed Bird of Paradise in the corner. It is unsafe, and using it as a read in neutral will most likely get you killed. | ||
| Line 462: | Line 485: | ||
{{FrameDataCargo-KOFXV | {{FrameDataCargo-KOFXV | ||
|moveId=ramon_hcbhcb+p,ramon_hcbhcb+ac | |moveId=ramon_hcbhcb+p,ramon_hcbhcb+ac | ||
|input= 6321463214A/C/AC | |||
|captions= Normal Version (Hitbox), Max Version | |||
|description= | |description= | ||
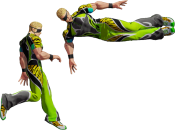
* Faster than 41236A. Mostly invalidated by 41236AC, as this move does not grant much in the way of okizeme, but you do get some advantage. | * Faster than 41236A. Mostly invalidated by 41236AC, as this move does not grant much in the way of okizeme, but you do get some advantage. | ||
| Line 471: | Line 496: | ||
{{FrameDataCargo-KOFXV | {{FrameDataCargo-KOFXV | ||
|moveId=ramon_qcbhcf+k,ramon_qcbhcf+bd | |moveId=ramon_qcbhcf+k,ramon_qcbhcf+bd | ||
|input= 2141236B/D/BD | |||
|captions= Normal Version (Hitbox),, Max Version | |||
|description= | |description= | ||
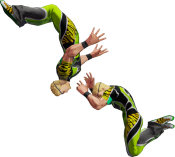
* Ramón leaps onto the wall behind him and dives quickly towards the opponent for a ranbu. The regular version sees this run happen in real time, making this move difficult for reversals, but happens during the flash when canceled from Rolling Sobat, making it a solid way to end combos. | * Ramón leaps onto the wall behind him and dives quickly towards the opponent for a ranbu. The regular version sees this run happen in real time, making this move difficult for reversals, but happens during the flash when canceled from Rolling Sobat, making it a solid way to end combos. | ||
Latest revision as of 07:42, 8 November 2024
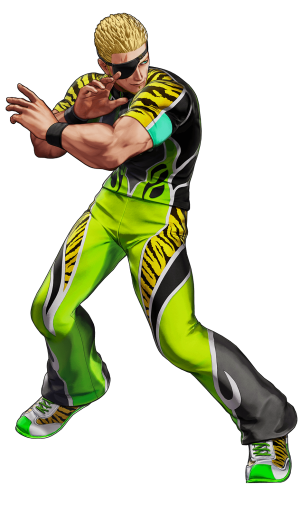
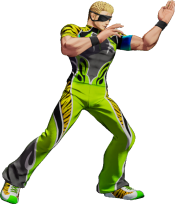
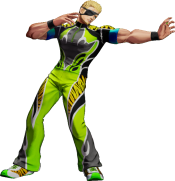
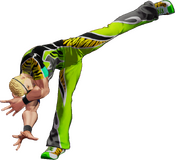
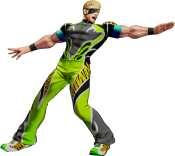
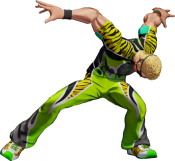
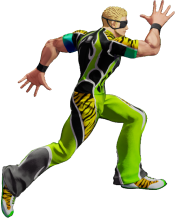
Although small for a fighter, he toys with his opponents by utilizing his agility and skillful throws. He joins G.A.W. where he fights alongside Antonov.
Hop: 33f
Backdash: 22f
Run Speed Ranking: 5
Can triangle jump
Movelist
(*) = EX OK
(!) = MAX OK
(Midair Only) = Can only be done in the air.
(Hold OK) = Can be held before releasing.
Throws
Command Normals
Sankaku-Tobi - ![]() (Near Wall) (Midair Only)
(Near Wall) (Midair Only)
Special Moves
Super Special Moves
El • Diablo • Amarillo • Ramón • Volando - ![]()
![]()
![]() +
+ ![]() /
/ ![]() !
!
Climax Super Special Moves
Quick Combo Reference
| 0 Meter |
Far Cnfirm |
f.5B > 214A = 165 dmg |
| 0.5 Meters |
Low |
2B > 2A > 623BD > 623D > 623K > 22C = 273 dmg |
| 1 Meter |
Anywhere |
cl.C/2C > 3D > 623BD > 623D > 623K > 22A > 41236AC > 22AC = 453 dmg |
| 2 Meters |
Anywhere |
cl.C/2C > 3D > 623B > 21441236BD = 463 dmg |
Gameplay Overview
Ramón is a fast, tricky character with plenty of extra mobility options and the range on key normals to back it up, most of which can lead to very important knockdowns. Once he's in, Ramón not only has crossups, command grabs and fake moves at his disposal, but unique pressure involving Feint Step which lets him frame trap, extend pressure and position himself for more mixups. From these, Ramón either gets hard knockdowns, corner resets or a way to further mix the opponent up, and the damage he gets for his meter is fantastic. All of this comes at the cost of just how weird Ramon is. He has very high whiff recovery on specials and heavies. He has horrible light confirms, awful lights outside of stand A, is very susceptible to guard cancel roll, and he can easily be jumped in on at the right angles. All of this means Ramon has difficulty playing a classic KoF low stagger game, and can't convert off a quick run up low into something good.
The gist of Feint Step pressure is this; after doing Feint Step, Ramón is left at +3. Although he can continue pressuring with another cr.C, the opponent can very easily mash jab or a quick heavy to beat it and potentially get a combo. Ramón's solution, then, is to either move to catch a whiff, press 5A, press 5C, or delay cr.C (either by holding Feint Step a little longer or delaying it manually) so it catches the recovery of the jab. To further crack open the opponent's defense, Ramón can use his running grab (41236K), run in for an EX TNC, hop in for standard KOF mixups, or use Feint Step to position himself for anything under the sun. Finally, he can simply block or roll to bait reversals or Shatter Strike, then melt the opponent's life bar from there. Although Ramón's pressure can be fake, its high reward and overall ambiguity grants Ramon a very healthy amount of mental plus frames. Once you get a solid hit, however, ending a combo with Hoist 2 > 5C > 214C in the corner or Hoist 1 > 41236AC > 22AC anywhere is the start of your vortex and the start of victory.
| Ramón is a mobile grappler who plays footsies using his long-ranged tools and fast movement options, then uses Feint Step in pressure to facilitate staggers and mixups. | |
| Pros | Cons |
|
|
Normals
Far Standing Normals
Far A
| stand A
st.A
st.A |
|---|
Far B
| stand B
st.B
st.B |
|---|
Far C
| stand C
st.C
st.C |
|---|
Far D
| stand D
st.D
st.D |
|---|
Close Standing Normals
Close A
| close A
cl.A
cl.A |
|---|
Close B
| close B
cl.B
cl.B |
|---|
Close C
| close C
cl.C
cl.C |
|---|
Close D
| close D
cl.D
cl.D |
|---|
Crouch Normals
Crouch A
| crouch A
cr.A
cr.A |
|---|
Crouch B
| crouch B
cr.B
cr.B |
|---|
Crouch C
| crouch C
cr.C
cr.C |
|---|
Crouch D
| crouch D
cr.D
cr.D |
|---|
Jump Normals
Jump A
| jump A
j.A
j.A |
|---|
Jump B
| jump B
j.B
j.B |
|---|
Jump C
| jump C
j.C
j.C |
|---|
Jump D
| jump D
j.D
j.D |
|---|
Rush
| rush
cl.AA
cl.AA |
|---|
Blowback
Blowback
| Blowback
st.CD
st.CD |
|---|
Shatter Strike
| Shatter Strike
236CD
236CD |
|---|
AdvanceStrike
| AdvanceStrike
214CD
214CD |
|---|
Jump CD
| jump CD
j.CD
j.CD |
|---|
Throws
| Arm Whip
(close) 4C or 6C
(close) 4C or 6C |
|---|
| Flying Mare
(close) 4D or 6D
(close) 4D or 6D |
|---|
Command Moves
| Sankaku-Tobi
j.9 near wall
j.9 near wall |
|---|
| Drop Kick
3D
3D |
|---|
| Head Butt
6A
6A |
|---|
| Hoist 1
22A
22A |
|---|
| Hoist 2
22C
22C |
|---|
Special Moves
Tiger Neck Chancery
| Tiger Neck Chancery
41236A/C/AC
41236A/C/AC |
|---|
Rolling Sobat
| Rolling Sobat
623B/D/BD
623B/D/BD |
|---|
Flying Body Attack
| Flying Body Attack
623K during Rolling Sobat
623K during Rolling Sobat |
|---|
Somersault
| Somersault
42136B/D/BD
42136B/D/BD |
|---|
Stop
| Stop
AB during 41236K/BD
AB during 41236K/BD |
|---|
Tiger Road
| Tiger Road
214B/D/BD
214B/D/BD |
|---|
Feint Dash
| Feint Dash
AB during Tiger Road
AB during Tiger Road |
|---|
Feint Jump
| Feint Jump
9 during Tiger Road
9 during Tiger Road |
|---|
Cross Chop
| Cross Chop
B/D during Tiger Road during Wall Cling
B/D during Tiger Road during Wall Cling |
|---|
Force of Will
| Force of Will
236A/C during Tiger Road during Wall Cling
236A/C during Tiger Road during Wall Cling |
|---|
Bird of Paradise
| Bird of Paradise
22AC
22AC |
|---|
Feint Step
| Feint Step
214A/C/AC
214A/C/AC |
|---|
Super Special Moves
Tiger Spin
| Tiger Spin
6321463214A/C/AC
6321463214A/C/AC |
|---|
El • Diablo • Amarillo • Ramón • Volando
| El • Diablo • Amarillo • Ramón • Volando
2141236B/D/BD
2141236B/D/BD |
|---|
Climax Super Special Moves
Hyper Sonic • Ramón
| Hyper Sonic • Ramón
2141236CD
2141236CD |
|---|
Misc
After a Feint Step, you are +3 on block if you cancelled any heavy attack or command normal, but +7 if you cancelled from st.CD. Given the latter's 17f startup, it is especially difficult to land without getting mashed out of. As being +3 isn't much to work with, you will have to be aware of opponents mashing jabs, as they will stuff your attempts at frame trapping with anything slow such as cr.C. Quite a few characters can mash buttons that will both stop offensive jumps and cr.C, sadly leaving you forced to wait for an option and counter it accordingly. You will be minus if you Feint Cancel a light attack, but doing so is still useful strictly for positioning.
Alternate Colors
 |
 |
 |
 |
 |
 |
 |
 |
