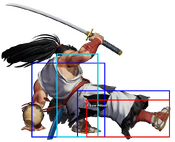
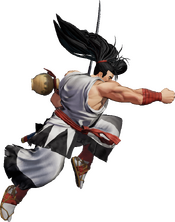
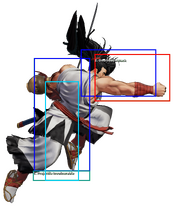
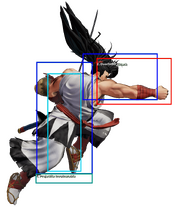
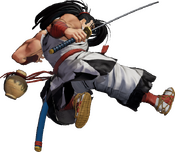
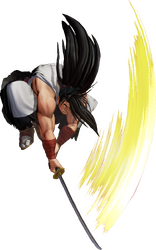
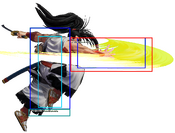
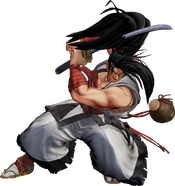
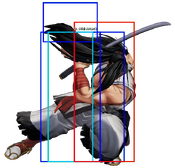
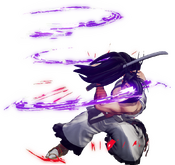
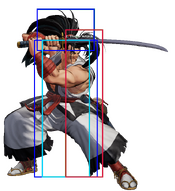
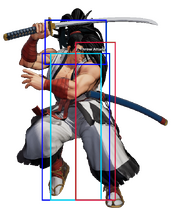
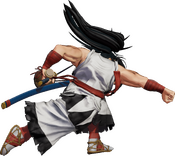
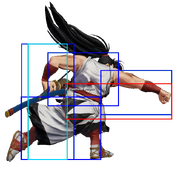
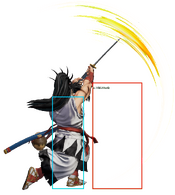
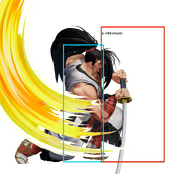
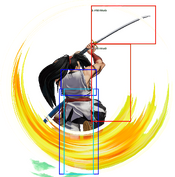
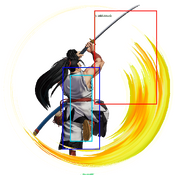
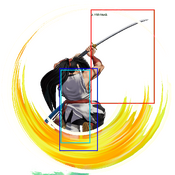
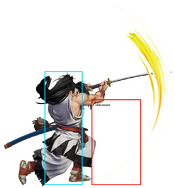
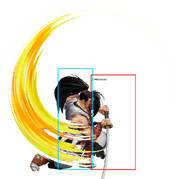
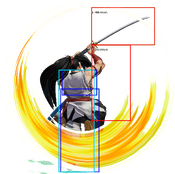
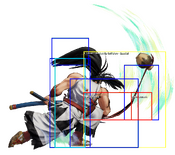
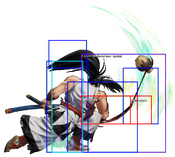
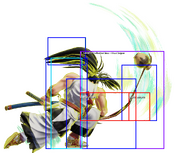
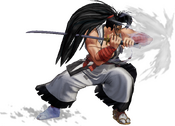
-Happy New Year 2025!
The King of Fighters XV/Haohmaru: Difference between revisions
| (28 intermediate revisions by 3 users not shown) | |||
| Line 119: | Line 119: | ||
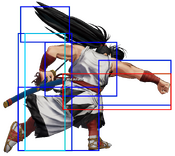
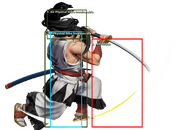
{{FrameDataCargo-KOFXV | {{FrameDataCargo-KOFXV | ||
|moveId=Haohmaru_fa | |moveId=Haohmaru_fa | ||
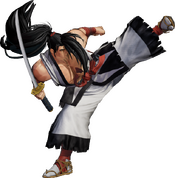
|captions=farA in SamSho | |||
|description= | |description= | ||
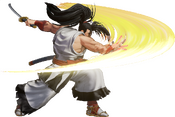
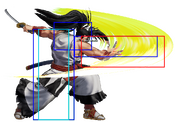
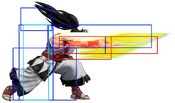
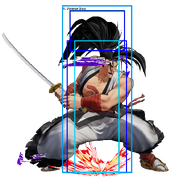
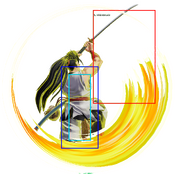
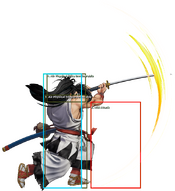
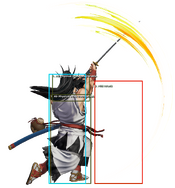
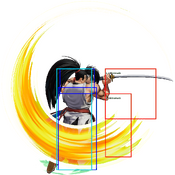
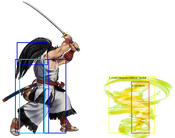
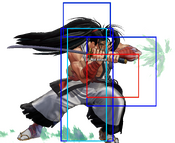
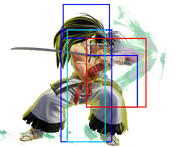
* | *Longer than a lot of other characters' far heavies. | ||
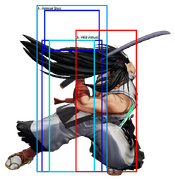
A quick slash with better range and faster startup than 5B, but lacks special cancel properties. It may not start combos but it's one of his best pokes. | |||
A quick slash with better range and faster startup than 5B, but lacks special cancel properties. | |||
}} | }} | ||
| Line 128: | Line 128: | ||
{{FrameDataCargo-KOFXV | {{FrameDataCargo-KOFXV | ||
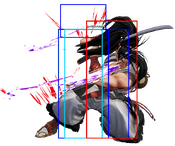
|moveId=Haohmaru_fb | |moveId=Haohmaru_fb | ||
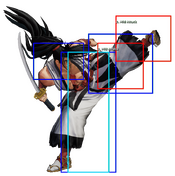
|captions=6D in SamSho | |||
|description= | |description= | ||
* Does not hit low like in the original game. | * Does not hit low like in the original game. | ||
| Line 137: | Line 138: | ||
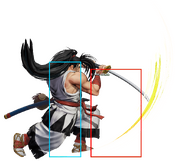
{{FrameDataCargo-KOFXV | {{FrameDataCargo-KOFXV | ||
|moveId=Haohmaru_fc | |moveId=Haohmaru_fc | ||
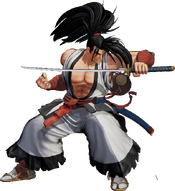
|captions= | |captions=farB in SamSho | ||
|description= | |description= | ||
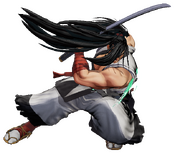
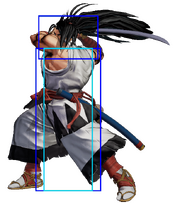
* | * Can hit some characters from round start distance, but is a step too short on most. | ||
Large poke that's good for controlling space. | Large poke that's good for controlling space. | ||
| Line 147: | Line 148: | ||
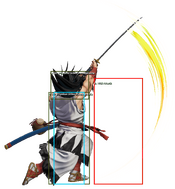
{{FrameDataCargo-KOFXV | {{FrameDataCargo-KOFXV | ||
|moveId=Haohmaru_fd | |moveId=Haohmaru_fd | ||
|captions=5D in SamSho | |||
|description= | |description= | ||
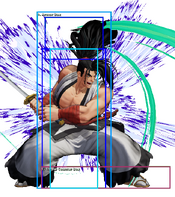
* Same animation as his close D, but not cancellable, so be careful. | * Same animation as his close D, but not cancellable, so be careful. | ||
| Line 158: | Line 160: | ||
{{FrameDataCargo-KOFXV | {{FrameDataCargo-KOFXV | ||
|moveId=Haohmaru_cla | |moveId=Haohmaru_cla | ||
|captions=closeA in SamSho | |||
|description= | |description= | ||
* | * Links into closeC, allowing Haohmaru to perform damaging light confirms up close. | ||
A very fast normal that's also very plus. This normal is ''extremely'' important for Haohmaru's | A very fast normal that's also very plus. This normal is ''extremely'' important for Haohmaru's confirms, allowing him to link into closeC from lows and crossups. Haohmaru should typically always be trying to cancel into cl.C when this move lands, especially considering how mediocre his autocombo is. | ||
}} | }} | ||
| Line 168: | Line 170: | ||
{{FrameDataCargo-KOFXV | {{FrameDataCargo-KOFXV | ||
|moveId=Haohmaru_clb | |moveId=Haohmaru_clb | ||
|captions=6D in SamSho | |||
|description= | |description= | ||
* Same exact frame data as his st.B, not much to say. | * Same exact frame data as his st.B, not much to say. | ||
| Line 175: | Line 178: | ||
{{FrameDataCargo-KOFXV | {{FrameDataCargo-KOFXV | ||
|moveId=Haohmaru_clc | |moveId=Haohmaru_clc | ||
|captions=closeB in SamSho | |||
|description= | |description= | ||
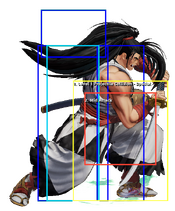
* | * '''THE BUTTON''' | ||
'' | Haohmaru's go to heavy. Links from closeA, starts his combos, amazing proximity. It may be slower than most closeCs, but it doesn't dissapoint. | ||
}} | }} | ||
| Line 183: | Line 187: | ||
{{FrameDataCargo-KOFXV | {{FrameDataCargo-KOFXV | ||
|moveId=Haohmaru_cld | |moveId=Haohmaru_cld | ||
|captions=5D in SamSho | |||
|description= | |description= | ||
* Same animation as far D, but cancels into both specials and 6A. | * Same animation as far D, but cancels into both specials and 6A. | ||
Haohmaru's cl.D looks exactly the same as his far D, but he can cancel it into both specials and 6A. This can be rather confusing, | Haohmaru's cl.D looks exactly the same as his far D, but he can cancel it into both specials and 6A. This can be rather confusing, and it's speed doesn't help it in being overshadowed by closeC. | ||
}} | }} | ||
| Line 193: | Line 198: | ||
{{FrameDataCargo-KOFXV | {{FrameDataCargo-KOFXV | ||
|moveId=Haohmaru_2a | |moveId=Haohmaru_2a | ||
|captions=2A in SamSho | |||
|description= | |description= | ||
* | *Plus on block. | ||
Haohmaru jabs the opponent with the hilt of his katana. Safe for pressure and used to go into farB, its stubby range is the only thing holding it down. | |||
Haohmaru jabs the opponent with the hilt of his katana. | |||
}} | }} | ||
| Line 202: | Line 207: | ||
{{FrameDataCargo-KOFXV | {{FrameDataCargo-KOFXV | ||
|moveId=Haohmaru_2b | |moveId=Haohmaru_2b | ||
|captions=2D in SamSho | |||
|description= | |description= | ||
* | * the low | ||
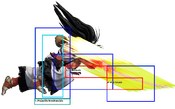
Haohmaru's main low, lets him start combos into 2A or closeA, decent range too. | |||
Haohmaru | |||
}} | }} | ||
| Line 211: | Line 216: | ||
{{FrameDataCargo-KOFXV | {{FrameDataCargo-KOFXV | ||
|moveId=Haohmaru_2c | |moveId=Haohmaru_2c | ||
|captions=2C/66C in SamSho | |||
|description= | |description= | ||
* Puts airborne opponents into a juggle state on counterhit | * Puts airborne opponents into a juggle state on counterhit | ||
Anti-air with above-average damage, but is slow and cannot be linked into from jump-ins. | Anti-air with above-average damage, but is slow and cannot be linked into from jump-ins. Its main job is as an anti air but it can be use for some Quick Max combos. | ||
}} | }} | ||
| Line 221: | Line 226: | ||
{{FrameDataCargo-KOFXV | {{FrameDataCargo-KOFXV | ||
|moveId=Haohmaru_2d | |moveId=Haohmaru_2d | ||
|captions=3D/66D in SamSho | |||
|description= | |description= | ||
* the other low | |||
* Moves Haohmaru forward during the animation, giving it a lot of range. | * Moves Haohmaru forward during the animation, giving it a lot of range. | ||
Haohmaru slides forward a considerable distance, giving this cr.D great range. However, it cannot cancel into command normals or specials, so Haohmaru cannot cancel into anything to make it safer if it gets blocked. | Haohmaru slides forward a considerable distance, giving this cr.D great range. However, it cannot cancel into command normals or specials, so Haohmaru cannot cancel into anything to make it safer if it gets blocked. | ||
| Line 235: | Line 241: | ||
|input=j.A | |input=j.A | ||
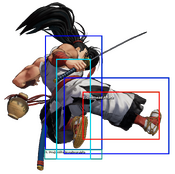
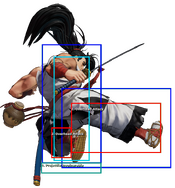
|hitboxCaptions= Hop Version, Jump Version | |hitboxCaptions= Hop Version, Jump Version | ||
|captions=jUnarmedS in SamSho | |||
|description2= | |description2= | ||
Basic, quick air-to-air. | Basic, quick air-to-air. | ||
}} | }} | ||
| Line 247: | Line 252: | ||
|input=j.B | |input=j.B | ||
|hitboxCaptions= Hop Version, Jump Version | |hitboxCaptions= Hop Version, Jump Version | ||
|captions=jD in SamSho | |||
|description2= | |description2= | ||
* | * Crosses up. | ||
* Hits crouching opponents. | |||
One of his most important normals and his go to crossup. You will be using this a lot, so be mindful of your jumps. | |||
}} | }} | ||
| Line 259: | Line 265: | ||
|input=j.C | |input=j.C | ||
|hitboxCaptions= Hop Version, Jump Version | |hitboxCaptions= Hop Version, Jump Version | ||
|captions=jC in SamSho | |||
|description2= | |description2= | ||
* | * Hits crouching opponents. | ||
A big j.C, hits very deep. It sacrifices horizontal range to for the ability to hit couchers and have less pushback than jD. | |||
A | |||
}} | }} | ||
| Line 271: | Line 277: | ||
|input=j.D | |input=j.D | ||
|hitboxCaptions= Hop Version, Jump Version | |hitboxCaptions= Hop Version, Jump Version | ||
|captions=jB in SamSho | |||
|description2= | |description2= | ||
Haohmaru performs a sideways slash. Covers a large amount of range and is a great air-to-air and a very good jump-in as well. Doesn't hit crouchers but it will hit at ranges where jB or jC won't. | |||
Haohmaru performs a sideways slash. Covers a large amount of range and is a great air-to-air and a very good jump-in as well. | |||
}} | }} | ||
| Line 283: | Line 286: | ||
{{FrameDataCargo-KOFXV | {{FrameDataCargo-KOFXV | ||
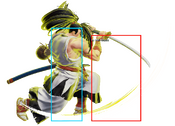
|moveId=Haohmaru_cd | |moveId=Haohmaru_cd | ||
|captions=jdAB in SamSho | |||
|description= | |description= | ||
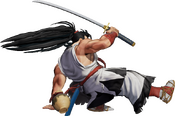
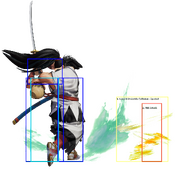
Haohmaru performs a shoulder charge that advances him forward. Good for kara canceling, the range of which Haohmaru advances forward is low, making it hard or impossible for him to perform Shatter Strike combos. | |||
Haohmaru performs a shoulder charge that advances him forward. Good for kara canceling | |||
}} | }} | ||
| Line 294: | Line 296: | ||
|name=Shatter Strike | |name=Shatter Strike | ||
|description= | |description= | ||
Has lower forward movement than it looks. | * Won't combo off of 6A | ||
Has lower forward movement than it looks. Barely ever combos. | |||
}} | }} | ||
| Line 301: | Line 304: | ||
|moveId=Haohmaru_214cd | |moveId=Haohmaru_214cd | ||
|description= | |description= | ||
*Same animation and range as his CD. | * Same animation and range as his CD. | ||
* The throw counter is at the feet. | * The throw counter is at the feet. | ||
Standard Advanced Strike, the extra time allows him to go into 236D combos. | |||
}} | }} | ||
| Line 313: | Line 315: | ||
|input=j.CD | |input=j.CD | ||
|hitboxCaptions= Hop Version, Jump Version | |hitboxCaptions= Hop Version, Jump Version | ||
|captions=KOF Original | |||
|description2= | |description2= | ||
Very slow, but massive j.CD. | Very slow, but massive j.CD. Lets him easily fish for Counter Hits but be careful, the hurtbox also becomes bigger. | ||
}} | }} | ||
| Line 332: | Line 335: | ||
|name=Adamantine Slash | |name=Adamantine Slash | ||
|input=(close) 4/6C | |input=(close) 4/6C | ||
|imageCaptions=BC in SamSho6 | |||
|description= | |description= | ||
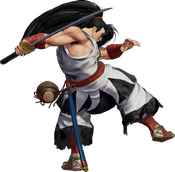
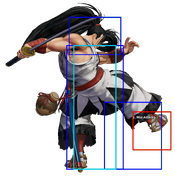
* | Based on his old throw, leaves him just enough oki outside of the corner. | ||
* Leads to a safejump in the corner. | |||
}} | }} | ||
| Line 341: | Line 346: | ||
|name=Headwind Slash | |name=Headwind Slash | ||
|input=(close) 4/6D | |input=(close) 4/6D | ||
|imageCaptions=KOF Original | |||
|description= | |description= | ||
* | Uses his back throw from SamSho as a basis. About the same as his C Throw. | ||
* Leads into a less reliable safejump when against the corner. | |||
}} | }} | ||
| Line 352: | Line 359: | ||
|input=6A | |input=6A | ||
|hitboxCaptions= Raw Version, Cancel Version | |hitboxCaptions= Raw Version, Cancel Version | ||
|captions=BC in SamSho | |||
|description= | |description= | ||
* As a command overhead, slow if used raw, but starts up faster and turns into a mid if canceled into. | * As a command overhead, slow if used raw, but starts up faster and turns into a mid if canceled into. | ||
His main overhead, but its mostly used for combos and frametraps, very useful but nothing unique. | |||
}} | }} | ||
| Line 363: | Line 370: | ||
|name=Iron Flash | |name=Iron Flash | ||
|input=AC | |input=AC | ||
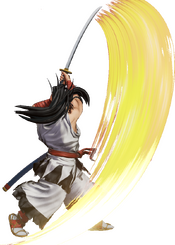
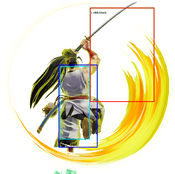
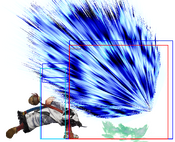
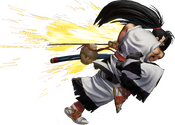
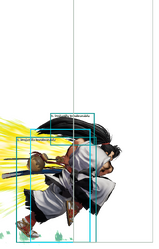
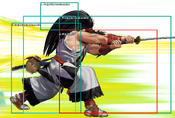
|captions=farC in SamSho | |||
|description= | |description= | ||
* '''H E A V Y''' | |||
* Data in [] refers to clean hit. | |||
* Completely uncancelable—cannot be canceled into or cancel into anything. | * Completely uncancelable—cannot be canceled into or cancel into anything. | ||
* Causes a soft knockdown on counterhit (+22: Tech / +62: Non-tech) | * Causes a soft knockdown on counterhit (+22: Tech / +62: Non-tech). Crumples on counterhit if it clean hits. | ||
A very unique normal for the KoF series, Haohmaru's AC lacks any cancel properties and has very slow startup, but makes up for it with absurdly high damage, doing the same as the average 1-bar super. On counter-hit, it causes a soft knockdown, and on a regular hit, it causes a unique stagger effect that leaves Haohmaru safe on hit to compensate for the otherwise high block disadvantage. | A very unique normal for the KoF series, Haohmaru's AC lacks any cancel properties and has very slow startup, but makes up for it with absurdly high damage, doing the same as the average 1-bar super. On counter-hit, it causes a soft knockdown, and on a regular hit, it causes a unique stagger effect that leaves Haohmaru safe on hit to compensate for the otherwise high block disadvantage. | ||
Its your highest damage combo ender, at the cost of oki, and as a poke its very dangerous. | |||
On a clean hit, he gains extra damage and causes a crumple on Counter Hits. You will try to go for these when using it after some moves (CD, 236D, 236AC). | |||
}} | }} | ||
| Line 378: | Line 389: | ||
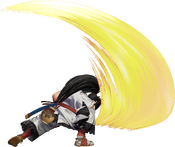
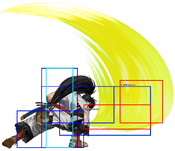
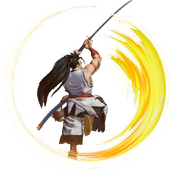
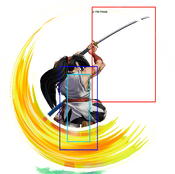
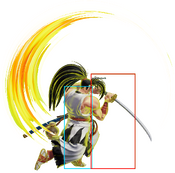
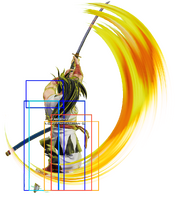
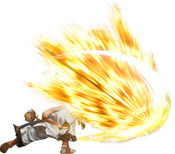
|name=Crescent Moon Slash | |name=Crescent Moon Slash | ||
|input=623A/C/AC | |input=623A/C/AC | ||
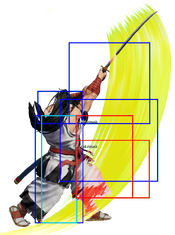
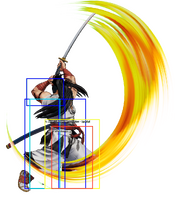
|imageCaptions= | |imageCaptions=623S in SamSho | ||
|hitboxCaptions= A Version, , , , C Version, , , , , , EX Version, , , , , | |hitboxCaptions= A Version, , , , C Version, , , , , , EX Version, , , , , | ||
|description3= | |description3= | ||
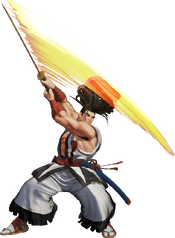
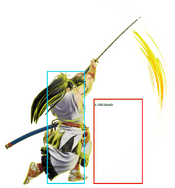
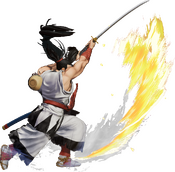
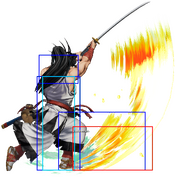
Haohmaru's most damaging and reliable combo | One of Haohmaru's most damaging and reliable combo enders, as well as a strong reversal thanks to its high damage and long range. All versions are prone to losing out on max damage if spaced improperly. | ||
---- | ---- | ||
'''623A:''' No forward movement. Great at catching opponents jumping in. | '''623A:''' No forward movement. Great at catching opponents jumping in. Leads to an easy safejump. | ||
---- | ---- | ||
'''623C:''' Has a noticeable amount of forward movement and goes very high. Has slower than average startup, so 623C can sometimes entirely miss jumping opponents depending on how high up they are. | '''623C:''' Has a noticeable amount of forward movement and goes very high. Has slower than average startup, so 623C can sometimes entirely miss jumping opponents depending on how high up they are. | ||
| Line 396: | Line 407: | ||
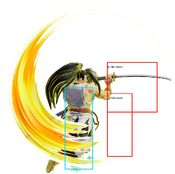
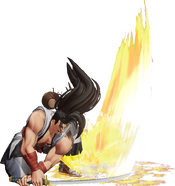
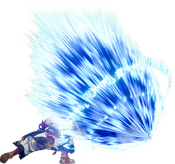
|name=Renting Tremor Slash | |name=Renting Tremor Slash | ||
|input=6623A/C/AC | |input=6623A/C/AC | ||
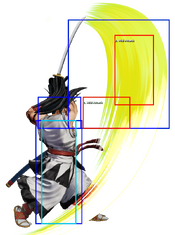
|imageCaptions= | |imageCaptions=6623S in SamSho | ||
|hitboxCaptions= A Version, , , , C Version, , , , , , EX Version, , , , , | |hitboxCaptions= A Version, , , , C Version, , , , , , EX Version, , , , , | ||
|description3= | |description3= | ||
* Can only be performed from frame 12 until frame 16 of a dash. | * Can only be performed from frame 12 until frame 16 of a dash. | ||
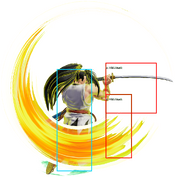
If 623P is inputted from frame 12-16 of a dash, it becomes Renting Tremor Slash, an immensely damaging DP (even more so than Omega Rugal's Genocide Cutter) with even more forward movement, faster startup, higher damage... and much more recovery. Essentially a higher risk, higher reward version of Kogetsuzan. | If 623P is inputted from frame 12-16 of a dash, it becomes Renting Tremor Slash, an immensely damaging DP (even more so than Omega Rugal's Genocide Cutter) with even more forward movement, faster startup, higher damage, a lot of oki... and much more recovery. Essentially a higher risk, higher reward version of Kogetsuzan. | ||
* 6623A always leads into an easy safejump no matter where. | |||
Shippu Kogetsuzan cannot be used as a combo ender unless the opponent is juggled | * 6623C leads into a safejump/crossup only after crumples and juggles. | ||
Shippu Kogetsuzan cannot be used as a combo ender unless the opponent is juggled or crumpled. | |||
}} | }} | ||
| Line 410: | Line 422: | ||
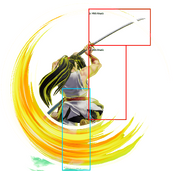
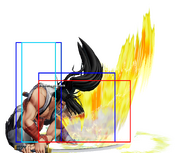
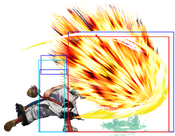
|name=Cyclone Slash | |name=Cyclone Slash | ||
|input=236A/C/AC | |input=236A/C/AC | ||
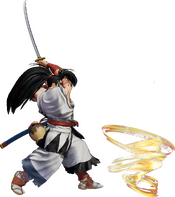
|imageCaptions= | |imageCaptions=236S/D in SamSho | ||
|hitboxCaptions= A Version, , A Version Feint Cancel, C Version, , EX Version | |hitboxCaptions= A Version, , A Version Feint Cancel, C Version, , EX Version | ||
|description3= | |description3= | ||
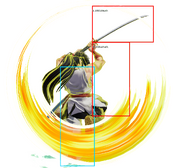
| Line 418: | Line 430: | ||
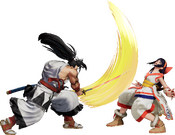
Haohmaru uses his katana to send out a small tornado that travels across the ground. Opponents that are hit by this tornado will be launched upwards, giving Haohmaru plenty of time to approach and prepare for his next move. | Haohmaru uses his katana to send out a small tornado that travels across the ground. Opponents that are hit by this tornado will be launched upwards, giving Haohmaru plenty of time to approach and prepare for his next move. | ||
The '''EX''' version puts the opponent into a juggle state, meaning anything Haohmaru hits the opponent with afterwards will land instead of whiffing like with the '''A''' or '''C''' version. | The '''EX''' version puts the opponent into a juggle state, meaning anything Haohmaru hits the opponent with afterwards will land instead of whiffing like with the '''A''' or '''C''' version. You have a lot of options, including setting up a Clean Hit. | ||
|description4= | |description4= | ||
| Line 429: | Line 441: | ||
|name=Earthquake Slice | |name=Earthquake Slice | ||
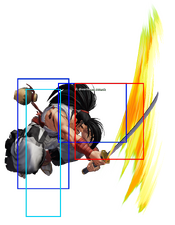
|input=4214A/C/AC | |input=4214A/C/AC | ||
|imageCaptions= | |imageCaptions=421S in SamSho | ||
|hitboxCaptions= A Version, C Version, , EX Version | |hitboxCaptions= A Version, C Version, , EX Version | ||
|description3= | |description3= | ||
* | * Hits overhead. | ||
* Heavy version is plus on block. | * Heavy version is plus on block. | ||
* '''EX''' version hits three times and causes a groundbounce, and it's best used after | * '''EX''' version hits mid, up to three times and causes a groundbounce, and it's best used after 236BD. It also hits OTG (damage in parenthesis) after 214AC,236AC,236236A/C/AC/B/D, add damage from 66 to 17 (usually 42 after 2 bar BnB). | ||
Haohmaru somersaults forward before striking the ground with his katana. This has the most startup out of all of Haohmaru's moves and therefore the most telegraphed, | Haohmaru somersaults forward before striking the ground with his katana. This has the most startup out of all of Haohmaru's moves and therefore the most telegraphed. The light version has the most reliable oki whislt the Heavy is plus on block, leading into frametraps. EX is a combo tool, be it as a bounce or OTG, but the OTG version loses you oki. Don't overuse this move. | ||
}} | }} | ||
| Line 444: | Line 456: | ||
|name=Rice Wine Whack | |name=Rice Wine Whack | ||
|input=214B/D/BD | |input=214B/D/BD | ||
|imageCaptions=214D in SamSho | |||
|hitboxCaptions= B Version, D Version, EX Version | |hitboxCaptions= B Version, D Version, EX Version | ||
|description3= | |description3= | ||
* '''B''' version nullifies projectiles, '''D''' version reflects projectiles. | * '''B''' version nullifies projectiles (and gets no additional bar doing that), '''D''' version reflects projectiles (if reflected projectile hits, Haohmaru gains projectile bar gain value). | ||
* '''EX''' version causes a crumple. | * '''EX''' version causes a crumple. | ||
* Ridiculously unsafe on block. Don't use this as a blockstring ender. | * Ridiculously unsafe on block. Don't use this as a blockstring ender. | ||
One of Haohmaru's faster special moves | One of Haohmaru's faster special moves, the EX version is used as his main combo started after Lights. It can also be used to nullify or reflect projectiles. Very unsafe and does low damage, so those are really its only uses. | ||
}} | }} | ||
| Line 459: | Line 472: | ||
|input=214A/C/AC | |input=214A/C/AC | ||
|hitboxCaptions= Normal Version, EX Version | |hitboxCaptions= Normal Version, EX Version | ||
|captions=623D in SamSho6 | |||
|description3= | |description3= | ||
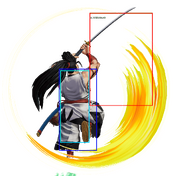
Making its return after being last seen on Rasetsumaru in SamSho6. | |||
* '''A''' and '''EX''' versions combo after heavies. | * '''A''' and '''EX''' versions combo after heavies. | ||
* '''A''' | * '''A''' and '''C''' versions juggle in the corner. | ||
* '''C''' version is plus on block, leads into frametraps. | |||
* '''EX''' version causes a sliding hard knockdown. | * '''EX''' version causes a sliding hard knockdown. | ||
A forward-rushing elbow tackle. Somewhat slow, but the opening it creates in blockstrings can trick opponents into pressing. | A forward-rushing elbow tackle. Somewhat slow, but the opening it creates in blockstrings can trick opponents into pressing. | ||
}} | }} | ||
| Line 474: | Line 487: | ||
|name=Cyclone Wave | |name=Cyclone Wave | ||
|input=236B/D/BD | |input=236B/D/BD | ||
|imageCaptions=236D in SamSho6 | |||
|hitboxCaptions= Normal Version, EX Version | |hitboxCaptions= Normal Version, EX Version | ||
|description3= | |description3= | ||
Another Bust/Rasetsumaru returnee. | |||
* '''D''' and '''EX''' versions launch and cause a juggle state. | * '''D''' and '''EX''' versions launch and cause a juggle state. | ||
* '''B''' and '''EX''' version have the same startup speeds and connect from heavies. | * '''B''' and '''EX''' version have the same startup speeds and connect from heavies. | ||
| Line 481: | Line 496: | ||
Haohmaru slashes upwards, creating a wave of energy that hits the opponent multiple times. | Haohmaru slashes upwards, creating a wave of energy that hits the opponent multiple times. | ||
The '''EX''' version of this move is his greatest combo tool, and opens up multiple extremely damaging combo routes, | The '''EX''' version of this move is his greatest combo tool, and opens up multiple extremely damaging combo routes, whilst the other versions are excellent as frametraps. | ||
}} | }} | ||
| Line 490: | Line 505: | ||
|name=Flame of the Conqueror | |name=Flame of the Conqueror | ||
|input=236236A/C/AC | |input=236236A/C/AC | ||
|imageCaptions=236BC in SamSho | |||
|hitboxCaptions= Normal Version, Max Version | |hitboxCaptions= Normal Version, Max Version | ||
|description3= | |description3= | ||
* Straightforward 1-hit super. | * Straightforward 1-hit super. | ||
* '''A''' version comes out faster, whilst the '''C''' version is slightly slower. | |||
* Based on his Weapon Flipping Technique from his home game. | * Based on his Weapon Flipping Technique from his home game. | ||
His most reliable super, big and equally big hitting. You'll be using the light version for cancels from 236B/214P, whilst the heavy's slower startup is great for cancels from juggles, making it reliably combo into other supers. | |||
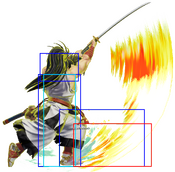
}} | }} | ||
| Line 503: | Line 519: | ||
|name=Supreme Gale Flash | |name=Supreme Gale Flash | ||
|input=236236B/D/BD | |input=236236B/D/BD | ||
|imageCaptions= ABC in SamSho | |||
|hitboxCaptions= Hitbox is the same for both normal and max versions. | |hitboxCaptions= Hitbox is the same for both normal and max versions. | ||
|description2= | |description2= | ||
* '''B''' and '''D''' versions function the same, and sideswitch on hit. | * '''B''' and '''D''' versions function the same, and sideswitch on hit. | ||
* '''MAX''' version does not sideswitch, making it a good option after 236236P. | * '''MAX''' version does not sideswitch, making it a good option after 236236P. | ||
Issen's mediocre entry into KOF. Its slow speed, besides being ironic, makes it less reliable than it could be, and the worse damage doesn't help. It does have better oki than 236236P, but that goes away the closer you get to the corner. | |||
236236BD is the version you'll see most, be it as a punish or a meter dump after 236236C. | |||
}} | }} | ||
| Line 516: | Line 535: | ||
|name=Supreme Severing Flash | |name=Supreme Severing Flash | ||
|input=2141236CD | |input=2141236CD | ||
|imageCaptions=KOF Original | |||
|description= | |description= | ||
* Has slightly more range than 236K. | * Has slightly more range than 236K. | ||
Standard Climax. Very punishable on block and whiff. | Standard Climax that deals a lot of damage. Very punishable on block and whiff. | ||
}} | }} | ||
Latest revision as of 18:23, 9 March 2025
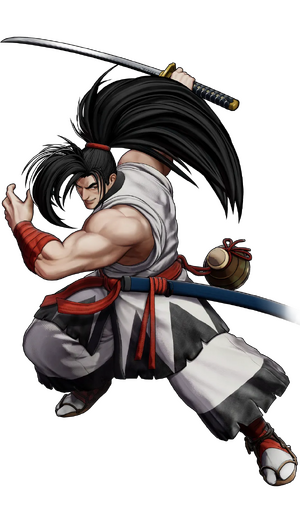
In order to help his friend Nakoruru, and to fight with new and formidable opponents, he travels far beyond time and space and lands on the KOF stage.
Hop: 32f
Backdash: 22f
Run Speed Ranking: 5
Movelist
(*) = EX OK
(!) = MAX OK
Throws
Adamantine Slash - (close) ![]() /
/ ![]() +
+ ![]()
Command Normals
Special Moves
Renting Tremor Slash - ![]()
![]() +
+ ![]() /
/ ![]() (*)
(*)
Super Special Moves
Flame of the Conqueror - ![]()
![]() +
+ ![]() /
/ ![]() (!)
(!)
Climax Super Special Moves
Quick Combo Reference
| 0 Meter |
Low Confirm |
2B > 2A > 5B > 214D/623C = 116/192 dmg |
| ½ Meter |
Low Confirm |
2B > 2A > 5B > 214BD > 623C = 253 dmg |
| 1 Meter |
Low Confirm |
2B > 2A > 5B > 623C > 236236A = 310 dmg |
| 2 Meters |
Low Confirm |
2B > 2A > 5B > 623C > 236236AC = 430 dmg |
Gameplay Overview
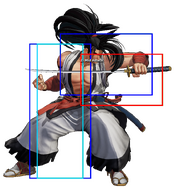
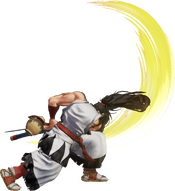
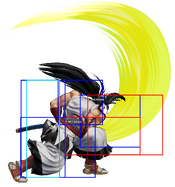
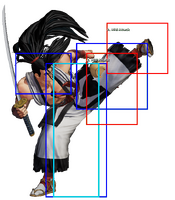
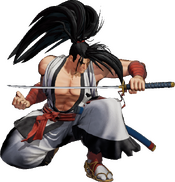
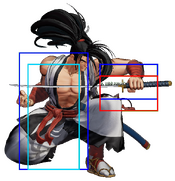
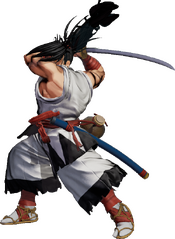
After nearly 30 years of being denied entry into the KoF franchise due to canonical issues, Haohmaru finally makes his playable debut in The King of Fighters XV. Haohmaru specializes in keeping opponents at a distance with his long range pokes, and capitalizing off of openings with his very high burst damage.
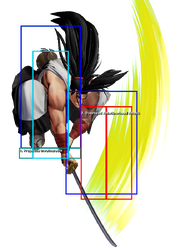
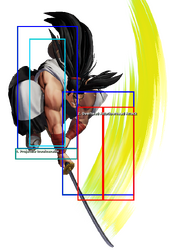
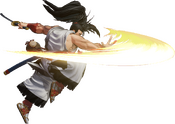
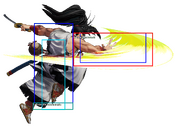
In essence, Haohmaru is basically a shoto with a sword. He's got a variety of tools for almost any scenario, such as anti-zoning tools in Rice Wine Whack (214K[K]); decent space control and zoning in his 5A and 5C, alongside a projectile that always knocks down (236P[P]); and a very strong anti-air game in his 2C and Crescent Moon Slash (623P[P]), a DP with very high damage. He also has decent pressure with cl.A, Cyclone Wave (236K[K]), 214C, and 4214C, which are plus on block. But his greatest attribute, undoubtedly, is his damage. EX Cyclone Wave is a 20-frame launcher that juggles opponents high, allowing him to connect his Iron Flash command normal (A+C), which does a whopping 200 damage on hit, or he can link one of his specials, such as 214A or 623C, into a super. This makes Haohmaru's metered damage potential very high, and getting hit by him even once can be a legitimate threat.
Unfortunately, Haohmaru's massive damage comes with a few drawbacks. First of all, he's slow. Very slow. Almost all of Haohmaru's specials have over 14 frames of startup, which makes his light confirms almost nonexistent. To make matters worse, he has pretty much no way to confirm his lights into any meaningful damage outside of his cl.A, which forces him to fight in close-range, a position where he absolutely struggles. Haohmaru is basically outclassed by almost all of the cast, who are better at poking and doing consistent damage than he is. In high-level play, there's almost no reason to play him unless you're just looking to have fun. If all you want is to play a swordfighter and feel like you're playing Samurai Shodown in KoF, then Haohmaru may be for you.
| Haohmaru is a mid-ranged swordsman who tries to keep the opponent at a distance before utilizing meter to score massive damage. | |
| Pros | Cons |
|
|
Normals
Far Standing Normals
Far A
| far A
f.A
f.A |
|---|
Far B
| far B
f.B
f.B |
|---|
Far C
| far C
f.C
f.C |
|---|
Far D
| far D
f.D
f.D |
|---|
Close Standing Normals
Close A
| close A
cl.A
cl.A |
|---|
Close B
| close B
cl.B
cl.B |
|---|
Close C
| close C
cl.C
cl.C |
|---|
Close D
| close D
cl.D
cl.D |
|---|
Crouch Normals
Crouch A
| crouch A
2A
2A |
|---|
Crouch B
| crouch B
2B
2B |
|---|
Crouch C
| crouch C
2C
2C |
|---|
Crouch D
| crouch D
2D
2D |
|---|
Jump Normals
Jump A
| jump A
j.A
j.A |
|---|
Jump B
| jump B
j.B
j.B |
|---|
Jump C
| jump C
j.C
j.C |
|---|
Jump D
| jump D
j.D
j.D |
|---|
Blowback
Blowback
| Blowback
CD
CD |
|---|
Shatter Strike
| Shatter Strike
236CD
236CD |
|---|
AdvanceStrike
| AdvanceStrike
214CD
214CD |
|---|
jump CD
| jump CD
j.CD
j.CD |
|---|
Rush Moves
| rush
cl.AA/c.AAX
cl.AA/c.AAX |
|---|
Throws
Adamantine Slash
| Adamantine Slash
(close) 4/6C
(close) 4/6C |
|---|
Headwind Slash
| Headwind Slash
(close) 4/6D
(close) 4/6D |
|---|
Command Moves
Surprise Attack
| Surprise Attack
6A
6A |
|---|
Iron Flash
| Iron Flash
AC
AC |
|---|
Special Moves
Crescent Moon Slash
| Crescent Moon Slash
623A/C/AC
623A/C/AC |
|---|
Renting Tremor Slash
| Renting Tremor Slash
6623A/C/AC
6623A/C/AC |
|---|
Cyclone Slash
| Cyclone Slash
236A/C/AC
236A/C/AC |
|---|
Earthquake Slice
| Earthquake Slice
4214A/C/AC
4214A/C/AC |
|---|
Rice Wine Whack
| Rice Wine Whack
214B/D/BD
214B/D/BD |
|---|
Shock Blast
| Shock Blast
214A/C/AC
214A/C/AC |
|---|
Cyclone Wave
| Cyclone Wave
236B/D/BD
236B/D/BD |
|---|
Super Special Moves
Flame of the Conqueror
| Flame of the Conqueror
236236A/C/AC
236236A/C/AC |
|---|
Supreme Gale Flash
| Supreme Gale Flash
236236B/D/BD
236236B/D/BD |
|---|
Climax
Supreme Severing Flash
| Supreme Severing Flash
2141236CD
2141236CD |
|---|
Misc
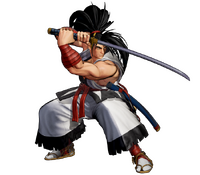
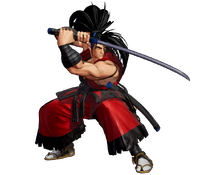
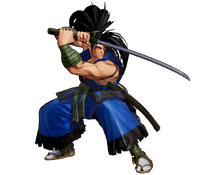
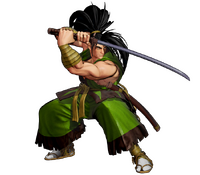
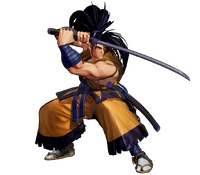
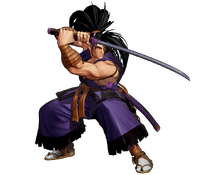
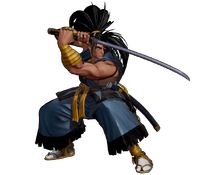
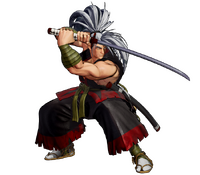
Alternate Colors
 |
 |
 |
 |
 |
 |
 |
 |
