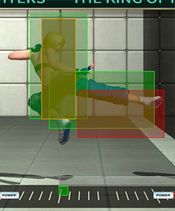
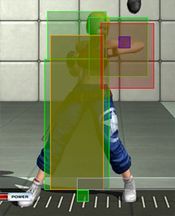
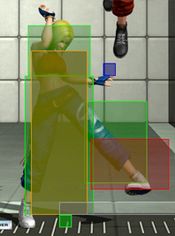
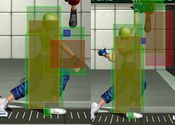
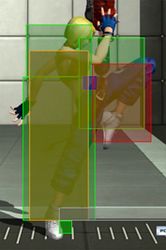
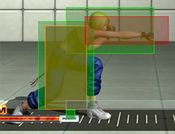
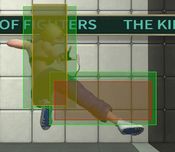
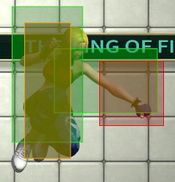
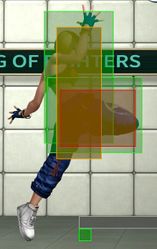
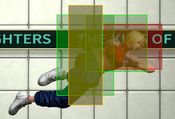
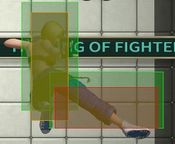
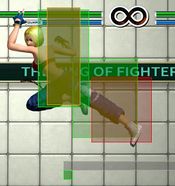
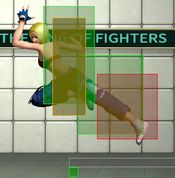
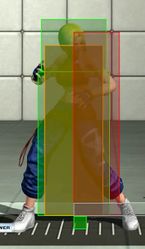
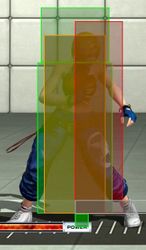
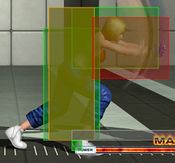
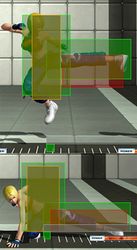
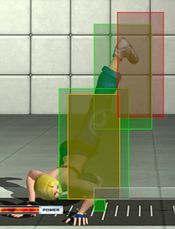
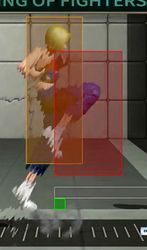
-The Dream Cancel Wiki has successfully upgraded it's wiki software and editing has returned. Tables for data have returned.
The King of Fighters XIV/Blue Mary: Difference between revisions
| (52 intermediate revisions by the same user not shown) | |||
| Line 2: | Line 2: | ||
=Movelist= | ==Movelist== | ||
(*) = EX OK | (*) = EX OK | ||
| Line 37: | Line 37: | ||
:Backdrop Real (Real Counter) - [[image:qcf.gif]] + [[image:a.gif]] / [[image:c.gif]] | :Backdrop Real (Real Counter) - [[image:qcf.gif]] + [[image:a.gif]] / [[image:c.gif]] | ||
M. Breaker - - [[image:dp.gif]] + [[image: | M. Breaker - - [[image:dp.gif]] + [[image:a.gif]] / [[image:c.gif]] (*) | ||
| Line 51: | Line 51: | ||
M. Dynamite Swing - [[image:qcf.gif]] [[image:qcf.gif]] + [[image:b.gif]] [[image:d.gif]] | M. Dynamite Swing - [[image:qcf.gif]] [[image:qcf.gif]] + [[image:b.gif]] [[image:d.gif]] | ||
=Quick Combo Reference= | ==Quick Combo Reference== | ||
{| border="1" align="center" style="font-size:90%" | {| border="1" align="center" style="font-size:90%" | ||
| Line 86: | Line 86: | ||
|} | |} | ||
=Gameplay Overview= | ==Gameplay Overview== | ||
'''Health: | '''Health: 1000''' | ||
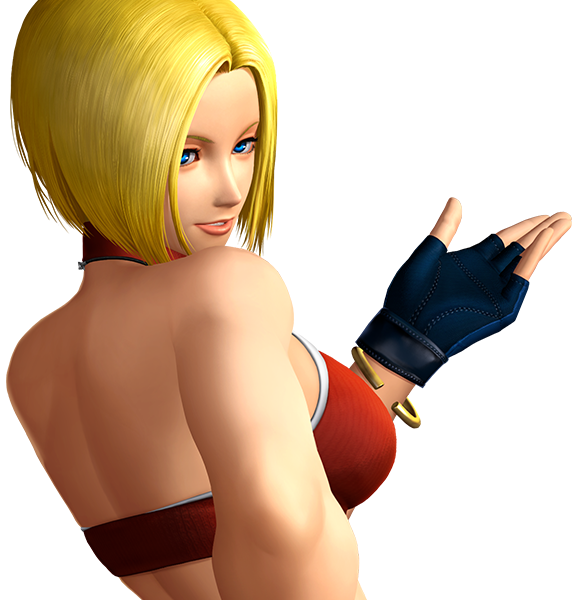
Blue Mary is a very strong character in KOFXIV. She has many tools such as: | Blue Mary is a very strong character in KOFXIV. She has many tools such as: | ||
| Line 98: | Line 98: | ||
* Plenty of easy mix-ups. | * Plenty of easy mix-ups. | ||
* An invincible reversal, dp+K, that puts the opponent in hard knockdown state. | * An invincible reversal, dp+K, that puts the opponent in a hard knockdown state. | ||
She can make the opponent second guess their approach easily, with her invincible moves, while forcing her way in neutral. | She can make the opponent second guess their approach easily, with her invincible moves, while forcing her way in neutral. | ||
=Normals= | ==Normals== | ||
<div class="toccolours mw-collapsible mw-collapsed">'''Far Standing Normals''' | |||
<div class="mw-collapsible-content"> | |||
{{MoveData | {{MoveData | ||
|image=Blue_Mary_Far_A.jpg | |image=Blue_Mary_Far_A.jpg | ||
| Line 121: | Line 121: | ||
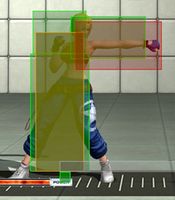
|hitbox=[https://drive.google.com/open?id=1SGhcRYqJuOMSJSz9cJ6V-b_wfHTv4KE0 Hitbox] | |hitbox=[https://drive.google.com/open?id=1SGhcRYqJuOMSJSz9cJ6V-b_wfHTv4KE0 Hitbox] | ||
|invul= | |invul= | ||
|description= Standard jab, which use to poke against hops. Whiffs on some characters crouching. Cant cancel into command normals. Special cancel-able | |description= *Standard jab, which use to poke against hops. | ||
*Whiffs on some characters crouching. | |||
*Cant cancel into command normals. | |||
*Special cancel-able | |||
}} | }} | ||
}} | }} | ||
{{MoveData | {{MoveData | ||
| Line 140: | Line 144: | ||
|hitbox=[https://drive.google.com/open?id=1RFIx42PZTKed1-VlHWTZul-P287Xe1_2 Hitbox] | |hitbox=[https://drive.google.com/open?id=1RFIx42PZTKed1-VlHWTZul-P287Xe1_2 Hitbox] | ||
|invul= | |invul= | ||
|description= More range than st.A. Great poke | |description= *More range than st.A. | ||
*Great poke against standing opponents. | |||
*Hits crouches. Only super Cancel-able. | |||
}} | }} | ||
}} | }} | ||
{{MoveData | {{MoveData | ||
| Line 159: | Line 166: | ||
|hitbox=[https://drive.google.com/open?id=1KZLOlg6ADQ-05YvM91ePBMs61OIo2i04 Hitbox] | |hitbox=[https://drive.google.com/open?id=1KZLOlg6ADQ-05YvM91ePBMs61OIo2i04 Hitbox] | ||
|invul= | |invul= | ||
|description= Hits twice. Only super cancelable. Moves her hitbox forward. | |description= *Hits twice. | ||
*Only super cancelable. | |||
*Moves her hitbox forward. | |||
}} | }} | ||
}} | }} | ||
{{MoveData | {{MoveData | ||
| Line 178: | Line 188: | ||
|hitbox=[https://drive.google.com/open?id=1OGgbE2RnsdDE8WPDXNywi_dZi2pVhQBw Hitbox] | |hitbox=[https://drive.google.com/open?id=1OGgbE2RnsdDE8WPDXNywi_dZi2pVhQBw Hitbox] | ||
|invul= Low: 7 to 21 (15 Frames) | |invul= Low: 7 to 21 (15 Frames) | ||
|description= Great range, but slow. Crushes slow lows or spamming cr. B (x2). Not command/special/super cancel-able. Cannot | |description= *Great range, but slow. | ||
*Crushes slow lows or spamming cr. B (x2). | |||
*Not command/special/super cancel-able. | |||
*Cannot quick max cancel. | |||
}} | }} | ||
}} | }} | ||
</div> | |||
</div> | |||
'''Close''' | <div class="toccolours mw-collapsible mw-collapsed">'''Close Standing Normals''' | ||
<div class="mw-collapsible-content"> | |||
{{MoveData | {{MoveData | ||
|image=Blue_Mary_Close_A.jpg | |image=Blue_Mary_Close_A.jpg | ||
| Line 200: | Line 215: | ||
|hitbox=[https://drive.google.com/open?id=16FOxvmNfho1PdZ7BLxRwTgp07iUkbq61 Hitbox] | |hitbox=[https://drive.google.com/open?id=16FOxvmNfho1PdZ7BLxRwTgp07iUkbq61 Hitbox] | ||
|invul= | |invul= | ||
|description= Standard close jab. Like Far A, cl. A is useful to stop hops | |description= *Standard close jab. | ||
*Like Far A, cl. A is useful to stop hops if the opponent hops close towards Blue Mary. | |||
}} | }} | ||
}} | }} | ||
{{MoveData | {{MoveData | ||
| Line 219: | Line 236: | ||
|hitbox=[https://drive.google.com/open?id=1T6UZP8VS_qg7iT0dHrSewD34WOEGfWPK Hitbox] | |hitbox=[https://drive.google.com/open?id=1T6UZP8VS_qg7iT0dHrSewD34WOEGfWPK Hitbox] | ||
|invul= | |invul= | ||
|description= Standing low Attack. Can cancel into itself. Point blank cl.B, cl.B, cr.B or Far B works. Can cancel, but will not combo into command normals. Special/super cancel-able. | |description= *Standing low Attack. | ||
*Can cancel into itself. | |||
*Point blank cl.B, cl.B, cr.B or Far B works. | |||
*Can cancel, but will not combo into command normals. | |||
*Special/super cancel-able. | |||
}} | }} | ||
}} | }} | ||
{{MoveData | {{MoveData | ||
| Line 238: | Line 260: | ||
|hitbox=[https://drive.google.com/open?id=1GaFpqPuUncYdULqHt-DNXOkr_Fp3dNfu Hitbox] | |hitbox=[https://drive.google.com/open?id=1GaFpqPuUncYdULqHt-DNXOkr_Fp3dNfu Hitbox] | ||
|invul= | |invul= | ||
|description= Hits twice. Command/special cancel-able. | |description= *Hits twice. | ||
*Command/special cancel-able. | |||
*Does not hit very high above her head. | |||
*Useful for grab/ close heavey OS against close empty hop/jump. | |||
}} | }} | ||
}} | }} | ||
{{MoveData | {{MoveData | ||
| Line 257: | Line 283: | ||
|hitbox=[https://drive.google.com/open?id=1PowNpwGQW5WpQUHAyNHIlp6ycY29bFRu Hitbox] | |hitbox=[https://drive.google.com/open?id=1PowNpwGQW5WpQUHAyNHIlp6ycY29bFRu Hitbox] | ||
|invul= | |invul= | ||
|description= Most damaging close heavy normal. The second best heavy normal to start combos after cross-ups and quick max. Has a lot of pushback that can make f+B whiff. | |description= *Most damaging close heavy normal. | ||
*The second best heavy normal to start combos after cross-ups and quick max. | |||
*Has a lot of pushback that can make f+B whiff. | |||
}} | }} | ||
}} | }}</div> | ||
</div> | |||
<div class="toccolours mw-collapsible mw-collapsed">'''Crouching Normals''' | |||
<div class="mw-collapsible-content"> | |||
{{MoveData | {{MoveData | ||
|image=Blue_Mary_Crouch_A.jpg | |image=Blue_Mary_Crouch_A.jpg | ||
| Line 279: | Line 308: | ||
|hitbox=[https://drive.google.com/open?id=1trr-cYEme5tEfXL6UxKIBAWMEk8DUaZ2 Hitbox] | |hitbox=[https://drive.google.com/open?id=1trr-cYEme5tEfXL6UxKIBAWMEk8DUaZ2 Hitbox] | ||
|invul= | |invul= | ||
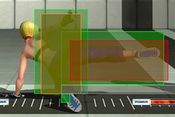
|description= Hits mid. Slightly less range than cr.B. command/special/super cancel-able. Useful for mid range into cr. D frame trap and can link into cl. D at point-blank range. | |description= *Hits mid. | ||
*Slightly less range than cr.B. command/special/super cancel-able. | |||
*Useful for mid-range into cr. D frame trap and can link into cl. D at point-blank range. | |||
}} | }} | ||
}} | }} | ||
{{MoveData | {{MoveData | ||
| Line 298: | Line 330: | ||
|hitbox=[https://drive.google.com/open?id=1w9syEjVkhdd9dV8HMnqn32FJCwZW9ZqN Hitbox] | |hitbox=[https://drive.google.com/open?id=1w9syEjVkhdd9dV8HMnqn32FJCwZW9ZqN Hitbox] | ||
|invul= | |invul= | ||
|description= Hits low and fast. Lowers her crouching hitbox a lot. Can't command/special cancel. Standard quick max starter. | |description= *Hits low and fast. | ||
*Lowers her crouching hitbox a lot. | |||
*Can't command/special cancel. | |||
*Standard quick max starter. | |||
}} | }} | ||
}} | }} | ||
{{MoveData | {{MoveData | ||
| Line 317: | Line 353: | ||
|hitbox=[https://drive.google.com/open?id=1wPHv_N8zjgytygyoUSVVl1M4JkOAZCXa Hitbox] | |hitbox=[https://drive.google.com/open?id=1wPHv_N8zjgytygyoUSVVl1M4JkOAZCXa Hitbox] | ||
|invul= | |invul= | ||
|description= Hits mid. Lowers hitbox plus moves her forward a bit. Her best heavy normal combo starter | |description= *Hits mid. | ||
*Lowers hitbox plus moves her forward a bit. | |||
*Her best heavy normal combo starter especially into f+B. | |||
}} | }} | ||
}} | }} | ||
{{MoveData | {{MoveData | ||
| Line 336: | Line 375: | ||
|hitbox=[https://drive.google.com/open?id=17QrGh7vpxDEctFxjX2F36DwFSvzf0mI1 Hitbox] | |hitbox=[https://drive.google.com/open?id=17QrGh7vpxDEctFxjX2F36DwFSvzf0mI1 Hitbox] | ||
|invul= | |invul= | ||
|description= Hits low and fast. Punishable if done at close range, but has a lot of pushback. So it's better use at mid to the furthest range of cr. D. Especially useful as a frame trap at mid-screen from cr.B (x3) or cr. B(x2), cr. A | |description= *Hits low and fast. | ||
*Punishable if done at close range, but has a lot of pushback. So it's better to use at mid to the furthest range of cr. D. Especially useful as a frame trap at mid-screen from cr.B (x3) or cr. B(x2), cr. A. | |||
}} | }} | ||
}} | }}</div> | ||
</div> | |||
''' | <div class="toccolours mw-collapsible mw-collapsed">'''Jump Normals''' | ||
<div class="mw-collapsible-content"> | |||
{{MoveData | {{MoveData | ||
|image= | |image=Blue_Mary_Jump_A.jpg | ||
|caption= | |caption= | ||
|name=Jump A | |name=Jump A | ||
| Line 380: | Line 399: | ||
|hitbox=[https://drive.google.com/open?id=1Ty_ZAeIKmn9sSONxqL1JXfJlB5bmJQ6g Hitbox] | |hitbox=[https://drive.google.com/open?id=1Ty_ZAeIKmn9sSONxqL1JXfJlB5bmJQ6g Hitbox] | ||
|invul= | |invul= | ||
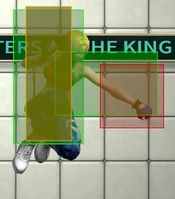
|description= Has a good diagonal hitbox. It's useful as a jump-in | |description= *Has a good diagonal hitbox. | ||
*It's useful as a jump-in confirmation and a quick poke in air-to-air situations. | |||
}} | }} | ||
}} | }} | ||
{{MoveData | {{MoveData | ||
|image= | |image=Blue_Mary_Jump_B.jpg | ||
|caption= | |caption= | ||
|name=Jump B | |name=Jump B | ||
| Line 399: | Line 420: | ||
|hitbox=[https://drive.google.com/open?id=1pKFKKoW7XtUFIm3XW3NRTbaLosJrJ78T Hitbox] | |hitbox=[https://drive.google.com/open?id=1pKFKKoW7XtUFIm3XW3NRTbaLosJrJ78T Hitbox] | ||
|invul= | |invul= | ||
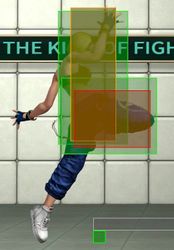
|description= A great cross-up tools during hops and jumps. | |description= *A great cross-up tools during hops and jumps. | ||
}} | }} | ||
}} | }} | ||
{{MoveData | {{MoveData | ||
|image= | |image=Blue_Mary_Jump_C.jpg | ||
|caption= | |caption= | ||
|name=Jump C | |name=Jump C | ||
| Line 418: | Line 440: | ||
|hitbox=[https://drive.google.com/open?id=1j6YmsjjIkyWZY3Ruxzwbl1hftHOVXjZG Hitbox] | |hitbox=[https://drive.google.com/open?id=1j6YmsjjIkyWZY3Ruxzwbl1hftHOVXjZG Hitbox] | ||
|invul= | |invul= | ||
|description= Useful for air-to-air situations. | |description= *Useful for air-to-air situations. | ||
}} | }} | ||
}} | }} | ||
{{MoveData | {{MoveData | ||
|image= | |image=Blue_Mary_Jump_D.jpg | ||
|caption= | |caption= | ||
|name=Jump D | |name=Jump D | ||
| Line 437: | Line 460: | ||
|hitbox=[https://drive.google.com/open?id=1j6YmsjjIkyWZY3Ruxzwbl1hftHOVXjZG Hitbox] | |hitbox=[https://drive.google.com/open?id=1j6YmsjjIkyWZY3Ruxzwbl1hftHOVXjZG Hitbox] | ||
|invul= | |invul= | ||
|description= Useful jump-in normal. Can cross-up on standing and crouching opponents depending on spacing. | |description= *Useful jump-in normal. | ||
*Can cross-up on standing and crouching opponents depending on spacing. | |||
}} | }} | ||
}} | }}</div> | ||
</div> | |||
<div class="toccolours mw-collapsible mw-collapsed">'''Hop Normals''' | |||
<div class="mw-collapsible-content"> | |||
{{MoveData | {{MoveData | ||
|image= | |image=Blue_Mary_Hop_A.jpg | ||
|caption= | |caption= | ||
|name=Hop A | |name=Hop A | ||
| Line 478: | Line 484: | ||
|hitbox=[https://drive.google.com/open?id=1lFgbAJqhant-RrRgLBTadWBIWIQbK7TM Hitbox] | |hitbox=[https://drive.google.com/open?id=1lFgbAJqhant-RrRgLBTadWBIWIQbK7TM Hitbox] | ||
|invul= | |invul= | ||
|description= Nearly the same as jump A except less active frames and damage. Has a good diagonal hitbox. It's useful as a jump-in | |description= *Nearly the same as jump A except less active frames and damage. | ||
*Has a good diagonal hitbox. | |||
*It's useful as a jump-in confirmation and a quick poke in air-to-air situations. | |||
}} | }} | ||
}} | }} | ||
{{MoveData | {{MoveData | ||
|image= | |image=Blue_Mary_Hop_B.jpg | ||
|caption= | |caption= | ||
|name=Hop B | |name=Hop B | ||
| Line 497: | Line 506: | ||
|hitbox=[https://drive.google.com/open?id=1mCA_zPC5bux4cnkXoFSZwZdJ_tvRKmsm Hitbox] | |hitbox=[https://drive.google.com/open?id=1mCA_zPC5bux4cnkXoFSZwZdJ_tvRKmsm Hitbox] | ||
|invul= | |invul= | ||
|description= Nearly the same as jump B except less active frames and damage. A great cross-up tools during hops and jumps. | |description= *Nearly the same as jump B except less active frames and damage. | ||
*A great cross-up tools during hops and jumps. | |||
}} | }} | ||
}} | }} | ||
{{MoveData | {{MoveData | ||
|image= | |image=Blue_Mary_Hop_C.jpg | ||
|caption= | |caption= | ||
|name=Hop C | |name=Hop C | ||
| Line 516: | Line 527: | ||
|hitbox=[https://drive.google.com/open?id=18l4-UL6WKMCSAvJztfMDhJ6-EJoN0SjI Hitbox] | |hitbox=[https://drive.google.com/open?id=18l4-UL6WKMCSAvJztfMDhJ6-EJoN0SjI Hitbox] | ||
|invul= | |invul= | ||
|description= Nearly the same as jump C except less active frames. Useful for air-to-air situations. | |description= *Nearly the same as jump C except less active frames. | ||
*Useful for air-to-air situations. | |||
}} | }} | ||
}} | }} | ||
{{MoveData | {{MoveData | ||
|image= | |image=Blue_Mary_Hop_D.jpg | ||
|caption= | |caption= | ||
|name=Hop D | |name=Hop D | ||
| Line 535: | Line 548: | ||
|hitbox=[https://drive.google.com/open?id=1LvBKf0P0N0dSb0p3hYGAoO1J1leqoyxG Hitbox] | |hitbox=[https://drive.google.com/open?id=1LvBKf0P0N0dSb0p3hYGAoO1J1leqoyxG Hitbox] | ||
|invul= | |invul= | ||
|description= Nearly the same as jump D except less active frames. Useful jump-in normal. Can cross-up on standing and crouching opponents depending on spacing. | |description= *Nearly the same as jump D except less active frames. | ||
*Useful jump-in normal. | |||
*Can cross-up on standing and crouching opponents depending on spacing. | |||
}} | |||
}}</div> | |||
</div> | |||
<div class="toccolours mw-collapsible mw-collapsed">'''Blowback''' | |||
<div class="mw-collapsible-content"> | |||
{{MoveData | |||
|image=Blue_Mary_Stand_CD.jpg | |||
|caption= | |||
|name=Stand CD | |||
|data= | |||
{{AttackData-KOFXIV | |||
|damage=75 | |||
|stun=100 | |||
|startup=15 | |||
|active=5 | |||
|recovery=22 | |||
|hitAdv=HKD (Gnd)/ SKD (Air) | |||
|blockAdv=-4 | |||
|hitbox=[https://drive.google.com/open?id=1O2CmsL4WKGZy2vv27TVS19d1uCfToTby Hitbox] | |||
|invul= | |||
|description= *Can cancel ending frames into her command normals. | |||
}} | }} | ||
}} | }} | ||
{{MoveData | {{MoveData | ||
|image= | |image=Blue_Mary_Jump_CD.jpg | ||
|caption= | |||
|name=Jump CD | |||
|data= | |||
{{AttackData-KOFXIV | |||
|damage=90 | |||
|stun=80 | |||
|startup=13 | |||
|active=7 | |||
|recovery=(Landing)+1 | |||
|hitAdv=SKD | |||
|blockAdv= | |||
|hitbox=[https://drive.google.com/open?id=1vO8fod0JCeywkJJ0buM2uvTLVH7gwnwD Hitbox] | |||
|invul= | |||
|description= *Great hit box for jump in pressure. | |||
*Blue Mary can abuse her hop CD, which has a wide hitbox around her foot. | |||
*It’s good as an air-to-ground normal. | |||
*Only invincible moves can beat it clean, so be cautious of opponents that are good at anti-airing. | |||
}} | |||
}} | |||
{{MoveData | |||
|image=Blue_Mary_Hop_CD.jpg | |||
|caption= | |caption= | ||
|name=Hop CD | |name=Hop CD | ||
| Line 554: | Line 616: | ||
|hitbox=[https://drive.google.com/open?id=1kTOVCe0IIHwSshedoD648Lm9QofyYiLb Hitbox] | |hitbox=[https://drive.google.com/open?id=1kTOVCe0IIHwSshedoD648Lm9QofyYiLb Hitbox] | ||
|invul= | |invul= | ||
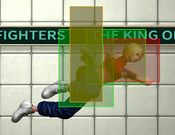
|description= Nearly the same as jump CD except less active frames and damage. Great | |description= *Nearly the same as jump CD except less active frames and damage. | ||
*Great hitbox for jump-in pressure. | |||
*Blue Mary can abuse her hop CD, which has a wide hitbox around her foot. | |||
*It’s good as an air-to-ground normal. | |||
*Only invincible moves can beat it clean, so be cautious of opponents that are good at anti-airing. | |||
}} | }} | ||
}} | }}</div> | ||
</div> | |||
==Throws== | |||
<div class="toccolours mw-collapsible mw-collapsed">'''Normal Throws''' | |||
<div class="mw-collapsible-content"> | |||
{{MoveData | {{MoveData | ||
|image= | |image=Blue_Mary_Forward_Throw.jpg | ||
|caption= | |caption= | ||
|name=Lock Kick (close, ←/→ + C) | |name=Lock Kick (close, ←/→ + C) | ||
| Line 575: | Line 643: | ||
|hitbox=[https://drive.google.com/open?id=1ZR9eA4w2l4za8pXTruXndA5nNfkadrcR Hitbox] | |hitbox=[https://drive.google.com/open?id=1ZR9eA4w2l4za8pXTruXndA5nNfkadrcR Hitbox] | ||
|invul= | |invul= | ||
|description= | |description= *Forward throw. | ||
}} | }} | ||
}} | }} | ||
{{MoveData | {{MoveData | ||
|image= | |image=Blue_Mary_Back_Throw.jpg | ||
|caption= | |caption= | ||
|name=Viktor Throw (close, ←/→ + D) | |name=Viktor Throw (close, ←/→ + D) | ||
| Line 594: | Line 663: | ||
|hitbox=[https://drive.google.com/open?id=1l-uesZGCpjqODdAZovCdafZB-tUJI1Ur Hitbox] | |hitbox=[https://drive.google.com/open?id=1l-uesZGCpjqODdAZovCdafZB-tUJI1Ur Hitbox] | ||
|invul= | |invul= | ||
|description= | |description= *Back throw. | ||
}} | }} | ||
}} | }}</div> | ||
</div> | |||
==Command Moves== | |||
<div class="toccolours mw-collapsible mw-collapsed">'''Command Moves''' | |||
<div class="mw-collapsible-content"> | |||
{{MoveData | {{MoveData | ||
|image= | |image=Blue_Mary_f+A.jpg | ||
|caption= | |caption= | ||
|name=Hammer Arch - (→ + A) | |name=Hammer Arch - (→ + A) | ||
|data= | |data= | ||
{{AttackData-KOFXIV | {{AttackData-KOFXIV | ||
|version=Without Cancel | |||
|damage=70 | |damage=70 | ||
|stun=60 | |stun=60 | ||
| Line 615: | Line 687: | ||
|hitbox=[https://drive.google.com/open?id=1NNCMjQHaRV8PQEZzHNFomqOqS3qA_Bww Hitbox] | |hitbox=[https://drive.google.com/open?id=1NNCMjQHaRV8PQEZzHNFomqOqS3qA_Bww Hitbox] | ||
|invul= Low: 3 to 19 (17 Frames) | |invul= Low: 3 to 19 (17 Frames) | ||
|description= | |description= *Overhead. | ||
*Special/super cancel-able. | |||
*Great range. | |||
*Can start max mode combos after hit (not hit confirm-able). | |||
}} | }} | ||
{{AttackData-KOFXIV | {{AttackData-KOFXIV | ||
|version=With Cancel | |||
|damage=30 | |damage=30 | ||
|stun=40 | |stun=40 | ||
| Line 627: | Line 703: | ||
|hitbox=[https://drive.google.com/open?id=12woRLQ-xVkdD4Qgggt5sozHyGmzu22OQ Hitbox] | |hitbox=[https://drive.google.com/open?id=12woRLQ-xVkdD4Qgggt5sozHyGmzu22OQ Hitbox] | ||
|invul= Low: 3 to 11 (9 Frames) | |invul= Low: 3 to 11 (9 Frames) | ||
|description= | |description= *Hits mid. | ||
*Special/super cancel-able. | |||
*Great range. | |||
*Can start max mode combos after hit (not hit confirm-able). | |||
}} | }} | ||
}} | }} | ||
{{MoveData | {{MoveData | ||
|image= | |image=Blue_Mary_b_or_f+B.jpg | ||
|caption= | |caption= | ||
|name=Double Rolling - (←/→ + B) | |name=Double Rolling - (←/→ + B) | ||
| Line 646: | Line 726: | ||
|hitbox=[https://drive.google.com/open?id=19NeGOih-e2e9OQQF9qW3MkreZDfwX_oJ Hitbox] | |hitbox=[https://drive.google.com/open?id=19NeGOih-e2e9OQQF9qW3MkreZDfwX_oJ Hitbox] | ||
|invul= Low: 16 to 21 (6 Frames) | |invul= Low: 16 to 21 (6 Frames) | ||
|description= Hits mid then low. Mostly used for combo filler. Special cancel-able. | |description= *Hits mid then low. Mostly used for combo filler. | ||
*Special cancel-able. | |||
*Doesn't crush lows. | |||
*If 1st hit connects on hit or guard, 2nd hit can whiff cancel and empty quickmax. | |||
}} | }} | ||
}} | }} | ||
{{MoveData | {{MoveData | ||
|image= | |image=Blue_Mary_df+B.jpg | ||
|caption= | |caption= | ||
|name=Climbing Arrow - (↘ +B) | |name=Climbing Arrow - (↘ +B) | ||
| Line 665: | Line 749: | ||
|hitbox=[https://drive.google.com/open?id=1dB6tWOiLWi1GfNn51ChHqPP8Ig-Fii7E Hitbox] | |hitbox=[https://drive.google.com/open?id=1dB6tWOiLWi1GfNn51ChHqPP8Ig-Fii7E Hitbox] | ||
|invul= | |invul= | ||
|description= * Hits mid. Special cancel-able. Launches opponent. Can combo into super on trade. Can combo into max mode on hit. Best used during quick max combos. | |description= * Hits mid. Special cancel-able. | ||
*Launches opponent. Can combo into super on trade. | |||
*Can combo into max mode on hit. | |||
*Best used during quick max combos. | |||
}} | }} | ||
}} | }}</div> | ||
</div> | |||
==Special Moves== | |||
<div class="toccolours mw-collapsible mw-collapsed"> '''Special Moves''' | |||
<div class="mw-collapsible-content"> | |||
{{MoveData | {{MoveData | ||
|image= | |image=Blue_Mary_Straight_Slicer.jpg | ||
|caption= | |caption= | ||
|name= | |name=Straight Slicer - (← charge → + B/D) | ||
|data= | |data= | ||
{{AttackData-KOFXIV | {{AttackData-KOFXIV | ||
|version=B | |||
|damage=60 | |damage=60 | ||
|stun=60 | |stun=60 | ||
| Line 686: | Line 776: | ||
|hitbox=[https://drive.google.com/open?id=1WxPxfeW13zX0ng0od4JPgVSwPpQkhm2h Hitbox] | |hitbox=[https://drive.google.com/open?id=1WxPxfeW13zX0ng0od4JPgVSwPpQkhm2h Hitbox] | ||
|invul=Low: 7 to 9 (3 Frames) | |invul=Low: 7 to 9 (3 Frames) | ||
|description= Main special in Blue Mary's bnb from a light normal attack. Hits low. | |description= *Main special in Blue Mary's bnb from a light normal attack. | ||
*Hits low. | |||
}} | }} | ||
{{AttackData-KOFXIV | {{AttackData-KOFXIV | ||
|version=D | |||
|damage=60 | |damage=60 | ||
|stun=60 | |stun=60 | ||
| Line 705: | Line 790: | ||
|hitbox=[https://drive.google.com/open?id=1CFjT1uOsDwwLH5KOigUUxMHc1jLT8F-L Hitbox] | |hitbox=[https://drive.google.com/open?id=1CFjT1uOsDwwLH5KOigUUxMHc1jLT8F-L Hitbox] | ||
|invul=Low: 7 to 11 (5 Frames) | |invul=Low: 7 to 11 (5 Frames) | ||
|description= Main special in Blue Mary's bnb from a heavy normal attack. Hits low. Can cancel into Crab Clutch, qcf+B/D. Requires more charge than light Straight Slicer. | |description= *Main special in Blue Mary's bnb from a heavy normal attack. | ||
*Hits low. | |||
*Can cancel into Crab Clutch, qcf+B/D. Requires more charge than light Straight Slicer. | |||
}} | }} | ||
}} | }} | ||
| Line 727: | Line 814: | ||
}} | }} | ||
}} | }} | ||
{{MoveData | {{MoveData | ||
|image= | |image=Blue_Mary_EX_Straight_Slicer.jpg | ||
|caption= | |caption= | ||
|name=EX Straight Slicer - (← charge → + BD) | |name=EX Straight Slicer - (← charge → + BD) | ||
| Line 768: | Line 856: | ||
{{MoveData | {{MoveData | ||
|image= | |image=Blue_Mary_Dp.jpg | ||
|caption= | |caption= | ||
|name= | |name=Vertical Arrow - (→↓↘ + B/D) | ||
|data= | |data= | ||
{{AttackData-KOFXIV | {{AttackData-KOFXIV | ||
|version= B | |||
|damage=78 | |damage=78 | ||
|stun=40 + 40 | |stun=40 + 40 | ||
| Line 782: | Line 871: | ||
|hitbox=[https://drive.google.com/open?id=1fwSsS3fZMGrYziAOCFzkvQfc7tNQycyj Hitbox] | |hitbox=[https://drive.google.com/open?id=1fwSsS3fZMGrYziAOCFzkvQfc7tNQycyj Hitbox] | ||
|invul=Full: 1 to 6 (6 Frames) | |invul=Full: 1 to 6 (6 Frames) | ||
|description= Blue Mary's fastest meterless reversal. Can cancel into M. Snatcher (→↓↘ + B/D) on hit. Best ender for quick max combos. | |description= *Blue Mary's fastest meterless reversal. | ||
*Can cancel into M. Snatcher (→↓↘ + B/D) on hit. | |||
*Best ender for quick max combos. | |||
}} | }} | ||
{{AttackData-KOFXIV | {{AttackData-KOFXIV | ||
|version= D | |||
|damage=97 | |damage=97 | ||
|stun=40 + 60 | |stun=40 + 60 | ||
| Line 801: | Line 886: | ||
|hitbox=[https://drive.google.com/open?id=13p7aeGB7inDWvbGRUzQsirgAhkT7_NVP Hitbox] | |hitbox=[https://drive.google.com/open?id=13p7aeGB7inDWvbGRUzQsirgAhkT7_NVP Hitbox] | ||
|invul=Full: 1 to 12 (12 Frames) | |invul=Full: 1 to 12 (12 Frames) | ||
|description= Blue Mary's reversal. Can cancel into M. Snatcher (→↓↘ + B/D) on hit. Best ender for quick max combos | |description= *Blue Mary's reversal. | ||
*Can cancel into M. Snatcher (→↓↘ + B/D) on hit. | |||
*Best ender for quick max combos | |||
}} | }} | ||
}} | }} | ||
| Line 820: | Line 907: | ||
|hitbox= | |hitbox= | ||
|invul= | |invul= | ||
|description= A follow-up that makes B/D Vertical Arrow a strong reversal since it's a hkd knockdown. Gives Blue Mary enough to do meaty jump D attack that is difficult for many characters to counter. | |description= *A follow-up that makes B/D Vertical Arrow a strong reversal since it's a hkd knockdown. | ||
*Gives Blue Mary enough to do a meaty jump D attack that is difficult for many characters to counter. | |||
}} | }} | ||
}} | }} | ||
{{MoveData | {{MoveData | ||
|image= | |image=Blue_Mary_EX_DP.jpg | ||
|caption= | |caption= | ||
|name=EX Vertical Arrow - (→↓↘ + BD) | |name=EX Vertical Arrow - (→↓↘ + BD) | ||
| Line 839: | Line 928: | ||
|hitbox=[https://drive.google.com/open?id=1zOzPeAmU9e011r0QPqPtAa7YnrMGnN7l Hitbox] | |hitbox=[https://drive.google.com/open?id=1zOzPeAmU9e011r0QPqPtAa7YnrMGnN7l Hitbox] | ||
|invul=Full: 1 to 8 (8 Frames) | |invul=Full: 1 to 8 (8 Frames) | ||
|description= Blue Mary's fastest antiair reversal in max mode. Not really useful in combos over regular Vertical Arrow unless you are guarantee to win the round or match. | |description= *Blue Mary's fastest antiair reversal in max mode. | ||
*Not really useful in combos over regular Vertical Arrow unless you are guarantee to win the round or match. | |||
}} | }} | ||
}} | }} | ||
| Line 845: | Line 935: | ||
{{MoveData | {{MoveData | ||
|image= | |image=Blue_Mary_Spin_Fall.jpg | ||
|caption= | |caption= | ||
|name= | |name=Spin Fall (↓↘→ + A/C) | ||
|data= | |data= | ||
{{AttackData-KOFXIV | {{AttackData-KOFXIV | ||
|version=A | |||
|damage=60 | |damage=60 | ||
|stun=60 | |stun=60 | ||
| Line 859: | Line 950: | ||
|hitbox=[https://drive.google.com/open?id=1IxlH0zKmAOHDloNv8FVzykltccy--NQP Hitbox] | |hitbox=[https://drive.google.com/open?id=1IxlH0zKmAOHDloNv8FVzykltccy--NQP Hitbox] | ||
|invul=Low: 7 to 28 (22 Frames) | |invul=Low: 7 to 28 (22 Frames) | ||
|description= An overhead attack that allows Blue Mary to move forward. The move is airborne. Can cancel into M. Spider (↓↘→ + A/C). | |description= *An overhead attack that allows Blue Mary to move forward. | ||
*The move is airborne. | |||
*Can cancel into M. Spider (↓↘→ + A/C). | |||
}} | }} | ||
{{AttackData-KOFXIV | {{AttackData-KOFXIV | ||
|version=C | |||
|damage=60 | |damage=60 | ||
|stun=60 | |stun=60 | ||
| Line 878: | Line 965: | ||
|hitbox=[https://drive.google.com/open?id=12ozIBDZhRgV02SXjbhDuSx9budxYTvt3 Hitbox] | |hitbox=[https://drive.google.com/open?id=12ozIBDZhRgV02SXjbhDuSx9budxYTvt3 Hitbox] | ||
|invul=Low: 8 to 27 (20 Frames) | |invul=Low: 8 to 27 (20 Frames) | ||
|description= An overhead attack that allows Blue Mary to move forward. Further than light Spin Fall. The move is airborne. Can cancel into M. Spider (↓↘→ + A/C) on hit. | |description= *An overhead attack that allows Blue Mary to move forward. | ||
*Further than light Spin Fall. | |||
*The move is airborne. | |||
*Can cancel into M. Spider (↓↘→ + A/C) on hit. | |||
}} | }} | ||
}} | }} | ||
| Line 897: | Line 987: | ||
|hitbox= | |hitbox= | ||
|invul= | |invul= | ||
|description= Switches sides with opponent when move connects. | |description= *Switches sides with opponent when move connects. | ||
}} | }} | ||
}} | }} | ||
{{MoveData | {{MoveData | ||
|image= | |image=Blue_Mary_EX_Spin_Fall.jpg | ||
|caption= | |caption= | ||
|name=EX Spin Fall (↓↘→ + AC) | |name=EX Spin Fall (↓↘→ + AC) | ||
| Line 909: | Line 1,000: | ||
|damage=107 | |damage=107 | ||
|stun=0 | |stun=0 | ||
|startup=15 | |startup=15 / Hits crouching opponent at 18 | ||
|active=6 | |active=6 | ||
|recovery=18 | |recovery=18 | ||
| Line 916: | Line 1,007: | ||
|hitbox=[https://drive.google.com/open?id=1b6Y_4ei6N3KCVq1o3MAkifL8SE_KqYPp Hitbox] | |hitbox=[https://drive.google.com/open?id=1b6Y_4ei6N3KCVq1o3MAkifL8SE_KqYPp Hitbox] | ||
|invul= Low: 1 to 22 (22 Frames) | |invul= Low: 1 to 22 (22 Frames) | ||
|description= An overhead attack that has no follow-up. The first hit will whiff on crouching opponents which will greatly cut this move's damage in half. It's a useful move for quick max combos after Stun Fang. | |description= *An overhead attack that has no follow-up since it will ground bound the opponent. | ||
*The first hit will whiff on crouching opponents which will greatly cut this move's damage in half. | |||
*It's a useful move for quick max combos after Stun Fang. | |||
}} | }} | ||
}} | }} | ||
| Line 922: | Line 1,015: | ||
{{MoveData | {{MoveData | ||
|image= | |image=Blue_Mary_Real_Counter.jpg | ||
|caption= | |caption= | ||
|name=Real Counter (↓↙← + A/C) | |name=Real Counter (↓↙← + A/C) | ||
| Line 941: | Line 1,034: | ||
{{MoveData | {{MoveData | ||
|image= | |image=Blue_Mary_Backdrop.jpg | ||
|caption= | |caption= | ||
|name=↳ Backdrop Real (In close, ↓↘→ + A/C) | |name=↳ Backdrop Real (In close, ↓↘→ + A/C) | ||
| Line 959: | Line 1,052: | ||
}} | }} | ||
}} | }} | ||
{{MoveData | {{MoveData | ||
|image= | |image=Blue_Mary_EX_RC.jpg | ||
|caption= | |caption= | ||
|name=EX Real Counter (↓↙← + AC) | |name=EX Real Counter (↓↙← + AC) | ||
| Line 976: | Line 1,070: | ||
|invul= Full: 1 to 31 (31 Frames) | |invul= Full: 1 to 31 (31 Frames) | ||
|description= * Just like normal Real Counter, EX Real Counter can be considered a dodge that cancels into a command grab. | |description= * Just like normal Real Counter, EX Real Counter can be considered a dodge that cancels into a command grab. | ||
* It can | * It can immediately cancel into a command grab. | ||
}} | }} | ||
}} | }} | ||
{{MoveData | {{MoveData | ||
|image= | |image=Blue_Mary_EX_Backdrop.jpg | ||
|caption= | |caption= | ||
|name=↳ EX Backdrop Real (In close, ↓↘→ + A/C) | |name=↳ EX Backdrop Real (In close, ↓↘→ + A/C) | ||
| Line 1,002: | Line 1,096: | ||
{{MoveData | {{MoveData | ||
|image= | |image=Blue_Mary_M_Breaker.jpg | ||
|caption= | |caption= | ||
|name= | |name=M. Breaker (→↓↘ + A/C) | ||
|data= | |data= | ||
{{AttackData-KOFXIV | {{AttackData-KOFXIV | ||
|version=A | |||
|damage=120 | |damage=120 | ||
|stun=0 | |stun=0 | ||
| Line 1,021: | Line 1,116: | ||
* Blue Mary can perform a 4 frame safe jump anywhere on the screen after this move: [https://www.youtube.com/watch?v=YMg7Max6RgI&feature=youtu.be Video Link] | * Blue Mary can perform a 4 frame safe jump anywhere on the screen after this move: [https://www.youtube.com/watch?v=YMg7Max6RgI&feature=youtu.be Video Link] | ||
}} | }} | ||
{{AttackData-KOFXIV | {{AttackData-KOFXIV | ||
|version= C | |||
|damage=120 | |damage=120 | ||
|stun=0 | |stun=0 | ||
|startup= | |startup=25 | ||
|active= | |active=6 | ||
|recovery= | |recovery=27 | ||
|hitAdv=HKD | |hitAdv=HKD | ||
|blockAdv=Unblockable | |blockAdv=Unblockable | ||
| Line 1,043: | Line 1,132: | ||
* It is not an air grab. | * It is not an air grab. | ||
* Blue Mary can perform a 4 frame safe jump anywhere on the screen after this move: [https://www.youtube.com/watch?v=YMg7Max6RgI&feature=youtu.be Video Link] | * Blue Mary can perform a 4 frame safe jump anywhere on the screen after this move: [https://www.youtube.com/watch?v=YMg7Max6RgI&feature=youtu.be Video Link] | ||
* Immediately jump to do 4-frame safe jump. | * Immediately jump to do a 4-frame safe jump. | ||
}} | }} | ||
}} | }} | ||
{{MoveData | {{MoveData | ||
|image= | |image=Blue_Mary_ex_M_Breaker.jpg | ||
|caption= | |caption= | ||
|name=EX M. Breaker (→↓↘ + AC) | |name=EX M. Breaker (→↓↘ + AC) | ||
| Line 1,066: | Line 1,156: | ||
* It is not an air grab. | * It is not an air grab. | ||
* Blue Mary can perform a 4-frame safe jump anywhere on the screen after this move: [https://www.youtube.com/watch?v=5Z1BXIHRUZE&feature=youtu.be Video Link] | * Blue Mary can perform a 4-frame safe jump anywhere on the screen after this move: [https://www.youtube.com/watch?v=5Z1BXIHRUZE&feature=youtu.be Video Link] | ||
* Immediately | * Immediately hyperjump to do a 4-frame safe jump. | ||
}} | }} | ||
}} | }}</div> | ||
</div> | |||
==Super Special Moves== | |||
<div class="toccolours mw-collapsible mw-collapsed">'''Super Special Moves''' | |||
<div class="mw-collapsible-content"> | |||
{{MoveData | {{MoveData | ||
|image= | |image=Blue_Mary_M_Typhoon.jpg | ||
|caption= | |caption= | ||
|name=M. Typhoon (In close, →↘↓↙←→↘↓↙← + B/D) | |name=M. Typhoon (In close, →↘↓↙←→↘↓↙← + B/D) | ||
| Line 1,094: | Line 1,186: | ||
}} | }} | ||
{{MoveData | {{MoveData | ||
|image= | |image=Blue_Mary_Max_M_Typhoon.jpg | ||
|caption= | |caption= | ||
|name=Max M. Typhoon (In close, →↘↓↙←→↘↓↙← + BD) | |name=Max M. Typhoon (In close, →↘↓↙←→↘↓↙← + BD) | ||
| Line 1,116: | Line 1,208: | ||
{{MoveData | {{MoveData | ||
|image= | |image=Blue_Mary_M_Splash.jpg | ||
|caption= | |caption= | ||
|name=M. Splash Rose (↓↘→↘↓↙← + A/C) | |name=M. Splash Rose (↓↘→↘↓↙← + A/C) | ||
| Line 1,138: | Line 1,230: | ||
{{MoveData | {{MoveData | ||
|image= | |image=Blue_Mary_Max_M_Splash.jpg | ||
|caption= | |caption= | ||
|name=Max M. Splash Rose (↓↘→↘↓↙← + AC) | |name=Max M. Splash Rose (↓↘→↘↓↙← + AC) | ||
| Line 1,154: | Line 1,246: | ||
|description= *Blue Mary's Max Ranbu super. | |description= *Blue Mary's Max Ranbu super. | ||
* Can Climax Cancel in M. Dynamite Swing (↓↘→↓↘→ + BD). It's best to climax cancel during the first two hits of Blue Mary's final launch into the air. | * Can Climax Cancel in M. Dynamite Swing (↓↘→↓↘→ + BD). It's best to climax cancel during the first two hits of Blue Mary's final launch into the air. | ||
* If done in the corner, Blue Mary will be there instead of the opponent, but she has enough time to perform a meaty | * If done in the corner, Blue Mary will be there instead of the opponent, but she has enough time to perform a meaty setup or cross-up. | ||
}} | }} | ||
}} | }}</div> | ||
</div> | |||
==Climax Super Special Moves== | |||
<div class="toccolours mw-collapsible mw-collapsed">'''Climax Super Special Moves''' | |||
<div class="mw-collapsible-content"> | |||
{{MoveData | {{MoveData | ||
|image= | |image=Blue_Mary_Climax.jpg | ||
|caption= | |caption= | ||
|name=M. Dynamite Swing (↓↘→↓↘→ + BD) | |name=M. Dynamite Swing (↓↘→↓↘→ + BD) | ||
| Line 1,179: | Line 1,273: | ||
* Can cancel from both versions of M. Splash Rose. | * Can cancel from both versions of M. Splash Rose. | ||
}} | }} | ||
}} | }}</div> | ||
</div> | |||
=Combos= | ==Combos== | ||
===Combo starter:=== | ===Combo starter:=== | ||
| Line 1,361: | Line 1,456: | ||
* cr. B, cr. B, (BC), cl. D, f+A, b~f+BD, qcf+A/C, qcf+AC (2 hits), b~f+BD, qcf+A/C, df+B, delay dp+B (1 hit, SC) qcf, hcb+A/C(CC), qcf(x2)+B = (693 dmg) | * cr. B, cr. B, (BC), cl. D, f+A, b~f+BD, qcf+A/C, qcf+AC (2 hits), b~f+BD, qcf+A/C, df+B, delay dp+B (1 hit, SC) qcf, hcb+A/C(CC), qcf(x2)+B = (693 dmg) | ||
=Misc= | ==Misc== | ||
===Meaty Jump Attack Set-ups:=== | ===Meaty Jump Attack Set-ups:=== | ||
| Line 1,367: | Line 1,462: | ||
Color Legend: | Color Legend: | ||
* Blue (Safe Jump Set-up): None of the opponent’s non-super reversals are fast enough to punish offensive character’s jump attack on wake-up. | * Blue (Safe Jump Set-up): None of the opponent’s non-super reversals are fast enough to punish the offensive character’s jump attack on wake-up. | ||
* Green (Pseudo Safe Jump Set-up): A set-up that can beat the defending characters’ fastest non-super reversal on wake-up. It is a safe jump against slower reversals. | * Green (Pseudo Safe Jump Set-up): A set-up that can beat the defending characters’ fastest non-super reversal on wake-up. It is a safe jump against slower reversals. | ||
| Line 1,433: | Line 1,528: | ||
|} | |} | ||
==Frame Data== | ==Frame Data and Hitbox== | ||
[https://docs.google.com/spreadsheets/d/1v1Iy2d7Bc2YwwTqW34InN2X2TvegowxVh9G8Rn6l4vA/edit#gid=32263301 Blue Mary KOFXIV Frama Data Link] | [https://docs.google.com/spreadsheets/d/1v1Iy2d7Bc2YwwTqW34InN2X2TvegowxVh9G8Rn6l4vA/edit#gid=32263301 Blue Mary KOFXIV Frama Data Link] | ||
[https://drive.google.com/drive/folders/1rOFFv0NDzTXVxZ84zf5ct6za2TqH220b Blue Mary KOFXIV Hitbox Gallery] | |||
=Videos= | =Videos= | ||
| Line 1,441: | Line 1,538: | ||
{{#ev:youtube|ZyXzI6e2OG4}} | {{#ev:youtube|ZyXzI6e2OG4}} | ||
=Contributors= | ==Contributors== | ||
Amedo310 | |||
=External Links= | ==External Links== | ||
Twitter feed: | Twitter feed: | ||
https://docs.google.com/spreadsheets/d/13__zMttExHJYETA4eCtObFypvZZJr1TDRsZZZHWjZIo/edit#gid=189594355 | https://docs.google.com/spreadsheets/d/13__zMttExHJYETA4eCtObFypvZZJr1TDRsZZZHWjZIo/edit#gid=189594355 | ||
=Discussion Threads= | ==Discussion Threads== | ||
Discuss at [add character section link here Dream Cancel] | Discuss at [add character section link here Dream Cancel] | ||
Latest revision as of 01:23, 27 May 2021
Movelist
(*) = EX OK
(!) = MAX OK
Throws
Command Normals
Special Moves
Straight Slicer - charge briefly ![]() then
then ![]() +
+ ![]() /
/![]() (*)
(*)
Super Special Moves
Climax Super Special Move
Quick Combo Reference
| 0 Meter |
Low, Anywhere |
(cr. B (x2 to x3), Far B) = 85 to 110 dmg |
| 1 Meter |
Anywhere |
(cr. B (x1-x2), cr. A, b~f+B (SC), qcf, hcb+A/C) = 259 to 275 dmg |
| 2 Meters |
Anywhere |
(cr. B (x2 to x3), Far B, qcf, hcb+AC) = 378 to 386 dmg |
Gameplay Overview
Health: 1000
Blue Mary is a very strong character in KOFXIV. She has many tools such as:
- An invincible dodge that leads into a command grab.
- A wide air CD that is good for pressure.
- Plenty of easy mix-ups.
- An invincible reversal, dp+K, that puts the opponent in a hard knockdown state.
She can make the opponent second guess their approach easily, with her invincible moves, while forcing her way in neutral.
Normals
Throws
Command Moves
Special Moves
Straight Slicer - (← charge → + B/D)
 |
|---|
| ↳ Crab Clutch (↓↘→ + B/D) |
|---|
EX Straight Slicer - (← charge → + BD)
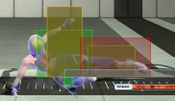 |
|---|
| ↳ Stun Fang (↓↘→ + A/C) |
|---|
Vertical Arrow - (→↓↘ + B/D)
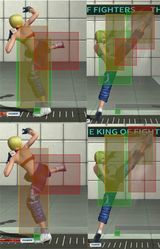 |
|---|
| ↳ M. Snatcher (→↓↘ + B/D) |
|---|
EX Vertical Arrow - (→↓↘ + BD)
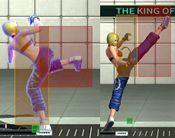 |
|---|
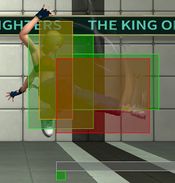
Spin Fall (↓↘→ + A/C)
 |
|---|
| ↳ M. Spider (↓↘→ + A/C) |
|---|
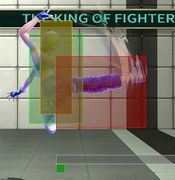
EX Spin Fall (↓↘→ + AC)
 |
|---|
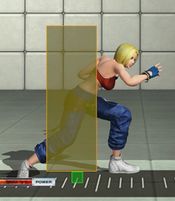
Real Counter (↓↙← + A/C)
 |
|---|
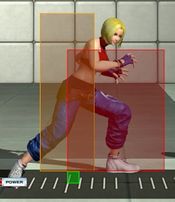
↳ Backdrop Real (In close, ↓↘→ + A/C)
 |
|---|
EX Real Counter (↓↙← + AC)
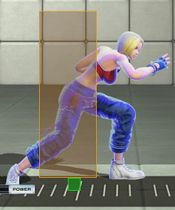 |
|---|
↳ EX Backdrop Real (In close, ↓↘→ + A/C)
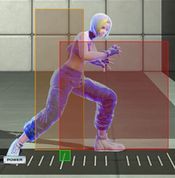 |
|---|
M. Breaker (→↓↘ + A/C)
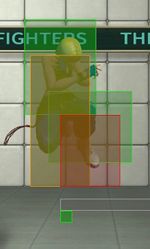 |
|---|
EX M. Breaker (→↓↘ + AC)
 |
|---|
Super Special Moves
Climax Super Special Moves
Combos
Combo starter:
- cr. B (x1 or x2), cr. A – The stable combo starter that connects only to b~f+B, the light slide kick.
- cl. C (1 hit), b+B – Cl. (1 hit) is one of two heavy normals that connects to f+B consistently, without f+B whiffing, at most ranges. After doing b+B, hold back to charge for the slide kick, b~f+B/D.
- cr. C, b+B – cr. C connects to f+B consistently without f+B whiffing all ranges. It can be considered the best combo to do after quick max to connect to ex slide kick, b~f+BD.
- cl. D, f+A – This is a combo to do after quick max in the anchor position. It leads to her most damaging mid-screen 2-meter anchor combo without spending any additional meter. It’s possible to do slide kick after this combo by immediately holding back during f+A. Delay f+K after f+A by a couple of frames to connect to slide kick.
- cl. D, b+B – Her most damaging combo starter, but requires cl. D to hit deep to connect f+B. It’s best to do this combo after a cross-up j. B or cross-up j. D. Also, it’s is useful after quick max for 1-meter max mode combos.
Rush Auto Combo
Meterless: Rush combo, b~f+D, qcfB/D = 172 dmg
1 Meter: Rush combo, qcf, hcb+A/C = 222 dmg
EX: Rush combo, qcf, hcb+AC = 363 dmg
0 meter
Anywhere
- cr. B (x2 to x3), Far B = (85 to 110 dmg)
- cr. B (x1 to x2), cr. A, b~f+B = (107 to 131 dmg)
(Main bread and butter combo. It's best to hold db while at the start of the combo to charge for b~f+B.)
- cl. C (1 hit), f+A, dp+B (x2) = (194 dmg)
- cl. D, f+A, b~f+D, qcf+B/D = (216 dmg)
- cl. D f+A, dp+B, dp+B (x2) = (234 dmg)
(cl. D has to hit very close against the opponent in order for b+B not to whiff. It's easier to do this combo after cross-up j. B or j. D.)
- cr. C, b+B (2 hits), b~f+D, qcf+B/D = (246 dmg)
(Along with cl. C (1 hit), cr. C seems to connect to b+B more consistently at any range.)
- cl. D b+B (2 hits), b~f+D, qcf+B/D = (256 dmg)
(cl. D has to hit very close against the opponent in order for b+B not to whiff. It's easier to do this combo after cross-up j. B or j. D.)
1 meter
1000 Max Mode and up/ All Positions/ Anywhere
- cr. B (x2 to x3), Far B, qcf, hcb+A/C = (237 to 254 dmg)
- cr. B (x1-x2), cr. A, b~f+B (SC), qcf, hcb+A/C = (259 to 275 dmg)
- cl. C (1 hit), b+B (2 hits), b~f+B(SC), qcf, hcb+A/C = (309 dmg)
- cr. C, b+B (2 hits), b~f+B(SC), qcf, hcb+A/C = (339 dmg)
- cr. B, cr. B, (BC), cr. C, b+B (2 hits), b~f+BD, delay qcf+A/C, df+B, qcf+AC (2 hits), dp+D (x2) = (355 dmg)
1500 Max Mode/ 3rd Position/ Corner
- cr. B, cr. B, (BC), cr. C, b+B (2 hits), qcf+AC, df+B, qcf+AC, dp+BD = (360 to 372 dmg)
2 meters
1000 Max Mode and up/ All Positions/ Anywhere
- cr. B (x2 to x3), Far B, qcf, hcb+AC = (378 to 386 dmg)
- cr. B (x1-x2), cr. A, b~f+B (SC), qcf, hcb+AC = (400 to 407 dmg)
- cl. C (1 hit), b+B (2 hits), b~f+B(SC), qcf, hcb+AC = (441 dmg)
- cr. C, b+B (2 hits), b~f+B(SC), qcf, hcb+AC = (471 dmg)
- cr. B, cr. B, (BC), cr. C, b+B (2 hits), b~f+BD, delay qcf+A/C, df+B, qcf, hcb+AC = (483 dmg)
1250 Max Mode and up/ 2nd and 3rd Positions/ Corner
- cr. B, cr. B, (BC), cr. C, b+B (2 hits), b~f+BD, delay qcf+A/C, df+B, delay dp+B (1 hit, SC), qcf, hcb+AC = (497 dmg)
1500 Max Mode and up/ 3rd Position/ Anywhere
- cr. B, cr. B, (BC), cl. D, f+A, b~f+BD, qcf+A/C, qcf+AC (2 hits), df+B, qcf, hcb+AC = (506 dmg)
1500 Max Mode and up/ 3rd Position/ Corner
- cr. B, cr. B, (BC), cl. D, b+B, b~f+BD, qcf+A/C, df+B, delay dp+B (1 hit, SC), qcf, hcb+AC = (505 dmg)
3 meters
1000 Max Mode and up/ All Positions/ Anywhere
- cr. B (x2 to x3), Far B, qcf, hcb+A/C(AC), hcb(x2)+BD = (404 to 407 dmg)
- cr. B (x1-x2), cr. A, b~f+B (SC), qcf, hcb+AC(AC), hcb(x2)+BD = (426 to 428 dmg)
- cl. C (1 hit), b+B (2 hits), b~f+B(SC), qcf, hcb+A/C(AC), hcb(x2)+BD = (462 dmg)
- cr. C, b+B (2 hits), b~f+B(SC), qcf, hcb+AC(AC), hcb(x2)+BD = (492 dmg)
- cr. B (x1-x2), cr. A, b~f+B(SC), qcf(x2)+BD = (494 to 493 dmg)
- cr. C, b+B (2 hits), b~f+B(SC), qcf(x2)+BD = (557 dmg)
- cr. B, cr. B, (BC), cr. C, b+B (2 hits), b~f+BD, qcf+A/C, df+B, qcf(x2)+BD = (528 dmg)
- cr. B, cr. B, (BC), cr. C, b+B (2 hits), b~f+BD, delay qcf+A/C, df+B, qcf+AC (2 hits), dp+B/D (1 hit, SC), qcf, hcb+AC = (529 dmg)
1250 Max Mode and up/ 2nd and 3rd Positions/ Corner
- cr. B, cr. B, (BC), cr. C, b+B (2 hits), b~f+BD, delay qcf+A/C, df+B, delay dp+B (1 hit, SC), qcf(x2)+BD = (542 dmg)
1500 Max Mode and up/ 3rd Position/ Anywhere
- cr. B, cr. B, (BC), cl. D, f+A, b~f+BD, qcf+A/C, qcf+AC (2 hits), df+B, qcf(x2)+BD = (551 dmg)
4 meters
1250 Max Mode and up/ 2nd and 3rd Positions/ Anywhere
- cr. B (x2 to x3), Far B, qcf, hcb+A/C(AC), hcb(x2)+BD = (526 to 518 dmg)
- cr. B (x1-x2), cr. A, b~f+B (SC), qcf, hcb+AC(AC), hcb(x2)+BD = (548 to 539 dmg)
- cl. C (1 hit), b+B (2 hits), b~f+B(SC), qcf, hcb+A/C(AC), hcb(x2)+BD = (573 dmg)
- cr. C, b+B (2 hits), b~f+B(SC), qcf, hcb+AC(AC), hcb(x2)+BD = (603 dmg)
- cr. B, cr. B, (BC), cr. C, b+B (2 hits), b~f+BD, delay qcf+A/C, df+B, qcf+AC (2 hits), dp+B/D (1 hit, SC) qcf, hcb+A/C (AC), hcb(x2)+BD = (549 dmg)
- cr. B, cr. B, (BC), cl. D, f+A, b~f+BD, qcf+A/C, qcf+AC (2 hits), delay b~f+BD, qcf+A/C, dash dp+B (1 hit, SC) qcf(x2)+BD = (580 dmg)
1250 Max Mode and up/ 2nd and 3rd Positions/ Corner
- cr. B, cr. B, (BC), cr. C, b+B (2 hits), b~f+BD, delay qcf+A/C, qcf+AC (2 hits), df+B, delay dp+B (1 hit, SC) qcf, hcb+A/C (AC), hcb(x2)+BD = (548 dmg)
1500 Max Mode and up/ 3rd Position/ Anywhere
- cr. B, cr. B, (BC), cl. D, f+A, b~f+BD, qcf+A/C, qcf+AC (2 hits), delay b~f+BD, qcf+A/C, dash dp+B (1 hit, SC) qcf, hcb+A/C (AC), hcb(x2)+BD = (555 dmg)
1500 Max Mode and up/ 3rd Position/ Corner
- cr. B, cr. B, (BC), cl. D, f+A, b~f+BD, qcf+A/C, qcf+AC (2 hits), b~f+BD, qcf+A/C, df+B, delay dp+B (1 hit, SC) qcf, hcb+A/C (AC), hcb(x2)+BD = (567 dmg)
- cr. B, cr. B, (BC), cl. D, f+A, b~f+BD, qcf+A/C, qcf+AC (2 hits), b~f+BD, qcf+A/C, df+B, delay dp+B (1 hit, SC) qcf(x2)+BD = (592 dmg)
5 meters
1500 Max Mode and up/ 3rd Position/ Anywhere
- cr. B (x2 to x3), Far B, qcf, hcb+AC(CC), qcf(x2)+BD = (609 to 601 dmg)
- cr. B (x1-x2), cr. A, b~f+B(SC), qcf, hcb+AC(CC), qcf(x2)+BD = (631 to 622 dmg)
- cl. C (1 hit), b+B (2 hits), b~f+B(SC), qcf, hcb+AC(CC), qcf(x2)+B = (656 dmg)
- cr. C, b+B (2 hits), b~f+B(SC), qcf, hcb+AC(CC), qcf(x2)+B = (686 dmg)
- cr. B, cr. B, (BC), cr. C, b+B (2 hits), b~f+BD, delay qcf+A/C, df+B, qcf, hcb+AC(CC), qcf(x2)+B = (638 dmg)
- cr. B, cr. B, (BC), cl. D, f+A, b~f+BD, delay qcf+A/C, df+B, qcf, hcb+AC(CC), qcf(x2)+B = (656 dmg)
- cr. B, cr. B, (BC), cl. D, f+A, b~f+BD, qcf+A/C, qcf+AC (2 hits), delay b~f+BD, qcf+A/C, dash dp+B (1 hit, SC) qcf, hcb+A/C(CC), qcf(x2)+B = (681 dmg)
1500 Max Mode and up/ 3rd Position/ Corner
- cr. B, cr. B, (BC), cl. D, f+A, b~f+BD, qcf+A/C, qcf+AC (2 hits), b~f+BD, qcf+A/C, df+B, delay dp+B (1 hit, SC) qcf, hcb+A/C(CC), qcf(x2)+B = (693 dmg)
Misc
Meaty Jump Attack Set-ups:
Color Legend:
- Blue (Safe Jump Set-up): None of the opponent’s non-super reversals are fast enough to punish the offensive character’s jump attack on wake-up.
- Green (Pseudo Safe Jump Set-up): A set-up that can beat the defending characters’ fastest non-super reversal on wake-up. It is a safe jump against slower reversals.
- Red (Won’t work): The opponent has a non-super reversal that can beat the offensive character’s jump attack on wake-up.
1. b~f+B at the corner- forward or neutral hop j. B: Only useful if the opponent does recovery rolls in the corner.
| Safe Jump Set-up: | Xanadu, Joe, Kensou, Blue Mary |
|---|---|
| Pseudo Safe Jump Set-up: | Kyo, Sylvie, Zarina, Iori, Kim, Nakoruru, Love Heart, Shun'Ei, Meitenkun, Leona, Billy, Terry, Andy, Alice, Athena, Robert, Yuri, Antonov, Rock, Heidern |
| Won’t work: | Choi, K', Kula, Ryo |
2. dp+B/D, dp+K at the corner- forward jump j. B or j. D:
| Safe Jump Set-up: | Xanadu, Joe, Kensou, Blue Mary |
|---|---|
| Pseudo Safe Jump Set-up: | Kyo, Sylvie, Zarina, Iori, Kim, Nakoruru, Love Heart, Shun'Ei, Meitenkun, Leona, Billy, Terry, Andy, Alice, Athena, Robert, Antonov, Heidern |
| Won’t work: | Choi, K', Kula, Ryo, Yuri, Rock |
3. dp+B/D, dp+K anywhere on screen - forward hyper jump j. D:
| Safe Jump Set-up: | Xanadu, Joe, Kensou, Blue Mary |
|---|---|
| Pseudo Safe Jump Set-up: | Kyo, Sylvie, Zarina, Iori, Kim, Nakoruru, Love Heart, Shun'Ei, Leona, Billy, Terry, Andy, Alice, Athena, Robert, Antonov, Heidern |
| Won’t work: | Choi, Meitenkun, K', Kula, Ryo, Yuri, Rock |
4. qcf+A/C(x2) anywhere on screen - forward hyper jump j. B or j. D:
| Safe Jump Set-up: | Xanadu, Joe, Kensou, Blue Mary |
|---|---|
| Pseudo Safe Jump Set-up: | Kyo, Sylvie, Zarina, Iori, Kim, Nakoruru, Love Heart, Shun'Ei, Leona, Billy, Terry, Andy, Alice, Athena, Robert, Antonov, Heidern |
| Won’t work: | Choi, Meitenkun, K', Kula, Ryo, Yuri, Rock |
Frame Data and Hitbox
Blue Mary KOFXIV Frama Data Link
Blue Mary KOFXIV Hitbox Gallery
Videos
Mary Combos ver.3.1 ➤ KOF14
Contributors
Amedo310
External Links
Twitter feed: https://docs.google.com/spreadsheets/d/13__zMttExHJYETA4eCtObFypvZZJr1TDRsZZZHWjZIo/edit#gid=189594355
Discussion Threads
Discuss at [add character section link here Dream Cancel]
