Difference between revisions of "The King of Fighters XIV/Blue Mary"
| (34 intermediate revisions by the same user not shown) | |||
| Line 2: | Line 2: | ||
=Movelist= | ==Movelist== | ||
(*) = EX OK | (*) = EX OK | ||
| Line 37: | Line 37: | ||
:Backdrop Real (Real Counter) - [[image:qcf.gif]] + [[image:a.gif]] / [[image:c.gif]] | :Backdrop Real (Real Counter) - [[image:qcf.gif]] + [[image:a.gif]] / [[image:c.gif]] | ||
M. Breaker - - [[image:dp.gif]] + [[image: | M. Breaker - - [[image:dp.gif]] + [[image:a.gif]] / [[image:c.gif]] (*) | ||
| Line 51: | Line 51: | ||
M. Dynamite Swing - [[image:qcf.gif]] [[image:qcf.gif]] + [[image:b.gif]] [[image:d.gif]] | M. Dynamite Swing - [[image:qcf.gif]] [[image:qcf.gif]] + [[image:b.gif]] [[image:d.gif]] | ||
=Quick Combo Reference= | ==Quick Combo Reference== | ||
{| border="1" align="center" style="font-size:90%" | {| border="1" align="center" style="font-size:90%" | ||
| Line 86: | Line 86: | ||
|} | |} | ||
=Gameplay Overview= | ==Gameplay Overview== | ||
'''Health: | '''Health: 1000''' | ||
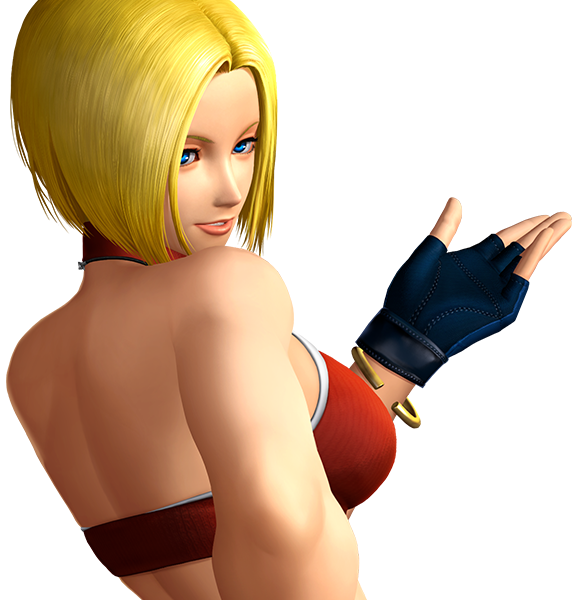
Blue Mary is a very strong character in KOFXIV. She has many tools such as: | Blue Mary is a very strong character in KOFXIV. She has many tools such as: | ||
| Line 98: | Line 98: | ||
* Plenty of easy mix-ups. | * Plenty of easy mix-ups. | ||
* An invincible reversal, dp+K, that puts the opponent in hard knockdown state. | * An invincible reversal, dp+K, that puts the opponent in a hard knockdown state. | ||
She can make the opponent second guess their approach easily, with her invincible moves, while forcing her way in neutral. | She can make the opponent second guess their approach easily, with her invincible moves, while forcing her way in neutral. | ||
=Normals= | ==Normals== | ||
<div class="toccolours mw-collapsible mw-collapsed">'''Far Standing Normals''' | <div class="toccolours mw-collapsible mw-collapsed">'''Far Standing Normals''' | ||
| Line 145: | Line 145: | ||
|invul= | |invul= | ||
|description= *More range than st.A. | |description= *More range than st.A. | ||
*Great poke | *Great poke against standing opponents. | ||
*Hits crouches. Only super Cancel-able. | *Hits crouches. Only super Cancel-able. | ||
}} | }} | ||
| Line 191: | Line 191: | ||
*Crushes slow lows or spamming cr. B (x2). | *Crushes slow lows or spamming cr. B (x2). | ||
*Not command/special/super cancel-able. | *Not command/special/super cancel-able. | ||
*Cannot | *Cannot quick max cancel. | ||
}} | }} | ||
}} | }} | ||
| Line 216: | Line 216: | ||
|invul= | |invul= | ||
|description= *Standard close jab. | |description= *Standard close jab. | ||
*Like Far A, cl. A is useful to stop hops | *Like Far A, cl. A is useful to stop hops if the opponent hops close towards Blue Mary. | ||
}} | }} | ||
}} | }} | ||
| Line 262: | Line 262: | ||
|description= *Hits twice. | |description= *Hits twice. | ||
*Command/special cancel-able. | *Command/special cancel-able. | ||
* | *Does not hit very high above her head. | ||
*Useful for grab/ close heavey OS against close empty hop/jump. | *Useful for grab/ close heavey OS against close empty hop/jump. | ||
}} | }} | ||
| Line 310: | Line 310: | ||
|description= *Hits mid. | |description= *Hits mid. | ||
*Slightly less range than cr.B. command/special/super cancel-able. | *Slightly less range than cr.B. command/special/super cancel-able. | ||
*Useful for mid range into cr. D frame trap and can link into cl. D at point-blank range. | *Useful for mid-range into cr. D frame trap and can link into cl. D at point-blank range. | ||
}} | }} | ||
}} | }} | ||
| Line 355: | Line 355: | ||
|description= *Hits mid. | |description= *Hits mid. | ||
*Lowers hitbox plus moves her forward a bit. | *Lowers hitbox plus moves her forward a bit. | ||
*Her best heavy normal combo starter | *Her best heavy normal combo starter especially into f+B. | ||
}} | }} | ||
}} | }} | ||
| Line 376: | Line 376: | ||
|invul= | |invul= | ||
|description= *Hits low and fast. | |description= *Hits low and fast. | ||
*Punishable if done at close range, but has a lot of pushback. So it's better use at mid to the furthest range of cr. D. Especially useful as a frame trap at mid-screen from cr.B (x3) or cr. B(x2), cr. A. | *Punishable if done at close range, but has a lot of pushback. So it's better to use at mid to the furthest range of cr. D. Especially useful as a frame trap at mid-screen from cr.B (x3) or cr. B(x2), cr. A. | ||
}} | }} | ||
}}</div> | }}</div> | ||
| Line 400: | Line 400: | ||
|invul= | |invul= | ||
|description= *Has a good diagonal hitbox. | |description= *Has a good diagonal hitbox. | ||
*It's useful as a jump-in | *It's useful as a jump-in confirmation and a quick poke in air-to-air situations. | ||
}} | }} | ||
}} | }} | ||
| Line 446: | Line 446: | ||
{{MoveData | {{MoveData | ||
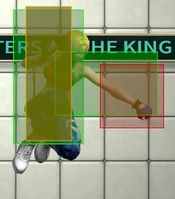
|image= | |image=Blue_Mary_Jump_D.jpg | ||
|caption= | |caption= | ||
|name=Jump D | |name=Jump D | ||
| Line 486: | Line 486: | ||
|description= *Nearly the same as jump A except less active frames and damage. | |description= *Nearly the same as jump A except less active frames and damage. | ||
*Has a good diagonal hitbox. | *Has a good diagonal hitbox. | ||
*It's useful as a jump-in | *It's useful as a jump-in confirmation and a quick poke in air-to-air situations. | ||
}} | }} | ||
}} | }} | ||
| Line 596: | Line 596: | ||
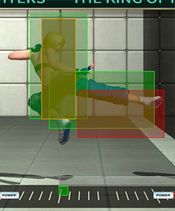
*Blue Mary can abuse her hop CD, which has a wide hitbox around her foot. | *Blue Mary can abuse her hop CD, which has a wide hitbox around her foot. | ||
*It’s good as an air-to-ground normal. | *It’s good as an air-to-ground normal. | ||
*Only invincible moves can beat it clean, so be | *Only invincible moves can beat it clean, so be cautious of opponents that are good at anti-airing. | ||
}} | }} | ||
}} | }} | ||
| Line 617: | Line 617: | ||
|invul= | |invul= | ||
|description= *Nearly the same as jump CD except less active frames and damage. | |description= *Nearly the same as jump CD except less active frames and damage. | ||
*Great | *Great hitbox for jump-in pressure. | ||
*Blue Mary can abuse her hop CD, which has a wide hitbox around her foot. | *Blue Mary can abuse her hop CD, which has a wide hitbox around her foot. | ||
*It’s good as an air-to-ground normal. | *It’s good as an air-to-ground normal. | ||
*Only invincible moves can beat it clean, so be | *Only invincible moves can beat it clean, so be cautious of opponents that are good at anti-airing. | ||
}} | }} | ||
}}</div> | }}</div> | ||
</div> | </div> | ||
=Throws= | ==Throws== | ||
<div class="toccolours mw-collapsible mw-collapsed">'''Normal Throws''' | <div class="toccolours mw-collapsible mw-collapsed">'''Normal Throws''' | ||
<div class="mw-collapsible-content"> | <div class="mw-collapsible-content"> | ||
| Line 668: | Line 668: | ||
</div> | </div> | ||
=Command Moves= | ==Command Moves== | ||
<div class="toccolours mw-collapsible mw-collapsed">'''Command Moves''' | <div class="toccolours mw-collapsible mw-collapsed">'''Command Moves''' | ||
<div class="mw-collapsible-content"> | <div class="mw-collapsible-content"> | ||
| Line 677: | Line 677: | ||
|data= | |data= | ||
{{AttackData-KOFXIV | {{AttackData-KOFXIV | ||
|version= | |version=Without Cancel | ||
|damage=70 | |damage=70 | ||
|stun=60 | |stun=60 | ||
| Line 693: | Line 693: | ||
}} | }} | ||
{{AttackData-KOFXIV | {{AttackData-KOFXIV | ||
|version= | |version=With Cancel | ||
|damage=30 | |damage=30 | ||
|stun=40 | |stun=40 | ||
| Line 728: | Line 728: | ||
|description= *Hits mid then low. Mostly used for combo filler. | |description= *Hits mid then low. Mostly used for combo filler. | ||
*Special cancel-able. | *Special cancel-able. | ||
* | *Doesn't crush lows. | ||
*If 1st hit connects on hit or guard, 2nd hit can whiff cancel and empty quickmax. | *If 1st hit connects on hit or guard, 2nd hit can whiff cancel and empty quickmax. | ||
}} | }} | ||
| Line 757: | Line 757: | ||
</div> | </div> | ||
=Special Moves= | ==Special Moves== | ||
<div class="toccolours mw-collapsible mw-collapsed"> '''Special Moves''' | |||
<div class="mw-collapsible-content"> | |||
{{MoveData | {{MoveData | ||
|image=Blue_Mary_Straight_Slicer.jpg | |image=Blue_Mary_Straight_Slicer.jpg | ||
| Line 907: | Line 908: | ||
|invul= | |invul= | ||
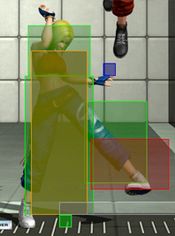
|description= *A follow-up that makes B/D Vertical Arrow a strong reversal since it's a hkd knockdown. | |description= *A follow-up that makes B/D Vertical Arrow a strong reversal since it's a hkd knockdown. | ||
*Gives Blue Mary enough to do meaty jump D attack that is difficult for many characters to counter. | *Gives Blue Mary enough to do a meaty jump D attack that is difficult for many characters to counter. | ||
}} | }} | ||
}} | }} | ||
| Line 913: | Line 914: | ||
{{MoveData | {{MoveData | ||
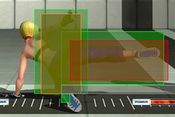
|image= | |image=Blue_Mary_EX_DP.jpg | ||
|caption= | |caption= | ||
|name=EX Vertical Arrow - (→↓↘ + BD) | |name=EX Vertical Arrow - (→↓↘ + BD) | ||
| Line 934: | Line 935: | ||
{{MoveData | {{MoveData | ||
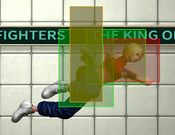
|image= | |image=Blue_Mary_Spin_Fall.jpg | ||
|caption= | |caption= | ||
|name=Spin Fall (↓↘→ + A/C) | |name=Spin Fall (↓↘→ + A/C) | ||
| Line 992: | Line 993: | ||
{{MoveData | {{MoveData | ||
|image= | |image=Blue_Mary_EX_Spin_Fall.jpg | ||
|caption= | |caption= | ||
|name=EX Spin Fall (↓↘→ + AC) | |name=EX Spin Fall (↓↘→ + AC) | ||
| Line 999: | Line 1,000: | ||
|damage=107 | |damage=107 | ||
|stun=0 | |stun=0 | ||
|startup=15 | |startup=15 / Hits crouching opponent at 18 | ||
|active=6 | |active=6 | ||
|recovery=18 | |recovery=18 | ||
| Line 1,014: | Line 1,015: | ||
{{MoveData | {{MoveData | ||
|image= | |image=Blue_Mary_Real_Counter.jpg | ||
|caption= | |caption= | ||
|name=Real Counter (↓↙← + A/C) | |name=Real Counter (↓↙← + A/C) | ||
| Line 1,033: | Line 1,034: | ||
{{MoveData | {{MoveData | ||
|image= | |image=Blue_Mary_Backdrop.jpg | ||
|caption= | |caption= | ||
|name=↳ Backdrop Real (In close, ↓↘→ + A/C) | |name=↳ Backdrop Real (In close, ↓↘→ + A/C) | ||
| Line 1,054: | Line 1,055: | ||
{{MoveData | {{MoveData | ||
|image= | |image=Blue_Mary_EX_RC.jpg | ||
|caption= | |caption= | ||
|name=EX Real Counter (↓↙← + AC) | |name=EX Real Counter (↓↙← + AC) | ||
| Line 1,069: | Line 1,070: | ||
|invul= Full: 1 to 31 (31 Frames) | |invul= Full: 1 to 31 (31 Frames) | ||
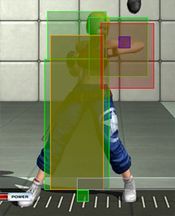
|description= * Just like normal Real Counter, EX Real Counter can be considered a dodge that cancels into a command grab. | |description= * Just like normal Real Counter, EX Real Counter can be considered a dodge that cancels into a command grab. | ||
* It can | * It can immediately cancel into a command grab. | ||
}} | }} | ||
}} | }} | ||
{{MoveData | {{MoveData | ||
|image= | |image=Blue_Mary_EX_Backdrop.jpg | ||
|caption= | |caption= | ||
|name=↳ EX Backdrop Real (In close, ↓↘→ + A/C) | |name=↳ EX Backdrop Real (In close, ↓↘→ + A/C) | ||
| Line 1,095: | Line 1,096: | ||
{{MoveData | {{MoveData | ||
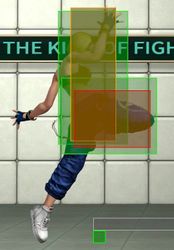
|image= | |image=Blue_Mary_M_Breaker.jpg | ||
|caption= | |caption= | ||
|name=M. Breaker (→↓↘ + A/C) | |name=M. Breaker (→↓↘ + A/C) | ||
| Line 1,131: | Line 1,132: | ||
* It is not an air grab. | * It is not an air grab. | ||
* Blue Mary can perform a 4 frame safe jump anywhere on the screen after this move: [https://www.youtube.com/watch?v=YMg7Max6RgI&feature=youtu.be Video Link] | * Blue Mary can perform a 4 frame safe jump anywhere on the screen after this move: [https://www.youtube.com/watch?v=YMg7Max6RgI&feature=youtu.be Video Link] | ||
* Immediately jump to do 4-frame safe jump. | * Immediately jump to do a 4-frame safe jump. | ||
}} | }} | ||
}} | }} | ||
| Line 1,137: | Line 1,138: | ||
{{MoveData | {{MoveData | ||
|image= | |image=Blue_Mary_ex_M_Breaker.jpg | ||
|caption= | |caption= | ||
|name=EX M. Breaker (→↓↘ + AC) | |name=EX M. Breaker (→↓↘ + AC) | ||
| Line 1,155: | Line 1,156: | ||
* It is not an air grab. | * It is not an air grab. | ||
* Blue Mary can perform a 4-frame safe jump anywhere on the screen after this move: [https://www.youtube.com/watch?v=5Z1BXIHRUZE&feature=youtu.be Video Link] | * Blue Mary can perform a 4-frame safe jump anywhere on the screen after this move: [https://www.youtube.com/watch?v=5Z1BXIHRUZE&feature=youtu.be Video Link] | ||
* Immediately | * Immediately hyperjump to do a 4-frame safe jump. | ||
}} | }} | ||
}} | }}</div> | ||
</div> | |||
==Super Special Moves== | |||
<div class="toccolours mw-collapsible mw-collapsed">'''Super Special Moves''' | |||
<div class="mw-collapsible-content"> | |||
{{MoveData | {{MoveData | ||
|image= | |image=Blue_Mary_M_Typhoon.jpg | ||
|caption= | |caption= | ||
|name=M. Typhoon (In close, →↘↓↙←→↘↓↙← + B/D) | |name=M. Typhoon (In close, →↘↓↙←→↘↓↙← + B/D) | ||
| Line 1,183: | Line 1,186: | ||
}} | }} | ||
{{MoveData | {{MoveData | ||
|image= | |image=Blue_Mary_Max_M_Typhoon.jpg | ||
|caption= | |caption= | ||
|name=Max M. Typhoon (In close, →↘↓↙←→↘↓↙← + BD) | |name=Max M. Typhoon (In close, →↘↓↙←→↘↓↙← + BD) | ||
| Line 1,205: | Line 1,208: | ||
{{MoveData | {{MoveData | ||
|image= | |image=Blue_Mary_M_Splash.jpg | ||
|caption= | |caption= | ||
|name=M. Splash Rose (↓↘→↘↓↙← + A/C) | |name=M. Splash Rose (↓↘→↘↓↙← + A/C) | ||
| Line 1,227: | Line 1,230: | ||
{{MoveData | {{MoveData | ||
|image= | |image=Blue_Mary_Max_M_Splash.jpg | ||
|caption= | |caption= | ||
|name=Max M. Splash Rose (↓↘→↘↓↙← + AC) | |name=Max M. Splash Rose (↓↘→↘↓↙← + AC) | ||
| Line 1,243: | Line 1,246: | ||
|description= *Blue Mary's Max Ranbu super. | |description= *Blue Mary's Max Ranbu super. | ||
* Can Climax Cancel in M. Dynamite Swing (↓↘→↓↘→ + BD). It's best to climax cancel during the first two hits of Blue Mary's final launch into the air. | * Can Climax Cancel in M. Dynamite Swing (↓↘→↓↘→ + BD). It's best to climax cancel during the first two hits of Blue Mary's final launch into the air. | ||
* If done in the corner, Blue Mary will be there instead of the opponent, but she has enough time to perform a meaty | * If done in the corner, Blue Mary will be there instead of the opponent, but she has enough time to perform a meaty setup or cross-up. | ||
}} | }} | ||
}} | }}</div> | ||
</div> | |||
==Climax Super Special Moves== | |||
<div class="toccolours mw-collapsible mw-collapsed">'''Climax Super Special Moves''' | |||
<div class="mw-collapsible-content"> | |||
{{MoveData | {{MoveData | ||
|image= | |image=Blue_Mary_Climax.jpg | ||
|caption= | |caption= | ||
|name=M. Dynamite Swing (↓↘→↓↘→ + BD) | |name=M. Dynamite Swing (↓↘→↓↘→ + BD) | ||
| Line 1,268: | Line 1,273: | ||
* Can cancel from both versions of M. Splash Rose. | * Can cancel from both versions of M. Splash Rose. | ||
}} | }} | ||
}} | }}</div> | ||
</div> | |||
=Combos= | ==Combos== | ||
===Combo starter:=== | ===Combo starter:=== | ||
| Line 1,450: | Line 1,456: | ||
* cr. B, cr. B, (BC), cl. D, f+A, b~f+BD, qcf+A/C, qcf+AC (2 hits), b~f+BD, qcf+A/C, df+B, delay dp+B (1 hit, SC) qcf, hcb+A/C(CC), qcf(x2)+B = (693 dmg) | * cr. B, cr. B, (BC), cl. D, f+A, b~f+BD, qcf+A/C, qcf+AC (2 hits), b~f+BD, qcf+A/C, df+B, delay dp+B (1 hit, SC) qcf, hcb+A/C(CC), qcf(x2)+B = (693 dmg) | ||
=Misc= | ==Misc== | ||
===Meaty Jump Attack Set-ups:=== | ===Meaty Jump Attack Set-ups:=== | ||
| Line 1,456: | Line 1,462: | ||
Color Legend: | Color Legend: | ||
* Blue (Safe Jump Set-up): None of the opponent’s non-super reversals are fast enough to punish offensive character’s jump attack on wake-up. | * Blue (Safe Jump Set-up): None of the opponent’s non-super reversals are fast enough to punish the offensive character’s jump attack on wake-up. | ||
* Green (Pseudo Safe Jump Set-up): A set-up that can beat the defending characters’ fastest non-super reversal on wake-up. It is a safe jump against slower reversals. | * Green (Pseudo Safe Jump Set-up): A set-up that can beat the defending characters’ fastest non-super reversal on wake-up. It is a safe jump against slower reversals. | ||
| Line 1,522: | Line 1,528: | ||
|} | |} | ||
==Frame Data== | ==Frame Data and Hitbox== | ||
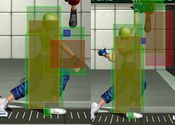
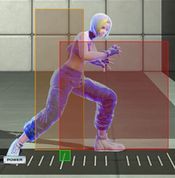
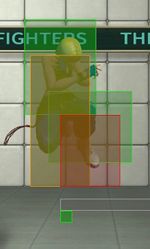
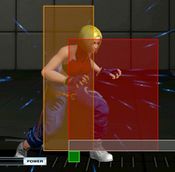
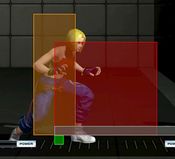
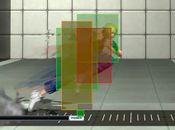
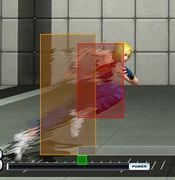
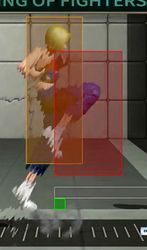
[https://docs.google.com/spreadsheets/d/1v1Iy2d7Bc2YwwTqW34InN2X2TvegowxVh9G8Rn6l4vA/edit#gid=32263301 Blue Mary KOFXIV Frama Data Link] | [https://docs.google.com/spreadsheets/d/1v1Iy2d7Bc2YwwTqW34InN2X2TvegowxVh9G8Rn6l4vA/edit#gid=32263301 Blue Mary KOFXIV Frama Data Link] | ||
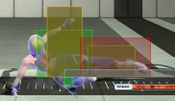
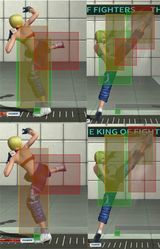
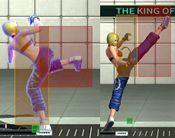
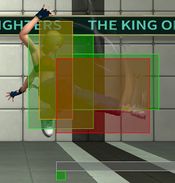
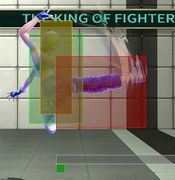
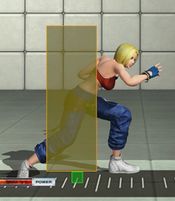
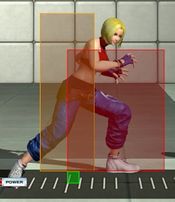
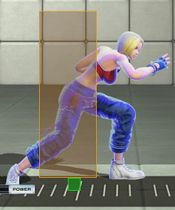
[https://drive.google.com/drive/folders/1rOFFv0NDzTXVxZ84zf5ct6za2TqH220b Blue Mary KOFXIV Hitbox Gallery] | |||
=Videos= | =Videos= | ||
| Line 1,530: | Line 1,538: | ||
{{#ev:youtube|ZyXzI6e2OG4}} | {{#ev:youtube|ZyXzI6e2OG4}} | ||
=Contributors= | ==Contributors== | ||
Amedo310 | |||
=External Links= | ==External Links== | ||
Twitter feed: | Twitter feed: | ||
https://docs.google.com/spreadsheets/d/13__zMttExHJYETA4eCtObFypvZZJr1TDRsZZZHWjZIo/edit#gid=189594355 | https://docs.google.com/spreadsheets/d/13__zMttExHJYETA4eCtObFypvZZJr1TDRsZZZHWjZIo/edit#gid=189594355 | ||
=Discussion Threads= | ==Discussion Threads== | ||
Discuss at [add character section link here Dream Cancel] | Discuss at [add character section link here Dream Cancel] | ||
Latest revision as of 01:23, 27 May 2021
Movelist
(*) = EX OK
(!) = MAX OK
Throws
Command Normals
Special Moves
Straight Slicer - charge briefly ![]() then
then ![]() +
+ ![]() /
/![]() (*)
(*)
Super Special Moves
Climax Super Special Move
Quick Combo Reference
| 0 Meter |
Low, Anywhere |
(cr. B (x2 to x3), Far B) = 85 to 110 dmg |
| 1 Meter |
Anywhere |
(cr. B (x1-x2), cr. A, b~f+B (SC), qcf, hcb+A/C) = 259 to 275 dmg |
| 2 Meters |
Anywhere |
(cr. B (x2 to x3), Far B, qcf, hcb+AC) = 378 to 386 dmg |
Gameplay Overview
Health: 1000
Blue Mary is a very strong character in KOFXIV. She has many tools such as:
- An invincible dodge that leads into a command grab.
- A wide air CD that is good for pressure.
- Plenty of easy mix-ups.
- An invincible reversal, dp+K, that puts the opponent in a hard knockdown state.
She can make the opponent second guess their approach easily, with her invincible moves, while forcing her way in neutral.
Normals
Throws
Command Moves
Special Moves
| Straight Slicer - (← charge → + B/D) |
|---|
| ↳ Crab Clutch (↓↘→ + B/D) |
|---|
| EX Straight Slicer - (← charge → + BD) |
|---|
| ↳ Stun Fang (↓↘→ + A/C) |
|---|
| Vertical Arrow - (→↓↘ + B/D) |
|---|
| ↳ M. Snatcher (→↓↘ + B/D) |
|---|
| EX Vertical Arrow - (→↓↘ + BD) |
|---|
| Spin Fall (↓↘→ + A/C) |
|---|
| ↳ M. Spider (↓↘→ + A/C) |
|---|
| EX Spin Fall (↓↘→ + AC) |
|---|
| Real Counter (↓↙← + A/C) |
|---|
| ↳ Backdrop Real (In close, ↓↘→ + A/C) |
|---|
| EX Real Counter (↓↙← + AC) |
|---|
| ↳ EX Backdrop Real (In close, ↓↘→ + A/C) |
|---|
| M. Breaker (→↓↘ + A/C) |
|---|
| EX M. Breaker (→↓↘ + AC) |
|---|
Super Special Moves
Climax Super Special Moves
Combos
Combo starter:
- cr. B (x1 or x2), cr. A – The stable combo starter that connects only to b~f+B, the light slide kick.
- cl. C (1 hit), b+B – Cl. (1 hit) is one of two heavy normals that connects to f+B consistently, without f+B whiffing, at most ranges. After doing b+B, hold back to charge for the slide kick, b~f+B/D.
- cr. C, b+B – cr. C connects to f+B consistently without f+B whiffing all ranges. It can be considered the best combo to do after quick max to connect to ex slide kick, b~f+BD.
- cl. D, f+A – This is a combo to do after quick max in the anchor position. It leads to her most damaging mid-screen 2-meter anchor combo without spending any additional meter. It’s possible to do slide kick after this combo by immediately holding back during f+A. Delay f+K after f+A by a couple of frames to connect to slide kick.
- cl. D, b+B – Her most damaging combo starter, but requires cl. D to hit deep to connect f+B. It’s best to do this combo after a cross-up j. B or cross-up j. D. Also, it’s is useful after quick max for 1-meter max mode combos.
Rush Auto Combo
Meterless: Rush combo, b~f+D, qcfB/D = 172 dmg
1 Meter: Rush combo, qcf, hcb+A/C = 222 dmg
EX: Rush combo, qcf, hcb+AC = 363 dmg
0 meter
Anywhere
- cr. B (x2 to x3), Far B = (85 to 110 dmg)
- cr. B (x1 to x2), cr. A, b~f+B = (107 to 131 dmg)
(Main bread and butter combo. It's best to hold db while at the start of the combo to charge for b~f+B.)
- cl. C (1 hit), f+A, dp+B (x2) = (194 dmg)
- cl. D, f+A, b~f+D, qcf+B/D = (216 dmg)
- cl. D f+A, dp+B, dp+B (x2) = (234 dmg)
(cl. D has to hit very close against the opponent in order for b+B not to whiff. It's easier to do this combo after cross-up j. B or j. D.)
- cr. C, b+B (2 hits), b~f+D, qcf+B/D = (246 dmg)
(Along with cl. C (1 hit), cr. C seems to connect to b+B more consistently at any range.)
- cl. D b+B (2 hits), b~f+D, qcf+B/D = (256 dmg)
(cl. D has to hit very close against the opponent in order for b+B not to whiff. It's easier to do this combo after cross-up j. B or j. D.)
1 meter
1000 Max Mode and up/ All Positions/ Anywhere
- cr. B (x2 to x3), Far B, qcf, hcb+A/C = (237 to 254 dmg)
- cr. B (x1-x2), cr. A, b~f+B (SC), qcf, hcb+A/C = (259 to 275 dmg)
- cl. C (1 hit), b+B (2 hits), b~f+B(SC), qcf, hcb+A/C = (309 dmg)
- cr. C, b+B (2 hits), b~f+B(SC), qcf, hcb+A/C = (339 dmg)
- cr. B, cr. B, (BC), cr. C, b+B (2 hits), b~f+BD, delay qcf+A/C, df+B, qcf+AC (2 hits), dp+D (x2) = (355 dmg)
1500 Max Mode/ 3rd Position/ Corner
- cr. B, cr. B, (BC), cr. C, b+B (2 hits), qcf+AC, df+B, qcf+AC, dp+BD = (360 to 372 dmg)
2 meters
1000 Max Mode and up/ All Positions/ Anywhere
- cr. B (x2 to x3), Far B, qcf, hcb+AC = (378 to 386 dmg)
- cr. B (x1-x2), cr. A, b~f+B (SC), qcf, hcb+AC = (400 to 407 dmg)
- cl. C (1 hit), b+B (2 hits), b~f+B(SC), qcf, hcb+AC = (441 dmg)
- cr. C, b+B (2 hits), b~f+B(SC), qcf, hcb+AC = (471 dmg)
- cr. B, cr. B, (BC), cr. C, b+B (2 hits), b~f+BD, delay qcf+A/C, df+B, qcf, hcb+AC = (483 dmg)
1250 Max Mode and up/ 2nd and 3rd Positions/ Corner
- cr. B, cr. B, (BC), cr. C, b+B (2 hits), b~f+BD, delay qcf+A/C, df+B, delay dp+B (1 hit, SC), qcf, hcb+AC = (497 dmg)
1500 Max Mode and up/ 3rd Position/ Anywhere
- cr. B, cr. B, (BC), cl. D, f+A, b~f+BD, qcf+A/C, qcf+AC (2 hits), df+B, qcf, hcb+AC = (506 dmg)
1500 Max Mode and up/ 3rd Position/ Corner
- cr. B, cr. B, (BC), cl. D, b+B, b~f+BD, qcf+A/C, df+B, delay dp+B (1 hit, SC), qcf, hcb+AC = (505 dmg)
3 meters
1000 Max Mode and up/ All Positions/ Anywhere
- cr. B (x2 to x3), Far B, qcf, hcb+A/C(AC), hcb(x2)+BD = (404 to 407 dmg)
- cr. B (x1-x2), cr. A, b~f+B (SC), qcf, hcb+AC(AC), hcb(x2)+BD = (426 to 428 dmg)
- cl. C (1 hit), b+B (2 hits), b~f+B(SC), qcf, hcb+A/C(AC), hcb(x2)+BD = (462 dmg)
- cr. C, b+B (2 hits), b~f+B(SC), qcf, hcb+AC(AC), hcb(x2)+BD = (492 dmg)
- cr. B (x1-x2), cr. A, b~f+B(SC), qcf(x2)+BD = (494 to 493 dmg)
- cr. C, b+B (2 hits), b~f+B(SC), qcf(x2)+BD = (557 dmg)
- cr. B, cr. B, (BC), cr. C, b+B (2 hits), b~f+BD, qcf+A/C, df+B, qcf(x2)+BD = (528 dmg)
- cr. B, cr. B, (BC), cr. C, b+B (2 hits), b~f+BD, delay qcf+A/C, df+B, qcf+AC (2 hits), dp+B/D (1 hit, SC), qcf, hcb+AC = (529 dmg)
1250 Max Mode and up/ 2nd and 3rd Positions/ Corner
- cr. B, cr. B, (BC), cr. C, b+B (2 hits), b~f+BD, delay qcf+A/C, df+B, delay dp+B (1 hit, SC), qcf(x2)+BD = (542 dmg)
1500 Max Mode and up/ 3rd Position/ Anywhere
- cr. B, cr. B, (BC), cl. D, f+A, b~f+BD, qcf+A/C, qcf+AC (2 hits), df+B, qcf(x2)+BD = (551 dmg)
4 meters
1250 Max Mode and up/ 2nd and 3rd Positions/ Anywhere
- cr. B (x2 to x3), Far B, qcf, hcb+A/C(AC), hcb(x2)+BD = (526 to 518 dmg)
- cr. B (x1-x2), cr. A, b~f+B (SC), qcf, hcb+AC(AC), hcb(x2)+BD = (548 to 539 dmg)
- cl. C (1 hit), b+B (2 hits), b~f+B(SC), qcf, hcb+A/C(AC), hcb(x2)+BD = (573 dmg)
- cr. C, b+B (2 hits), b~f+B(SC), qcf, hcb+AC(AC), hcb(x2)+BD = (603 dmg)
- cr. B, cr. B, (BC), cr. C, b+B (2 hits), b~f+BD, delay qcf+A/C, df+B, qcf+AC (2 hits), dp+B/D (1 hit, SC) qcf, hcb+A/C (AC), hcb(x2)+BD = (549 dmg)
- cr. B, cr. B, (BC), cl. D, f+A, b~f+BD, qcf+A/C, qcf+AC (2 hits), delay b~f+BD, qcf+A/C, dash dp+B (1 hit, SC) qcf(x2)+BD = (580 dmg)
1250 Max Mode and up/ 2nd and 3rd Positions/ Corner
- cr. B, cr. B, (BC), cr. C, b+B (2 hits), b~f+BD, delay qcf+A/C, qcf+AC (2 hits), df+B, delay dp+B (1 hit, SC) qcf, hcb+A/C (AC), hcb(x2)+BD = (548 dmg)
1500 Max Mode and up/ 3rd Position/ Anywhere
- cr. B, cr. B, (BC), cl. D, f+A, b~f+BD, qcf+A/C, qcf+AC (2 hits), delay b~f+BD, qcf+A/C, dash dp+B (1 hit, SC) qcf, hcb+A/C (AC), hcb(x2)+BD = (555 dmg)
1500 Max Mode and up/ 3rd Position/ Corner
- cr. B, cr. B, (BC), cl. D, f+A, b~f+BD, qcf+A/C, qcf+AC (2 hits), b~f+BD, qcf+A/C, df+B, delay dp+B (1 hit, SC) qcf, hcb+A/C (AC), hcb(x2)+BD = (567 dmg)
- cr. B, cr. B, (BC), cl. D, f+A, b~f+BD, qcf+A/C, qcf+AC (2 hits), b~f+BD, qcf+A/C, df+B, delay dp+B (1 hit, SC) qcf(x2)+BD = (592 dmg)
5 meters
1500 Max Mode and up/ 3rd Position/ Anywhere
- cr. B (x2 to x3), Far B, qcf, hcb+AC(CC), qcf(x2)+BD = (609 to 601 dmg)
- cr. B (x1-x2), cr. A, b~f+B(SC), qcf, hcb+AC(CC), qcf(x2)+BD = (631 to 622 dmg)
- cl. C (1 hit), b+B (2 hits), b~f+B(SC), qcf, hcb+AC(CC), qcf(x2)+B = (656 dmg)
- cr. C, b+B (2 hits), b~f+B(SC), qcf, hcb+AC(CC), qcf(x2)+B = (686 dmg)
- cr. B, cr. B, (BC), cr. C, b+B (2 hits), b~f+BD, delay qcf+A/C, df+B, qcf, hcb+AC(CC), qcf(x2)+B = (638 dmg)
- cr. B, cr. B, (BC), cl. D, f+A, b~f+BD, delay qcf+A/C, df+B, qcf, hcb+AC(CC), qcf(x2)+B = (656 dmg)
- cr. B, cr. B, (BC), cl. D, f+A, b~f+BD, qcf+A/C, qcf+AC (2 hits), delay b~f+BD, qcf+A/C, dash dp+B (1 hit, SC) qcf, hcb+A/C(CC), qcf(x2)+B = (681 dmg)
1500 Max Mode and up/ 3rd Position/ Corner
- cr. B, cr. B, (BC), cl. D, f+A, b~f+BD, qcf+A/C, qcf+AC (2 hits), b~f+BD, qcf+A/C, df+B, delay dp+B (1 hit, SC) qcf, hcb+A/C(CC), qcf(x2)+B = (693 dmg)
Misc
Meaty Jump Attack Set-ups:
Color Legend:
- Blue (Safe Jump Set-up): None of the opponent’s non-super reversals are fast enough to punish the offensive character’s jump attack on wake-up.
- Green (Pseudo Safe Jump Set-up): A set-up that can beat the defending characters’ fastest non-super reversal on wake-up. It is a safe jump against slower reversals.
- Red (Won’t work): The opponent has a non-super reversal that can beat the offensive character’s jump attack on wake-up.
1. b~f+B at the corner- forward or neutral hop j. B: Only useful if the opponent does recovery rolls in the corner.
| Safe Jump Set-up: | Xanadu, Joe, Kensou, Blue Mary |
|---|---|
| Pseudo Safe Jump Set-up: | Kyo, Sylvie, Zarina, Iori, Kim, Nakoruru, Love Heart, Shun'Ei, Meitenkun, Leona, Billy, Terry, Andy, Alice, Athena, Robert, Yuri, Antonov, Rock, Heidern |
| Won’t work: | Choi, K', Kula, Ryo |
2. dp+B/D, dp+K at the corner- forward jump j. B or j. D:
| Safe Jump Set-up: | Xanadu, Joe, Kensou, Blue Mary |
|---|---|
| Pseudo Safe Jump Set-up: | Kyo, Sylvie, Zarina, Iori, Kim, Nakoruru, Love Heart, Shun'Ei, Meitenkun, Leona, Billy, Terry, Andy, Alice, Athena, Robert, Antonov, Heidern |
| Won’t work: | Choi, K', Kula, Ryo, Yuri, Rock |
3. dp+B/D, dp+K anywhere on screen - forward hyper jump j. D:
| Safe Jump Set-up: | Xanadu, Joe, Kensou, Blue Mary |
|---|---|
| Pseudo Safe Jump Set-up: | Kyo, Sylvie, Zarina, Iori, Kim, Nakoruru, Love Heart, Shun'Ei, Leona, Billy, Terry, Andy, Alice, Athena, Robert, Antonov, Heidern |
| Won’t work: | Choi, Meitenkun, K', Kula, Ryo, Yuri, Rock |
4. qcf+A/C(x2) anywhere on screen - forward hyper jump j. B or j. D:
| Safe Jump Set-up: | Xanadu, Joe, Kensou, Blue Mary |
|---|---|
| Pseudo Safe Jump Set-up: | Kyo, Sylvie, Zarina, Iori, Kim, Nakoruru, Love Heart, Shun'Ei, Leona, Billy, Terry, Andy, Alice, Athena, Robert, Antonov, Heidern |
| Won’t work: | Choi, Meitenkun, K', Kula, Ryo, Yuri, Rock |
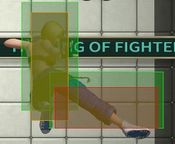
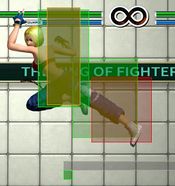
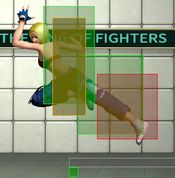
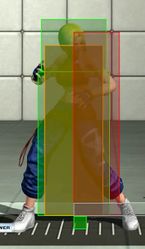
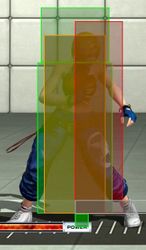
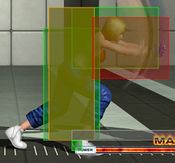
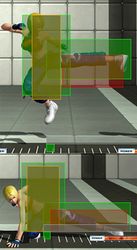
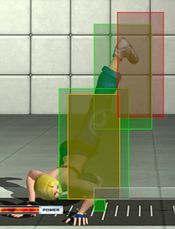
Frame Data and Hitbox
Blue Mary KOFXIV Frama Data Link
Blue Mary KOFXIV Hitbox Gallery
Videos
Mary Combos ver.3.1 ➤ KOF14
Contributors
Amedo310
External Links
Twitter feed: https://docs.google.com/spreadsheets/d/13__zMttExHJYETA4eCtObFypvZZJr1TDRsZZZHWjZIo/edit#gid=189594355
Discussion Threads
Discuss at [add character section link here Dream Cancel]
