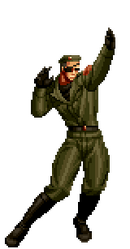
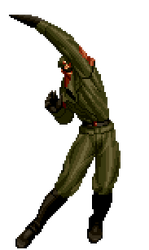
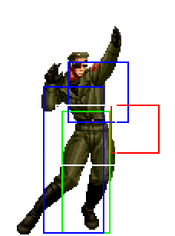
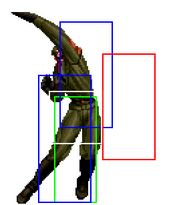
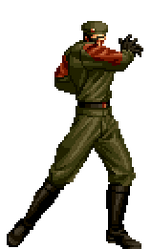
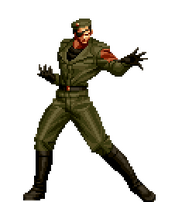
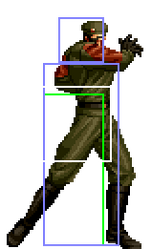
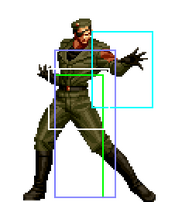
-Happy New Year 2025!
The King of Fighters 2002 UM/Heidern: Difference between revisions
No edit summary |
Franck Frost (talk | contribs) No edit summary |
||
| (30 intermediate revisions by 2 users not shown) | |||
| Line 389: | Line 389: | ||
|description= | |description= | ||
<br> | <br> | ||
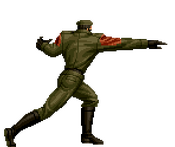
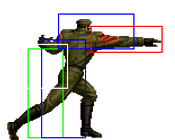
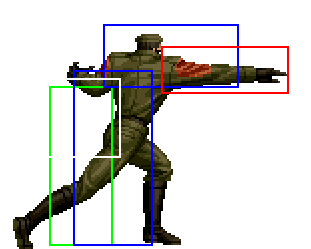
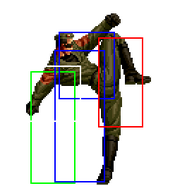
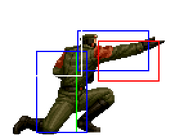
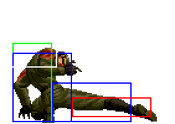
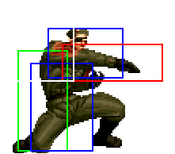
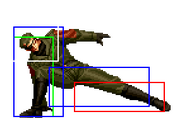
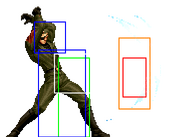
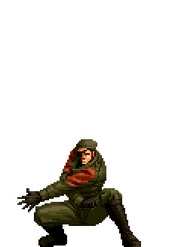
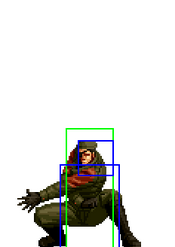
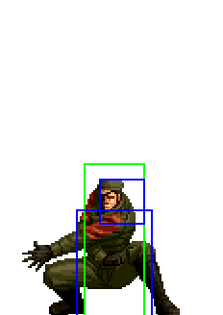
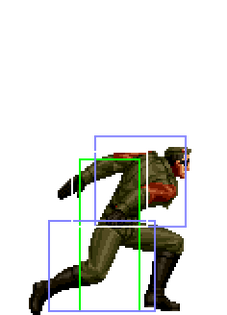
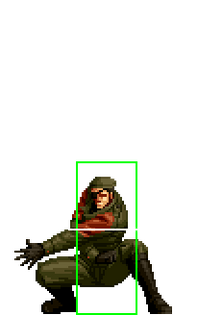
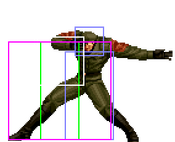
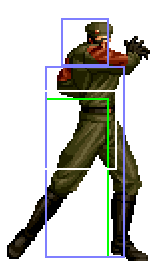
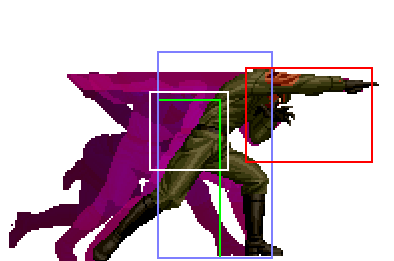
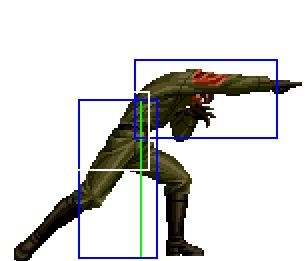
Hits low, but not cancellable. It has great horizontal range & comes out at a decent speed to be used a low poke but it isn't a combo tool.<br> | |||
<br> | <br> | ||
|phases= | |phases= | ||
<gallery mode=packed-hover heights=139px> | <gallery mode=packed-hover heights=139px> | ||
| Line 399: | Line 397: | ||
</gallery> | </gallery> | ||
}} | }} | ||
==== ==== | ==== ==== | ||
{{FrameDataCargo-KOF02UM | {{FrameDataCargo-KOF02UM | ||
| Line 404: | Line 403: | ||
|description= | |description= | ||
<br> | <br> | ||
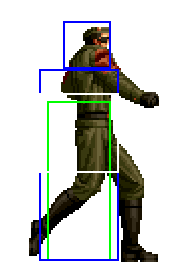
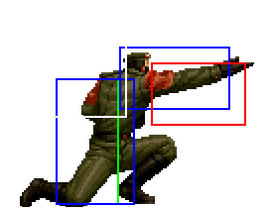
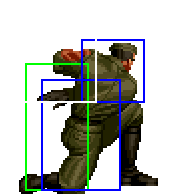
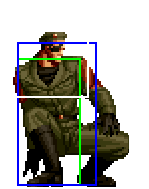
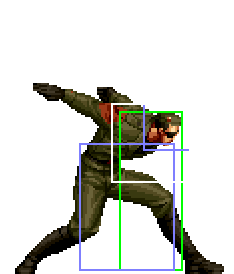
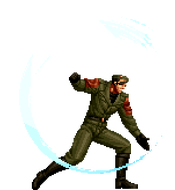
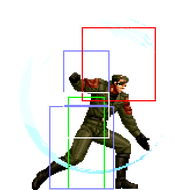
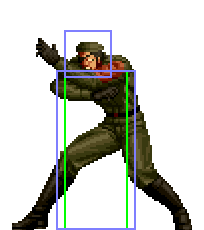
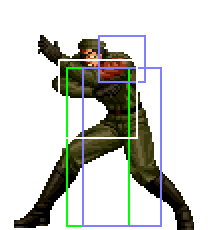
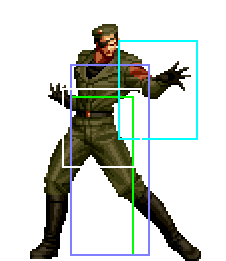
A | A fast swinging horizontal chop that is whiff cancel-able, but has less horizontal range than {{Hover|cr. A|2A}}.<br> | ||
<br> | <br> | ||
* Cancelable on hit/whiff. | * Cancelable on hit/whiff. | ||
|phases= | |phases= | ||
<gallery mode=packed-hover heights=139px> | <gallery mode=packed-hover heights=139px> | ||
| Line 414: | Line 412: | ||
</gallery> | </gallery> | ||
}} | }} | ||
==== ==== | ==== ==== | ||
{{FrameDataCargo-KOF02UM | {{FrameDataCargo-KOF02UM | ||
| Line 419: | Line 418: | ||
|description= | |description= | ||
<br> | <br> | ||
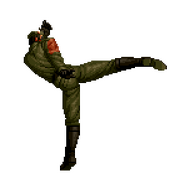
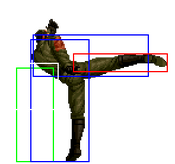
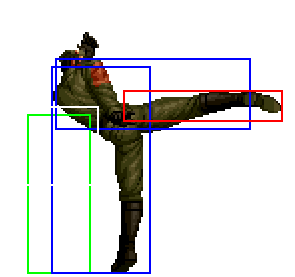
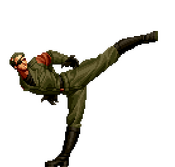
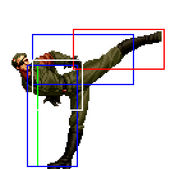
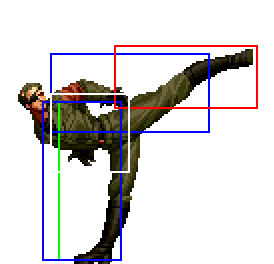
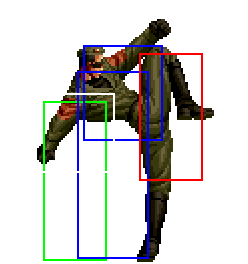
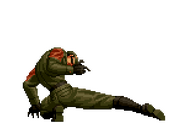
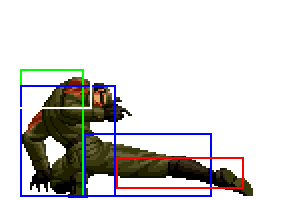
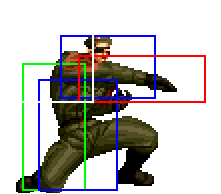
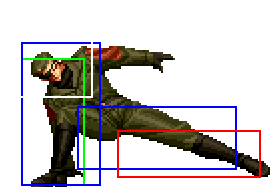
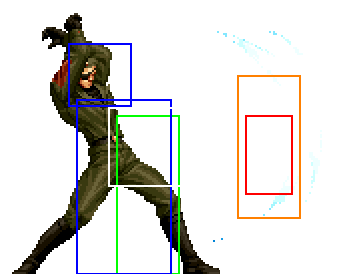
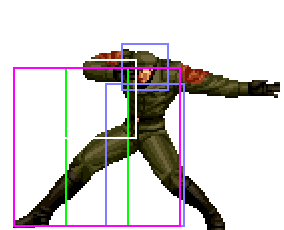
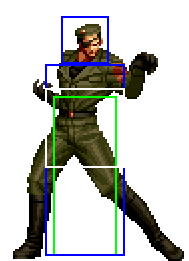
A | A sweep that has enormous range & is whiff cancel-able too.<br> | ||
<br> | <br> | ||
* Cancelable on hit/whiff. | * Cancelable on hit/whiff. | ||
|phases= | |phases= | ||
<gallery mode=packed-hover heights=139px> | <gallery mode=packed-hover heights=139px> | ||
| Line 429: | Line 427: | ||
</gallery> | </gallery> | ||
}} | }} | ||
==== ==== | ==== ==== | ||
===Jump Normals=== | ===Jump Normals=== | ||
| Line 438: | Line 437: | ||
|description3= | |description3= | ||
<br> | <br> | ||
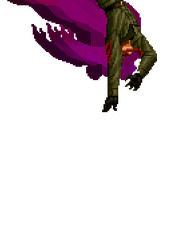
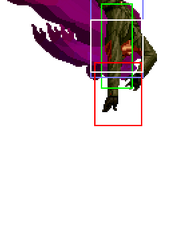
A downward angled chop that is active for a good amount of time. | |||
}} | }} | ||
==== ==== | ==== ==== | ||
{{FrameDataCargo-KOF02UM | {{FrameDataCargo-KOF02UM | ||
| Line 445: | Line 445: | ||
|name=jump B | |name=jump B | ||
|input=j.B | |input=j.B | ||
|description2= | |||
<br> | |||
An aerial side kick that has good horizontal range similar to his far B. | |||
|description3= | |description3= | ||
<br> | <br> | ||
A quick kick that swings up in front of Heidern. | |||
}} | }} | ||
==== ==== | ==== ==== | ||
{{FrameDataCargo-KOF02UM | {{FrameDataCargo-KOF02UM | ||
| Line 456: | Line 460: | ||
|description2= | |description2= | ||
<br> | <br> | ||
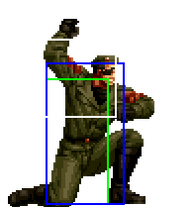
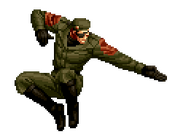
A two handed chop that can easily cross-up standing & crouching opponents, is good to use as a combo starter into cl.C or cl.D & can be used as an instant overhead on medium and taller crouchers. | |||
}} | }} | ||
==== ==== | ==== ==== | ||
{{FrameDataCargo-KOF02UM | {{FrameDataCargo-KOF02UM | ||
| Line 463: | Line 468: | ||
|name=jump D | |name=jump D | ||
|input=j.D | |input=j.D | ||
|description2= | |||
<br> | |||
A diagonally aimed kick that is great to start combos & can cross-up as well. Hop D can be used as an instant overhead on medium and taller crouchers, slower than j.C but with more reach so better to jump away with. | |||
|description3= | |description3= | ||
<br> | <br> | ||
A kick that swings down in front of Heidern. Can be used to hit opponents in advance in front of Heidern that has finished rolling near him | |||
}} | }} | ||
| Line 474: | Line 482: | ||
|description= | |description= | ||
<br> | <br> | ||
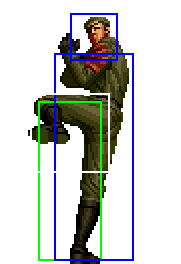
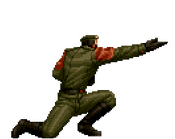
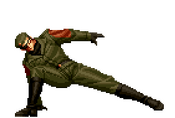
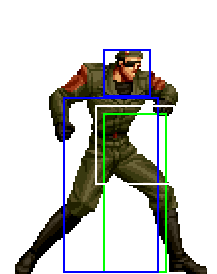
A | A very slow finger point that is aimed diagonally above and in front of Heidern's head.<br> | ||
<br> | <br> | ||
* Cancelable on hit/whiff. | * Cancelable on hit/whiff. | ||
| Line 491: | Line 499: | ||
|description2= | |description2= | ||
<br> | <br> | ||
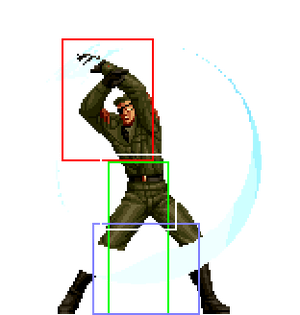
A double swinging chop (that resembles a crescent moon) that hits in-front of Heidern. | |||
}} | }} | ||
| Line 530: | Line 538: | ||
|hitbox=02UM_Heidern_f+B_2.png | |hitbox=02UM_Heidern_f+B_2.png | ||
|description= | |description= | ||
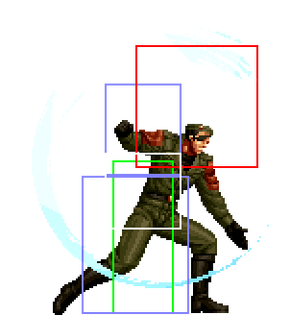
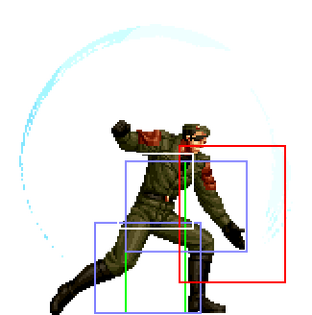
Heidern | Heidern performs a 2 Hit roundhouse kick. If canceled into from cl. C or cl. D, the first hit can easily cancel into his desperation moves. Hits overhead, loses overhead property if canceled from cl. C or cl. D<br> | ||
<br> | <br> | ||
* [[The_King_of_Fighters_2002_UM/Offense#Standing_Overheads|Standing Overhead]]. | * [[The_King_of_Fighters_2002_UM/Offense#Standing_Overheads|Standing Overhead]]. | ||
<ul><li> '''Mix-up Advice''': After {{Hover| | <ul><li> '''Mix-up Advice''': After {{Hover|cr.A you can delay cancel into f+B to get the raw f+B|2A you can delay cancel into 6B to get the raw 6B}} out faster than linking it. If the opponent blocks it in the corner, you can '''BC run''' and do <b>{{Hover|cr.B|2B}}</b> to get a big damage combo if it hits.</li> | ||
<li> '''Combo Advice''': You can do '''BC run, | <li> '''Combo Advice''': You can do '''BC run,''' <b>{{Hover|cr.A|2A}}</b> and continue the combo depending on where you are at the screen.</li></ul> | ||
|phases= | |phases= | ||
<gallery mode=packed-hover heights=210px> | <gallery mode=packed-hover heights=210px> | ||
| Line 563: | Line 571: | ||
|moveId=heidern_b~f+A,heidern_b~f+C | |moveId=heidern_b~f+A,heidern_b~f+C | ||
|input=b~f + A/C | |input=b~f + A/C | ||
|input2=6 | |input2=[6]8 A/C | ||
|image=02UM_Heidern_b~f+A_2_ima.png | |image=02UM_Heidern_b~f+A_2_ima.png | ||
|image2=02UM_Heidern_b~f+A_3_ima.png | |image2=02UM_Heidern_b~f+A_3_ima.png | ||
| Line 579: | Line 587: | ||
File:02UM_Heidern_b~f+A_4.png|'''Early Recovery''' | File:02UM_Heidern_b~f+A_4.png|'''Early Recovery''' | ||
</gallery> | </gallery> | ||
|description2=</ | |description2=heidern | ||
heidern.< | * [[The_King_of_Fighters_2002_UM/Offense#Standing_Overheads|Standing Overhead]]. | ||
< | <ul><li> '''Mix-up Advice''': After {{Hover|cr.B/A, cr.A you can delay cancel into f+B to get the raw f+B|2B/A, 2A you can delay cancel into 6B to get the raw 6B}} out faster than linking it. This gives you an overhead after {{Hover|cr.A versus just canceling into df+D|2A versus just canceling into 3D}} for a low.</li> | ||
<li> '''Combo Advice''': You can do '''BC run, cl.C''' to combo off a very close {{Hover|f+B. Off the previous mix-up, you can max bypass f+B|6B. Off the previous mix-up, you can max bypass 6B}} into <b>{{Hover|qcf+BC, [(C)qcf+A, (C)qcf+C]x1~2 (SC) qcfx2+A|236BC, [(C)236A, (C)236C]x1~2 (SC) 236236A}}</b> or <b>{{Hover|qcf+BC, [(C)qcf+A, (C)qcf+C]x2 (SC) qcb,hcf+P|236BC, [(C)236A, (C)236C]x2 (SC) 2141236P}}[[The_King_of_Fighters_2002_UM/heidern_Kusanagi/Combos#General_Notes|(Charge)]]</b> to spend 2 bars on a 36~41% conversion.</li></ul> | |||
< | |phases2= | ||
< | <gallery mode=packed-hover heights=210px> | ||
<ul><li> '''Combo Advice''': | File:02UM_Heidern_b~f+A_2.png|'''Startup''' | ||
File:02UM_Heidern_b~f+A_3.png|'''Active''' | |||
File:02UM_Heidern_b~f+A_4.png|'''Early Recovery''' | |||
</gallery> | |||
}} | |||
===Moon Slasher=== | |||
==== ==== | |||
{{FrameDataCargo-KOF02UM | |||
|moveId=heidern_d~u+A,heidern_d~u+C | |||
|input=d~u + A/C | |||
|input2=[6]8 A/C | |||
|image=02UM_Heidern_d~u+A_2_ima.png | |||
|image2=02UM_Heidern_d~u+A_4_ima.png | |||
|hitbox=02UM_Heidern_d~u+A_2.png | |||
|hitbox2=02UM_Heidern_d~u+A_4.png | |||
|description= | |||
heidern | |||
* [[The_King_of_Fighters_2002_UM/Offense#Standing_Overheads|Standing Overhead]]. | |||
<ul><li> '''Mix-up Advice''': After {{Hover|cr.B/A, cr.A you can delay cancel into f+B to get the raw f+B|2B/A, 2A you can delay cancel into 6B to get the raw 6B}} out faster than linking it. This gives you an overhead after {{Hover|cr.A versus just canceling into df+D|2A versus just canceling into 3D}} for a low.</li> | |||
<li> '''Combo Advice''': You can do '''BC run, cl.C''' to combo off a very close {{Hover|f+B. Off the previous mix-up, you can max bypass f+B|6B. Off the previous mix-up, you can max bypass 6B}} into <b>{{Hover|qcf+BC, [(C)qcf+A, (C)qcf+C]x1~2 (SC) qcfx2+A|236BC, [(C)236A, (C)236C]x1~2 (SC) 236236A}}</b> or <b>{{Hover|qcf+BC, [(C)qcf+A, (C)qcf+C]x2 (SC) qcb,hcf+P|236BC, [(C)236A, (C)236C]x2 (SC) 2141236P}}[[The_King_of_Fighters_2002_UM/heidern_Kusanagi/Combos#General_Notes|(Charge)]]</b> to spend 2 bars on a 36~41% conversion.</li></ul> | |||
|phases= | |||
<gallery mode=packed-hover heights=210px> | |||
File:02UM_Heidern_d~u+A_2.png|'''Startup''' | |||
File:02UM_Heidern_d~u+A_3.png|'''Active''' | |||
File:02UM_Heidern_d~u+A_4.png|'''Active''' | |||
File:02UM_Heidern_d~u+A_5.png|'''Active''' | |||
File:02UM_Heidern_d~u+A_6.png|'''Early Recovery''' | |||
</gallery> | |||
|description2= | |||
heidern | |||
* [[The_King_of_Fighters_2002_UM/Offense#Standing_Overheads|Standing Overhead]]. | |||
<ul><li> '''Mix-up Advice''': After {{Hover|cr.B/A, cr.A you can delay cancel into f+B to get the raw f+B|2B/A, 2A you can delay cancel into 6B to get the raw 6B}} out faster than linking it. This gives you an overhead after {{Hover|cr.A versus just canceling into df+D|2A versus just canceling into 3D}} for a low.</li> | |||
<li> '''Combo Advice''': You can do '''BC run, cl.C''' to combo off a very close {{Hover|f+B. Off the previous mix-up, you can max bypass f+B|6B. Off the previous mix-up, you can max bypass 6B}} into <b>{{Hover|qcf+BC, [(C)qcf+A, (C)qcf+C]x1~2 (SC) qcfx2+A|236BC, [(C)236A, (C)236C]x1~2 (SC) 236236A}}</b> or <b>{{Hover|qcf+BC, [(C)qcf+A, (C)qcf+C]x2 (SC) qcb,hcf+P|236BC, [(C)236A, (C)236C]x2 (SC) 2141236P}}[[The_King_of_Fighters_2002_UM/heidern_Kusanagi/Combos#General_Notes|(Charge)]]</b> to spend 2 bars on a 36~41% conversion.</li></ul> | |||
|phases2= | |||
<gallery mode=packed-hover heights=210px> | |||
File:02UM_Heidern_d~u+C_2.png|'''Startup''' | |||
File:02UM_Heidern_d~u+C_3.png|'''Active''' | |||
File:02UM_Heidern_d~u+C_4.png|'''Active''' | |||
File:02UM_Heidern_d~u+C_5.png|'''Active''' | |||
File:02UM_Heidern_d~u+C_6.png|'''Early Recovery''' | |||
</gallery> | |||
}} | |||
===Storm Bringer=== | |||
==== ==== | |||
{{FrameDataCargo-KOF02UM | |||
|moveId=heidern_hcb+A,heidern_hcb+C | |||
|input=hcb + A/C | |||
|input2=63214 A/C | |||
|image=02UM_Heidern_hcb+A_1_ima.png | |||
|image2=02UM_Heidern_hcb+A_2_ima.png | |||
|hitbox=02UM_Heidern_hcb+A_1.png | |||
|hitbox2=02UM_Heidern_hcb+A_2.png | |||
|description= | |||
heidern | |||
* [[The_King_of_Fighters_2002_UM/Offense#Standing_Overheads|Standing Overhead]]. | |||
<ul><li> '''Mix-up Advice''': After {{Hover|cr.B/A, cr.A you can delay cancel into f+B to get the raw f+B|2B/A, 2A you can delay cancel into 6B to get the raw 6B}} out faster than linking it. This gives you an overhead after {{Hover|cr.A versus just canceling into df+D|2A versus just canceling into 3D}} for a low.</li> | |||
<li> '''Combo Advice''': You can do '''BC run, cl.C''' to combo off a very close {{Hover|f+B. Off the previous mix-up, you can max bypass f+B|6B. Off the previous mix-up, you can max bypass 6B}} into <b>{{Hover|qcf+BC, [(C)qcf+A, (C)qcf+C]x1~2 (SC) qcfx2+A|236BC, [(C)236A, (C)236C]x1~2 (SC) 236236A}}</b> or <b>{{Hover|qcf+BC, [(C)qcf+A, (C)qcf+C]x2 (SC) qcb,hcf+P|236BC, [(C)236A, (C)236C]x2 (SC) 2141236P}}[[The_King_of_Fighters_2002_UM/heidern_Kusanagi/Combos#General_Notes|(Charge)]]</b> to spend 2 bars on a 36~41% conversion.</li></ul> | |||
|phases= | |||
<gallery mode=packed-hover heights=210px> | |||
File:02UM_Heidern_hcb+A_1.png|'''Startup''' | |||
File:02UM_Heidern_hcb+A_2.png|'''Active''' | |||
File:02UM_Heidern_hcb+A_3.png|'''Early Recovery''' | |||
</gallery> | |||
|description2= | |||
heidern | |||
* [[The_King_of_Fighters_2002_UM/Offense#Standing_Overheads|Standing Overhead]]. | |||
<ul><li> '''Mix-up Advice''': After {{Hover|cr.B/A, cr.A you can delay cancel into f+B to get the raw f+B|2B/A, 2A you can delay cancel into 6B to get the raw 6B}} out faster than linking it. This gives you an overhead after {{Hover|cr.A versus just canceling into df+D|2A versus just canceling into 3D}} for a low.</li> | |||
<li> '''Combo Advice''': You can do '''BC run, cl.C''' to combo off a very close {{Hover|f+B. Off the previous mix-up, you can max bypass f+B|6B. Off the previous mix-up, you can max bypass 6B}} into <b>{{Hover|qcf+BC, [(C)qcf+A, (C)qcf+C]x1~2 (SC) qcfx2+A|236BC, [(C)236A, (C)236C]x1~2 (SC) 236236A}}</b> or <b>{{Hover|qcf+BC, [(C)qcf+A, (C)qcf+C]x2 (SC) qcb,hcf+P|236BC, [(C)236A, (C)236C]x2 (SC) 2141236P}}[[The_King_of_Fighters_2002_UM/heidern_Kusanagi/Combos#General_Notes|(Charge)]]</b> to spend 2 bars on a 36~41% conversion.</li></ul> | |||
|phases2= | |||
<gallery mode=packed-hover heights=210px> | |||
File:02UM_Heidern_hcb+A_1.png|'''Startup''' | |||
File:02UM_Heidern_hcb+A_2.png|'''Active''' | |||
File:02UM_Heidern_hcb+A_3.png|'''Early Recovery''' | |||
</gallery> | |||
}} | |||
===Killing Bringer=== | |||
==== ==== | |||
{{FrameDataCargo-KOF02UM | |||
|moveId=heidern_hcb+B,heidern_hcb+D | |||
|input=hcb + B/D | |||
|input2=63214 B/D | |||
|image=02UM_Heidern_hcb+B_1_ima.png | |||
|image2=02UM_Heidern_hcb+B_2_ima.png | |||
|hitbox=02UM_Heidern_hcb+B_1.png | |||
|hitbox2=02UM_Heidern_hcb+B_2.png | |||
|description= | |||
heidern | |||
* [[The_King_of_Fighters_2002_UM/Offense#Standing_Overheads|Standing Overhead]]. | |||
<ul><li> '''Mix-up Advice''': After {{Hover|cr.B/A, cr.A you can delay cancel into f+B to get the raw f+B|2B/A, 2A you can delay cancel into 6B to get the raw 6B}} out faster than linking it. This gives you an overhead after {{Hover|cr.A versus just canceling into df+D|2A versus just canceling into 3D}} for a low.</li> | |||
<li> '''Combo Advice''': You can do '''BC run, cl.C''' to combo off a very close {{Hover|f+B. Off the previous mix-up, you can max bypass f+B|6B. Off the previous mix-up, you can max bypass 6B}} into <b>{{Hover|qcf+BC, [(C)qcf+A, (C)qcf+C]x1~2 (SC) qcfx2+A|236BC, [(C)236A, (C)236C]x1~2 (SC) 236236A}}</b> or <b>{{Hover|qcf+BC, [(C)qcf+A, (C)qcf+C]x2 (SC) qcb,hcf+P|236BC, [(C)236A, (C)236C]x2 (SC) 2141236P}}[[The_King_of_Fighters_2002_UM/heidern_Kusanagi/Combos#General_Notes|(Charge)]]</b> to spend 2 bars on a 36~41% conversion.</li></ul> | |||
|phases= | |||
<gallery mode=packed-hover heights=210px> | |||
File:02UM_Heidern_hcb+B_1.png|'''Startup''' | |||
File:02UM_Heidern_hcb+B_2.png|'''Active''' | |||
File:02UM_Heidern_hcb+B_3.png|'''Early Recovery''' | |||
</gallery> | |||
|description2= | |||
heidern | |||
* [[The_King_of_Fighters_2002_UM/Offense#Standing_Overheads|Standing Overhead]]. | |||
<ul><li> '''Mix-up Advice''': After {{Hover|cr.B/A, cr.A you can delay cancel into f+B to get the raw f+B|2B/A, 2A you can delay cancel into 6B to get the raw 6B}} out faster than linking it. This gives you an overhead after {{Hover|cr.A versus just canceling into df+D|2A versus just canceling into 3D}} for a low.</li> | |||
<li> '''Combo Advice''': You can do '''BC run, cl.C''' to combo off a very close {{Hover|f+B. Off the previous mix-up, you can max bypass f+B|6B. Off the previous mix-up, you can max bypass 6B}} into <b>{{Hover|qcf+BC, [(C)qcf+A, (C)qcf+C]x1~2 (SC) qcfx2+A|236BC, [(C)236A, (C)236C]x1~2 (SC) 236236A}}</b> or <b>{{Hover|qcf+BC, [(C)qcf+A, (C)qcf+C]x2 (SC) qcb,hcf+P|236BC, [(C)236A, (C)236C]x2 (SC) 2141236P}}[[The_King_of_Fighters_2002_UM/heidern_Kusanagi/Combos#General_Notes|(Charge)]]</b> to spend 2 bars on a 36~41% conversion.</li></ul> | |||
|phases2= | |||
<gallery mode=packed-hover heights=210px> | |||
File:02UM_Heidern_hcb+B_1.png|'''Startup''' | |||
File:02UM_Heidern_hcb+B_2.png|'''Active''' | |||
File:02UM_Heidern_hcb+B_3.png|'''Early Recovery''' | |||
</gallery> | |||
}} | |||
==Desperation Moves== | |||
===Heidern End=== | |||
==== ==== | |||
{{FrameDataCargo-KOF02UM | |||
|moveId=heidern_qcbhcf+B,heidern_qcbhcf+D | |||
|input=qcb,hcf + B/D | |||
|input2=214236 B/D | |||
|image=02UM_Heidern_qcbhcf+B_1_ima.png | |||
|image2=02UM_Heidern_qcbhcf+B_3_ima.png | |||
|hitbox=02UM_Heidern_qcbhcf+B_1.png | |||
|hitbox2=02UM_Heidern_qcbhcf+B_3.png | |||
|description= | |||
heidern | |||
* [[The_King_of_Fighters_2002_UM/Offense#Standing_Overheads|Standing Overhead]]. | |||
<ul><li> '''Mix-up Advice''': After {{Hover|cr.B/A, cr.A you can delay cancel into f+B to get the raw f+B|2B/A, 2A you can delay cancel into 6B to get the raw 6B}} out faster than linking it. This gives you an overhead after {{Hover|cr.A versus just canceling into df+D|2A versus just canceling into 3D}} for a low.</li> | |||
<li> '''Combo Advice''': You can do '''BC run, cl.C''' to combo off a very close {{Hover|f+B. Off the previous mix-up, you can max bypass f+B|6B. Off the previous mix-up, you can max bypass 6B}} into <b>{{Hover|qcf+BC, [(C)qcf+A, (C)qcf+C]x1~2 (SC) qcfx2+A|236BC, [(C)236A, (C)236C]x1~2 (SC) 236236A}}</b> or <b>{{Hover|qcf+BC, [(C)qcf+A, (C)qcf+C]x2 (SC) qcb,hcf+P|236BC, [(C)236A, (C)236C]x2 (SC) 2141236P}}[[The_King_of_Fighters_2002_UM/heidern_Kusanagi/Combos#General_Notes|(Charge)]]</b> to spend 2 bars on a 36~41% conversion.</li></ul> | |||
|phases= | |||
<gallery mode=packed-hover heights=210px> | |||
File:02UM_Heidern_qcbhcf+B_1.png|'''Startup''' | |||
File:02UM_Heidern_qcbhcf+B_3.png|'''Active''' | |||
File:02UM_Heidern_qcbhcf+B_4.png|'''Early Recovery''' | |||
</gallery> | |||
|description2= | |||
heidern | |||
* [[The_King_of_Fighters_2002_UM/Offense#Standing_Overheads|Standing Overhead]]. | |||
<ul><li> '''Mix-up Advice''': After {{Hover|cr.B/A, cr.A you can delay cancel into f+B to get the raw f+B|2B/A, 2A you can delay cancel into 6B to get the raw 6B}} out faster than linking it. This gives you an overhead after {{Hover|cr.A versus just canceling into df+D|2A versus just canceling into 3D}} for a low.</li> | |||
<li> '''Combo Advice''': You can do '''BC run, cl.C''' to combo off a very close {{Hover|f+B. Off the previous mix-up, you can max bypass f+B|6B. Off the previous mix-up, you can max bypass 6B}} into <b>{{Hover|qcf+BC, [(C)qcf+A, (C)qcf+C]x1~2 (SC) qcfx2+A|236BC, [(C)236A, (C)236C]x1~2 (SC) 236236A}}</b> or <b>{{Hover|qcf+BC, [(C)qcf+A, (C)qcf+C]x2 (SC) qcb,hcf+P|236BC, [(C)236A, (C)236C]x2 (SC) 2141236P}}[[The_King_of_Fighters_2002_UM/heidern_Kusanagi/Combos#General_Notes|(Charge)]]</b> to spend 2 bars on a 36~41% conversion.</li></ul> | |||
|phases2= | |||
<gallery mode=packed-hover heights=210px> | |||
File:02UM_Heidern_qcbhcf+B_1.png|'''Startup''' | |||
File:02UM_Heidern_qcbhcf+B_3.png|'''Active''' | |||
File:02UM_Heidern_qcbhcf+B_4.png|'''Early Recovery''' | |||
</gallery> | |||
}} | }} | ||
== | ===Final Bringer=== | ||
{{ | ==== ==== | ||
{{# | {{FrameDataCargo-KOF02UM | ||
|moveId=heidern_qcfqcf+A,heidern_qcfqcf+C | |||
{{ | |input=qcf,qcf + A/C | ||
{{# | |input2=236236 A/C | ||
|image=02UM_Heidern_qcfqcf+A_6_ima.png | |||
|hitbox=02UM_Heidern_qcfqcf+A_6.png | |||
|description= | |||
heidern | |||
* [[The_King_of_Fighters_2002_UM/Offense#Standing_Overheads|Standing Overhead]]. | |||
<ul><li> '''Mix-up Advice''': After {{Hover|cr.B/A, cr.A you can delay cancel into f+B to get the raw f+B|2B/A, 2A you can delay cancel into 6B to get the raw 6B}} out faster than linking it. This gives you an overhead after {{Hover|cr.A versus just canceling into df+D|2A versus just canceling into 3D}} for a low.</li> | |||
<li> '''Combo Advice''': You can do '''BC run, cl.C''' to combo off a very close {{Hover|f+B. Off the previous mix-up, you can max bypass f+B|6B. Off the previous mix-up, you can max bypass 6B}} into <b>{{Hover|qcf+BC, [(C)qcf+A, (C)qcf+C]x1~2 (SC) qcfx2+A|236BC, [(C)236A, (C)236C]x1~2 (SC) 236236A}}</b> or <b>{{Hover|qcf+BC, [(C)qcf+A, (C)qcf+C]x2 (SC) qcb,hcf+P|236BC, [(C)236A, (C)236C]x2 (SC) 2141236P}}[[The_King_of_Fighters_2002_UM/heidern_Kusanagi/Combos#General_Notes|(Charge)]]</b> to spend 2 bars on a 36~41% conversion.</li></ul> | |||
|phases= | |||
<gallery mode=packed-hover heights=210px> | |||
File:02UM_Heidern_qcfqcf+A_1.png|'''Startup''' | |||
File:02UM_Heidern_qcfqcf+A_2.png|'''Startup''' | |||
File:02UM_Heidern_qcfqcf+A_3.png|'''Startup''' | |||
File:02UM_Heidern_qcfqcf+A_4.png|'''Startup''' | |||
File:02UM_Heidern_qcfqcf+A_5.png|'''Startup''' | |||
File:02UM_Heidern_qcfqcf+A_6.png|'''Active''' | |||
</gallery> | |||
|description2= | |||
heidern | |||
* [[The_King_of_Fighters_2002_UM/Offense#Standing_Overheads|Standing Overhead]]. | |||
<ul><li> '''Mix-up Advice''': After {{Hover|cr.B/A, cr.A you can delay cancel into f+B to get the raw f+B|2B/A, 2A you can delay cancel into 6B to get the raw 6B}} out faster than linking it. This gives you an overhead after {{Hover|cr.A versus just canceling into df+D|2A versus just canceling into 3D}} for a low.</li> | |||
<li> '''Combo Advice''': You can do '''BC run, cl.C''' to combo off a very close {{Hover|f+B. Off the previous mix-up, you can max bypass f+B|6B. Off the previous mix-up, you can max bypass 6B}} into <b>{{Hover|qcf+BC, [(C)qcf+A, (C)qcf+C]x1~2 (SC) qcfx2+A|236BC, [(C)236A, (C)236C]x1~2 (SC) 236236A}}</b> or <b>{{Hover|qcf+BC, [(C)qcf+A, (C)qcf+C]x2 (SC) qcb,hcf+P|236BC, [(C)236A, (C)236C]x2 (SC) 2141236P}}[[The_King_of_Fighters_2002_UM/heidern_Kusanagi/Combos#General_Notes|(Charge)]]</b> to spend 2 bars on a 36~41% conversion.</li></ul> | |||
|phases2= | |||
<gallery mode=packed-hover heights=210px> | |||
File:02UM_Heidern_qcfqcf+A_1.png|'''Startup''' | |||
File:02UM_Heidern_qcfqcf+A_2.png|'''Startup''' | |||
File:02UM_Heidern_qcfqcf+A_3.png|'''Startup''' | |||
File:02UM_Heidern_qcfqcf+A_4.png|'''Startup''' | |||
File:02UM_Heidern_qcfqcf+A_5.png|'''Startup''' | |||
File:02UM_Heidern_qcfqcf+A_6.png|'''Active''' | |||
</gallery> | |||
}} | |||
==Videos== | ==Videos== | ||
| Line 600: | Line 783: | ||
{{#ev:youtube|zo78algrUl8|||'''Nikolai-保力達 (Heidern Best Rounds)'''|frame}} | {{#ev:youtube|zo78algrUl8|||'''Nikolai-保力達 (Heidern Best Rounds)'''|frame}} | ||
{{#ev:youtube|W1AZ7151J2g|||'''Nikolai-保力達 (Heidern Best Rounds 2)'''|frame}} | {{#ev:youtube|W1AZ7151J2g|||'''Nikolai-保力達 (Heidern Best Rounds 2)'''|frame}} | ||
{{#ev:youtube|lpSD82t_AyA|||'''Dilkay Heidern best rounds KOF 2002 UM''' by [https://www.youtube.com/c/KOF2002UMNORTHAFRICA KOFNORTHAFRICA]|frame}} | |||
{{#ev:youtube|_P_h_arPe3o|||'''Heidern Master Class'''|frame}} | {{#ev:youtube|_P_h_arPe3o|||'''Heidern Master Class'''|frame}} | ||
==External Links== | ==External Links== | ||
Revision as of 18:51, 4 August 2024

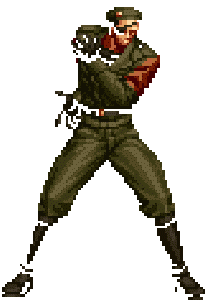
Movelist
Throws
Critical Drive - close in air, ![]() /
/ ![]() /
/ ![]() +
+ ![]() /
/ ![]()
Command Move
Special Moves
Desperation Moves
Super Desperation Moves
Hidden Super Desperation Move
| 0 Bar |
Anywhere |
cr.A×1~2, d~u+A = 17% |
| 1 Bar |
Anywhere |
(jump-in), cl.C, f+B(1), qcb,hcf+K = 36% |
| 3 Bar |
Anywhere |
(jump-in), cl.C, f+B(1), qcb,hcf+BD = 49% |
Gameplay Overview
Close
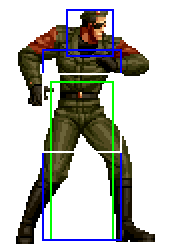
- cl.A/B/C/D are cancel-able.
- cl.A is a straight chop that can chain into itself, cr. A, cl.B & cr. B
- cl. B is a kick that is aimed around the opponent's pelvis area and can chain into cr. B.
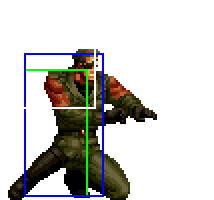
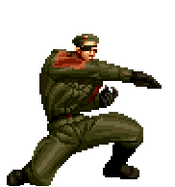
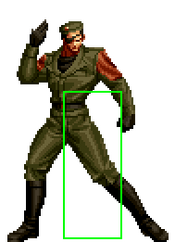
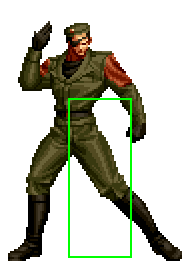
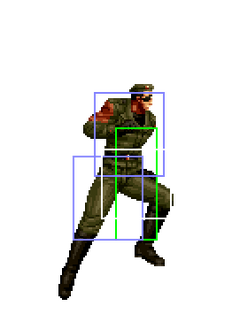
- cl. C is a two hit vertical chop where the 2nd hit can be cancelled easily into his F+B command normal attack. Its also useful to hit opponents trying to jump over Heidern.
- cl. D is single hit knee attack that can cancel into his F+B command normal
Stand
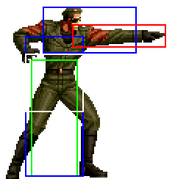
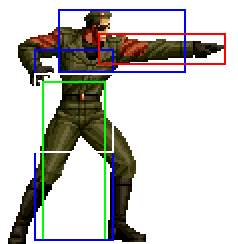
- Far A is cancel-able & is good for stopping incoming hops. It whiffs on crouching opponents.
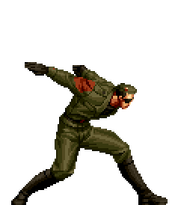
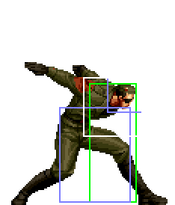
- Far B is a great round kick aimed at the opponent's mid-section. Useful to use as a poke at mid-range.
- Far C has great reach to be used preemptively stop incoming hops or as a far poke
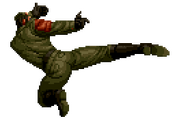
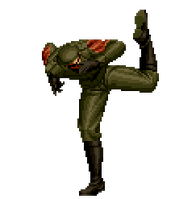
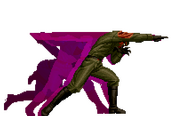
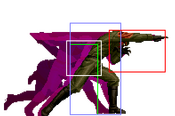
- Far D is a far ranged but slow, spinning side kick that is aimed at the opponent's head. It isn't whiff cancel-able, so be careful using it in neutral
Crouch
- cr.A/C/D are cancel-able
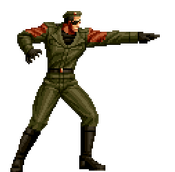
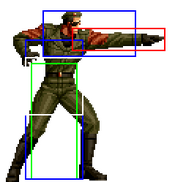
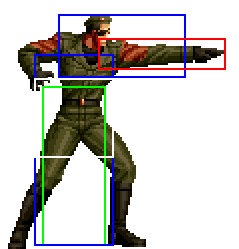
- cr.A is a very fast chop that has good horizontal range and can combo into his charge d~u+P special move. It can chain into itself, stand A & cr. B.
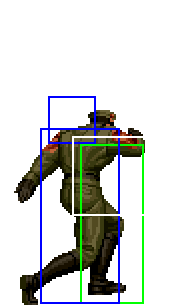
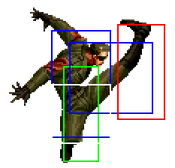
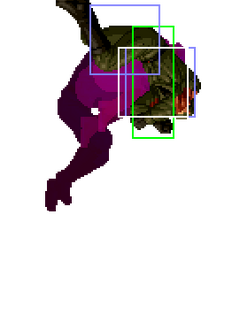
- Crouch B hits low, but is not cancel-able. It has great horizontal range & comes out at a decent speed to be used a low poke but it isn't a combo tool.
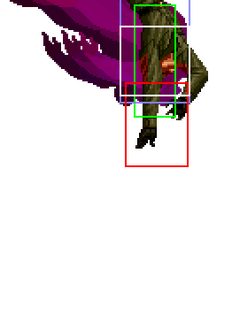
- Crouch C is a fast swinging horizontal chop that is whiff cancel-able, but has less horizontal range than cr. A.
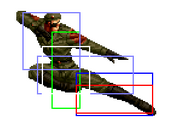
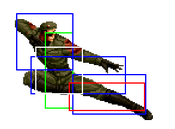
- Crouch D is a sweep that has enormous range & is whiff cancel-able too.
Jump
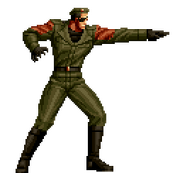
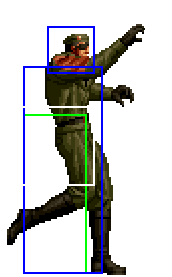
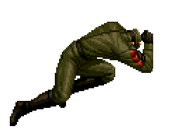
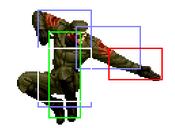
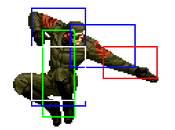
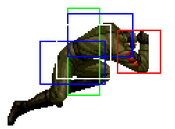
- Neutral j.A is a elbow that hits below his arm
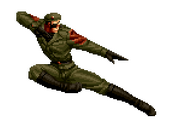
- j.A is a downward angled chop that is active for a good amount of time
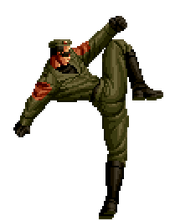
- Neutral j.B is a quick kick that swings up in front of Heidern
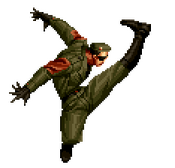
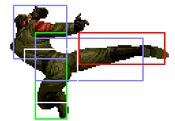
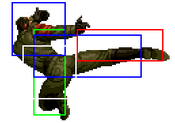
- j.B is a aerial side kick that has good horizontal range similar to his far B
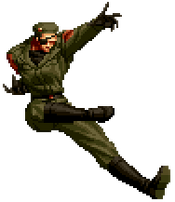
- j.C is a two handed chop that can easily cross-up standing & crouching opponents, is good to use as a combo starter into cl.C or cl.D & can be used as an instant overhead on medium and taller crouchers.
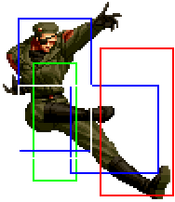
- Neutral j.D is a kick that swings down in front of Heidern. Can be used to hit opponents in advance in front of Heidern that has finished rolling near him
- j.D is a diagonally aimed kick that is great to start combos & can cross-up as well. Hop D can be used as an instant overhead on medium and taller crouchers, slower than j.C but with more reach so better to jump away with.
Blowback Attack
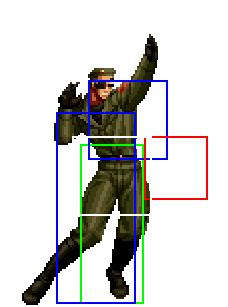
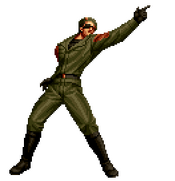
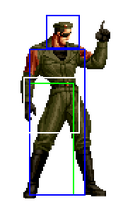
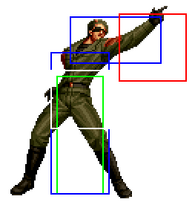
- Stand CD is a very slow finger point that is aimed diagonally above and in front of Heidern's head
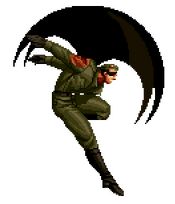
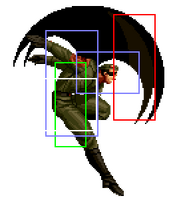
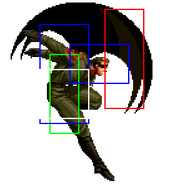
- Jump CD is a double swinging chop (that resembles a crescent moon) that hits in-front of Heidern
Throws
Lead Belcher - (b/f + C) close
- Heidern grabs the opponent, slams them to the ground, then chops them. The opponent lands & wakes up near Heidern at a horizontal space where the tip of where his far B (LK) hits.
- Hard knockdown
Backstabbing - (b/f + D) close
- Heidern quickly crawls behind the opponent to stab them in the back. The opponent lands 3/4ths screen distance away.
- Soft knockdown
Critical Drive - (b/d/f + C) close in air
- Heidern grabs the opponent by stabbing them with his hand, then body slams them into the ground on the opposite side. The distance the opponent lands and wakes up at is around the same distance as his Backstabbing normal throw, 3/4ths screen distance away.
- Hard knockdown
Command Move
Shooter Narnangel [Stenier Gale] - b/f + B
- Heidern performs a 2 Hit roundhouse kick. If canceled into from cl. C or cl. D, the first hit can easily cancel into his desperation moves.
- Hits overhead, loses overhead property if canceled from cl. C or cl. D
Special Moves
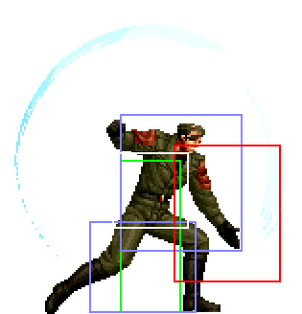
Cross Cutter - (Charge b~f + A/C)
- Heidern crosses his hands sending out two crescents of energy
- Hits mid allowing it to be block crouching or standing
- Both versions cause soft knockdown on hit
- The projectile will completely whiff on crouching smaller characters like Bao, Chin, and Choi
- A version is slower to start and moves across the screen at a slower pace
- During A version Heidern recovers fast enough at 3/4 screen to begin following the projectile toward the opponent
- A version becomes safe on block about 1.5 characters away, but is negative on block point blank
- C version travels faster across the screen
- C version only becomes safe on block at 1/2 screen
- Great move for Heidern to control space with and plan his attack. The hitbox of the move is certainly not as big as the projectile looks as it can be jumped over and even hopped if timed right.
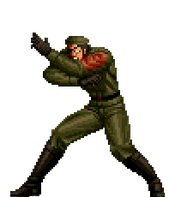
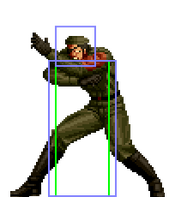
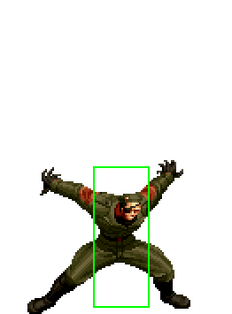
Moon Slasher - (Charge d~u + A/C)
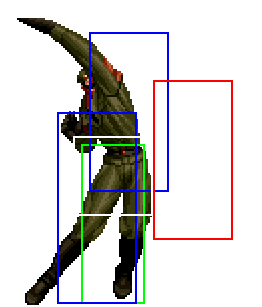
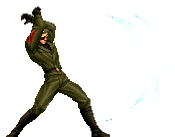
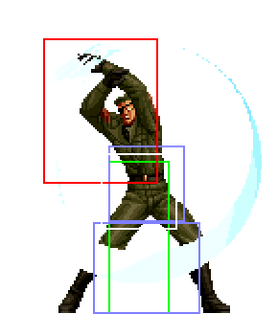
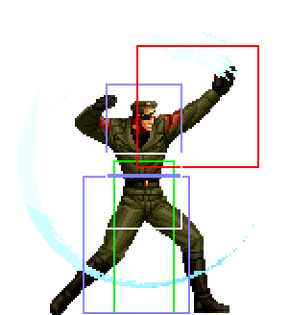
- General Heidern cuts his hand through the air creating a crescent of energy around himself
- Hits mid allowing it to be blocked high or low
- Both versions cause soft knockdown
- Does not have any start-up invincibility
- C version outputs more damage and starts-up faster, while the A version does less damage but has a bit less recovery
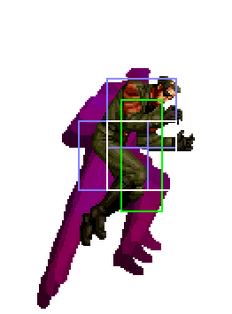
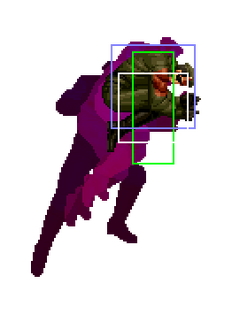
Neck Rolling - (Charge d~u + B/D)
- Heidern slowly flips towards the opponent, grabs them, then swings horizontally around their neck like a helicopter propeller.
- The opponent lands at the other end of the screen
- Does not have any invincibility. Heidern can be easily attacked out of this move.
- Counts as a moving command throw that cannot be blocked. He can throw only grounded opponents, and opponents while they are rolling. He cannot throw jumping opponents.
Storm Bringer - (hcb + A/C close)
- Heidern grabs the opponents mid-section then removes the energy from them. The opponent lands 3/4ths screen distance away from Heidern.
- Counts as a delayed command throw. Has no invincibility.
- Can be mashed out of. The Heidern player can counter act that by mashing buttons as well to get the maximum amount of damage.
- Hard knockdown
Killing Bringer - (hcb + B/D)
- Heidern poses then counters the opponent's attack. The impales the opponent with his hand to steal life from them.
- Heidern can only counter standing or jumping attacks that hit in front or around of his hand during the pose animation. He cannot counter attacks that hit above or around his head, and he cannot counter low attacks.
- Heidern can gain back around 50 damage points, while the inflicting around 110 damage to the opponent if both players do not mash any buttons or if they mash buttons together. If the Heidern player mashes buttons and the opponent does not mash, Heidern receives 90 damage, and the opponent loses around 160 damage.
- This counter has rather slow start-up but is active for a considerable amount of time.
Desperation Moves
Final Bringer - (qcf x 2 + A/C)
- This is a stronger version of his Neck Roller special move. Unlike the special move version, this DM can be blocked but can hit jumping opponents.
- If blocked, Heidern can be punished while he is landing.
- Heidern gains around 150 damage while the opponent loses around 180 damage.
Heidern End - (qcb, hcf + B/D)
- Heidern rushes slightly towards the opponent then stabs them with his hand. A second later, the opponent is blasted away then lands at the corner of the screen.
- The light kick version travels 1/4th screen distance while the heavy kick version travels close to a half screen distance.
- Heidern can be attacked out of his move before he reaches the opponent. It is also unsafe if blocked, and has long recovery if whiffed.
Super Desperation Moves
Final Bringer - (qcf x 2 + A+C)
- A stronger version of the DM version.
- Heidern gains around around 140 damage, while the opponent loses 320 damage.
- Hard knockdown
Heidern End - (qcb, hcf + B+D)
- A much stronger version of the DM version.
- Has the same horizontal distance as the light kick version of the DM version.
- Inflicts around 330 damage
- Hard knockdown
Hidden Super Desperation Move
Caliburn - qcf x 2 + BD
- This HSDM has two versions depending on the distance away from the opponent.
- Far version: Heidern performs the close C (heavy punch) animation to unleash a high wave of energy towards the opponent. On hit, it can inflict around 190-200 damage depending on the distance. If blocked, the chip damage can be around 100 damage. The opponent can roll but they will get hit at the end of their roll. The opponent can only Guard Cancel Roll during the last hit of the energy wave.
- Close version: This is an UNBLOCKABLE ATTACK. Heidern picks the opponent up (with the animation of close heavy punch) then blasts the opponent away dealing 350 damage. Causes a hard knockdown
Normals
Far Standing Normals
| standing A
st.A
A |
|---|
| standing B
st.B
B |
|---|
| standing C
st.C
C |
|---|
| standing D
st.D
D |
|---|
Close Standing Normals
| close A
cl.A
cl.A |
|---|
| close B
cl.B
cl.B |
|---|
| close C
cl.C
cl.C |
|---|
| close D
cl.D
cl.D |
|---|
Crouch Normals
| crouching A
cr.A
2A |
|---|
| crouching B
cr.B
2B |
|---|
| crouching C
cr.C
2C |
|---|
| crouching D
cr.D
2D |
|---|
Jump Normals
| jump A
j.A
j.A |
|---|
| jump B
j.B
j.B |
|---|
| jump C
j.C
j.C |
|---|
| jump D
j.D
j.D |
|---|
Blowback Normals
| st.CD
st.CD
CD |
|---|
| jump CD
j.CD
j.CD |
|---|
Throws
Hachi Tetsu
| No results
No results
No results
|
No results |
|---|
Issetsu Seoi
| No results
No results
No results
|
No results |
|---|
Command Normals
Shooter Narnangel
| Shooter Narnangel
f+B
6B |
|---|
Special Moves
Cross Cutter
| Cross Cutter
b~f + A/C
[6]8 A/C |
|---|
Moon Slasher
| Moon Slasher
d~u + A/C
[6]8 A/C |
|---|
Storm Bringer
| Storm Bringer
hcb + A/C
63214 A/C |
|---|
Killing Bringer
| Killing Bringer
hcb + B/D
63214 B/D |
|---|
Desperation Moves
Heidern End
| Heidern End
qcb,hcf + B/D
214236 B/D |
|---|
Final Bringer
| Final Bringer
qcf,qcf + A/C
236236 A/C |
|---|
Videos
External Links
Check Heidern's frame data
Discuss at 02UM Discord server
Discuss at Dream Cancel
Discuss at Orochinagi
