|
|
| (13 intermediate revisions by 2 users not shown) |
| Line 1: |
Line 1: |
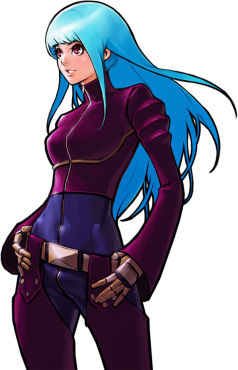
| [[File:02UM Kula Profile.png|right|thumb]] | | <section begin="image"/>[[File:02UM Kula Profile.png|right|thumb|x370px]]<section end="image"/>[[File:02UM Kula 0.gif|right|x300px]] |
|
| |
|
| ==Movelist== | | ==Movelist== |
| [[File:Kof02ummovelistkula.png]] | | |
| | '''Throws''' |
| | |
| | Ice Coffin - close, [[image:bk.gif]] / [[image:fd.gif]] + [[image:c.gif]] |
| | |
| | Behind Slash - close, [[image:bk.gif]] / [[image:fd.gif]] + [[image:d.gif]] |
| | |
| | '''Command Moves''' |
| | |
| | One Inch - [[image:fd.gif]] + [[image:a.gif]] |
| | |
| | Slider Shoot - [[image:df.gif]] + [[image:b.gif]] |
| | |
| | Critical Ice - [[image:df.gif]] + [[image:c.gif]] |
| | |
| | '''Special Moves''' |
| | |
| | Diamond Breath - [[image:qcf.gif]] + [[image:a.gif]] / [[image:c.gif]] |
| | |
| | Crow Bites - [[image:dp.gif]] + [[image:a.gif]] / [[image:c.gif]] |
| | |
| | Counter Shell - [[image:qcb.gif]] + [[image:a.gif]] / [[image:c.gif]] |
| | |
| | Lay Spin - [[image:qcb.gif]] + [[image:b.gif]] / [[image:d.gif]] |
| | |
| | ::Stand - [[image:fd.gif]] + [[image:b.gif]] |
| | |
| | ::Sit - [[image:fd.gif]] + [[image:d.gif]] |
| | |
| | '''Desperation Moves''' |
| | |
| | Diamond Edge - [[image:qcf.gif]][[image:qcf.gif]] + [[image:a.gif]] / [[image:c.gif]] |
| | |
| | La Cachola - in air, [[image:qcf.gif]][[image:qcf.gif]] + [[image:b.gif]] / [[image:d.gif]] |
| | |
| | '''Super Desperation Move''' |
| | |
| | Freeze Execution - [[image:hcb.gif]][[image:hcb.gif]] + [[image:a.gif]][[image:c.gif]] |
| | |
| | '''Hidden Super Desperation Move''' |
| | |
| | Freeze Compression - [[image:qcf.gif]][[image:qcf.gif]] + [[image:b.gif]][[image:d.gif]] |
|
| |
|
| {| border="1" align="center" style="font-size:90%" | | {| border="1" align="center" style="font-size:90%" |
| |+ | | |+ |
| | |
| == Quick Starter Combo Reference == | | == Quick Starter Combo Reference == |
| '''[[The_King_of_Fighters_2002_UM/Controls|Notation]]''' | | '''[[The_King_of_Fighters_2002_UM/Controls|Notation]]''' |
| Line 46: |
Line 88: |
| |- | | |- |
| |} | | |} |
| | |
| | == Gameplay Overview == |
| | {{StrengthsAndWeaknesses |
| | | description = }} |
|
| |
|
| ==Normals== | | ==Normals== |
| Line 204: |
Line 250: |
| cl.C(2), f+A whiffs on crouching Bao, stick to cl.C(1), f+A against him.<br> | | cl.C(2), f+A whiffs on crouching Bao, stick to cl.C(1), f+A against him.<br> |
|
| |
|
| ====0 Stock====
| | ===0 Stock=== |
|
| |
|
| ''Anywhere'' | | ''Anywhere'' |
| Line 216: |
Line 262: |
| dp+C would be a no-brainer if it wasn't held back by two things. One of which being the strong tendency of the 2nd hit to whiff on crouchers, hence not knocking down and leaving her punishable. Chin and Choi are the only ones against whom this will happen even if they're standing. | | dp+C would be a no-brainer if it wasn't held back by two things. One of which being the strong tendency of the 2nd hit to whiff on crouchers, hence not knocking down and leaving her punishable. Chin and Choi are the only ones against whom this will happen even if they're standing. |
| :'''The crouchers dp+C will fully connect on are:''' | | :'''The crouchers dp+C will fully connect on are:''' |
| ::<pre>Daimon, Reg Robert, Ex Robert Seth, Ramon, Maxima, Whip, Chang, Lin, Yamazaki, Billy, Reg Takuma, Xiangfei, Hinako, King, Igniz, Rugal</pre> | | ::<pre>Daimon, Reg Robert, Ex Robert, Seth, Ramon, Maxima, Whip, Chang, Lin, Yamazaki, Billy, Reg Takuma, Xiangfei, Hinako, King, Igniz, Rugal</pre> |
| </tabber> | | </tabber> |
|
| |
|
| | <tabber> |
| | Combo= |
| ★ '''cl.C(1), f+A, qcb+B > f+D, qcb+C / dp+C''' | | ★ '''cl.C(1), f+A, qcb+B > f+D, qcb+C / dp+C''' |
| : Main jump-in confirm and punish route, great carry. You need to delay dp+C to get both hits. If point-blank, preferably without a jump-in, you can use cl.C(2), f+A. End with qcb+C for less carry and damage but hard knockdown and more safety, preferred. | | : Main jump-in confirm and punish route, great carry. You need to delay dp+C to get both hits. Near point-blank you can use cl.C(2) but it's inconsistent, more in specifics. End with qcb+C for less carry and damage but hard knockdown and more safety, preferred. |
| | |-| |
| | Specifics= |
| | : If you use both cl.C hits, qcb+B will whiff on crouching Jhun while f+D won't combo on standing(Kyo, Kyo-1, Kyo-2, Kusanagi, Nameless, Shingo, Jhun, Shermie) and become inconsistent on standing Bao. |
| | : On other characters, you can use it if you're point-blank, no jump-in. Do keep in mind that if you haven't reached the corner by f+D, qcb+C then becomes harder to land and it's more important to delay dp+C. If you'd rather qcb+C's hard knockdown over dp+C's damage and carry, stick to cl.C(1). |
| | </tabber> |
|
| |
|
| ''Corner'' | | ''Corner'' |
|
| |
|
| ★ '''cl.C(1), f+A, qcf+A, qcb+B, dp+C''' | | ★ '''cl.C(1), f+A, qcf+A, qcb+B, dp+C''' |
| : Corner variant of the jump-in confirm with slightly better damage. | | : Corner variant of the jump-in confirm with slightly better damage. You can use cl.C(2) point-blank but it gets harder and inconsistent to add a jump-in. |
|
| |
|
| * cl.C(1), f+A, qcf+A, delay qcb+B > f+B, qcb+C / dp+C | | * cl.C(1), f+A, qcf+A, delay qcb+B > f+B, qcb+C / dp+C |
| : Better optimized version of the previous route. No need to delay qcb+B against Yamazaki. End with qcb+C for less carry and damage but hard knockdown and more safety, preferred. | | : Better optimized version of the previous route. No need to delay qcb+B against Yamazaki. End with qcb+C for less carry and damage but hard knockdown and more safety, preferred. |
|
| |
|
| ★ '''cl.C(2), f+A, qcf+A, qcb+B > f+B, qcb+B, dp+C'''
| | * cl.C(1), f+A, qcf+A, delay qcb+D, cr.C |
| : Optimal corner conversion for a point-blank punish. You can get the second qcb+B's f+B follow-up if you delay it. Stick to cl.C(1) on Yamazaki. Doesn't work on crouching Bao. | | : Corner reset with lower damage but decent frame advantage. You don't have to delay qcb+D if you use cl.C(2) but it gets harder and inconsistent to add a jump-in. |
|
| |
|
| | ★ '''cl.C(2), f+A, qcf+A, qcb+B > f+B, [qcb+C or (qcb+B, dp+C)]''' |
| | : Optimal corner conversion for a point-blank punish. Use qcb+C for hard knockdown and better oki compared to dp's better damage. Stick to cl.C(1) on Yamazaki. Doesn't work on crouching Bao. |
|
| |
|
| ====1 Stock====
| | * cl.C(2), f+A, qcf+A, qcb+B > f+B, delay qcb+B > f+B, qcb+C / dp+C |
| | : A bit more optimized version of the previous corner route. The timing to delay qcb+B is fairly peculiar so the previous version is preferred. Delay dp+C to properly connect. Use qcb+C for hard knockdown and better oki compared to dp's better damage. Stick to cl.C(1) on Yamazaki. Doesn't work on crouching Bao. |
| | |
| | |
| | ===1 Stock=== |
|
| |
|
| ''Anywhere'' | | ''Anywhere'' |
| Line 242: |
Line 301: |
|
| |
|
|
| |
|
| ====2 Stocks====
| | ===2 Stocks=== |
|
| |
|
| ''Anywhere'' | | ''Anywhere'' |
|
| |
|
| ★ '''cr.B×1~3, cr.B/st.B, dp+C(1) (SC) qcfx2+P''' | | ★ '''cr.B×1~3, cr.B/st.B, dp+C(1) (SC) qcfx2+P''' |
| : The best combo to spend meter on. cr.B's hitconfirm ability and rancge makes this very practical and canceling dp+C early means you don't have to worry about whiffing the 2nd hit. You can do the super cancel as ''f,qcf+C(1) (SC) qcf+P''. | | : The best combo to spend meter on. cr.B's hitconfirm ability and range makes this very practical and canceling dp+C early means you don't have to worry about whiffing the 2nd hit. You can do the super cancel as ''f,qcf+C(1) (SC) qcf+P''. |
|
| |
|
| * cl.C(1), f+A, dp+C(1) (SC) qcfx2+P | | * cl.C(1), f+A, dp+C(1) (SC) qcfx2+P |
| Line 264: |
Line 323: |
|
| |
|
|
| |
|
| ====3 Stocks====
| | ===3 Stocks=== |
|
| |
|
| ''Anywhere'' | | ''Anywhere'' |
| Line 300: |
Line 359: |
| : Low starter for the converson. | | : Low starter for the converson. |
|
| |
|
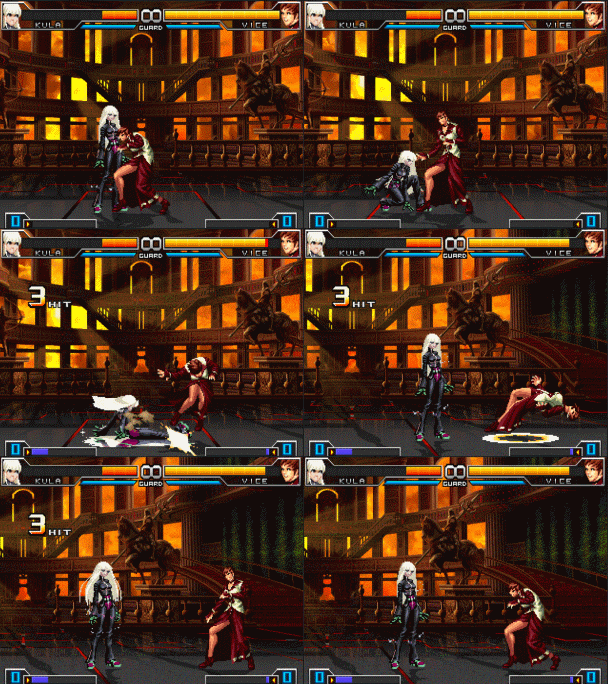
| ====Combo Animations====
| | |
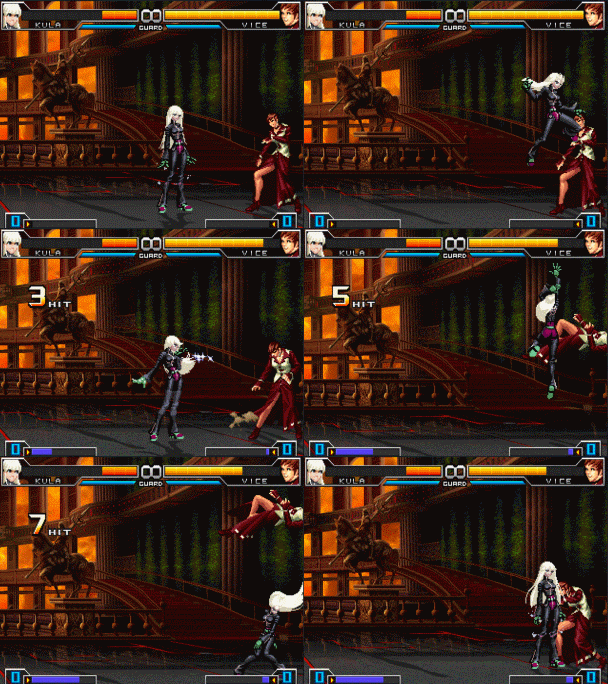
| | ===Combo Animations=== |
|
| |
|
| [[File:Kulacombotest.gif]] | | [[File:Kulacombotest.gif]] |
| * cr.B, cr.B, df+B | | * cr.B, cr.B, df+B |
|
| |
| ---
| |
|
| |
|
| [[File:Kulacombo2.gif]] | | [[File:Kulacombo2.gif]] |
| * j.D, cl.C(2), qcf+A, qcb+D, cr. C | | * j.D, cl.C(2), qcf+A, qcb+D, cr. C |
|
| |
|
| |
|
| ==Changes from OG2k2== | | ==Changes from OG2k2== |
| Line 321: |
Line 378: |
|
| |
|
| Specials | | Specials |
| * DP + C now has a huge counter hit window. This move gets affected by the same universal change other uppercuts have. | | * DP + C now has a huge counter hit window. Universal change across all dp's. |
| * QCB + K does not have startup invincibility. | | * QCB + K does not have startup invincibility. |
|
| |
|
| Line 329: |
Line 386: |
| ==Videos== | | ==Videos== |
|
| |
|
| {{#ev:youtube|e-OgvjTZxG4}} | | {{#ev:youtube|e-OgvjTZxG4|||'''Xiaohai.小孩 (Kula Best Rounds)'''|frame}} |
| | | {{#ev:youtube|9z-oYN9O-e8|||'''쿨라 플레이 모음(Kula Best Rounds) -SANWA M`(엠대쉬)'''|frame}} |
| | |
| Kula Master Class | |
| | |
| {{#ev:youtube|gX32nF0-8qA}} | | {{#ev:youtube|gX32nF0-8qA}} |
|
| |
|


