|
|
| (9 intermediate revisions by 2 users not shown) |
| Line 1: |
Line 1: |
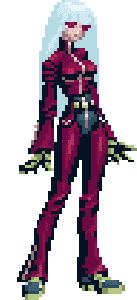
| [[File:02UM Kula Profile.png|right|thumb]] | | <section begin="image"/>[[File:02UM Kula Profile.png|right|thumb|x370px]]<section end="image"/>[[File:02UM Kula 0.gif|right|x300px]] |
|
| |
|
| ==Movelist== | | ==Movelist== |
| Line 88: |
Line 88: |
| |- | | |- |
| |} | | |} |
| | |
| | == Gameplay Overview == |
| | {{StrengthsAndWeaknesses |
| | | description = }} |
|
| |
|
| ==Normals== | | ==Normals== |
| Line 246: |
Line 250: |
| cl.C(2), f+A whiffs on crouching Bao, stick to cl.C(1), f+A against him.<br> | | cl.C(2), f+A whiffs on crouching Bao, stick to cl.C(1), f+A against him.<br> |
|
| |
|
| ====0 Stock====
| | ===0 Stock=== |
|
| |
|
| ''Anywhere'' | | ''Anywhere'' |
| Line 261: |
Line 265: |
| </tabber> | | </tabber> |
|
| |
|
| | <tabber> |
| | Combo= |
| ★ '''cl.C(1), f+A, qcb+B > f+D, qcb+C / dp+C''' | | ★ '''cl.C(1), f+A, qcb+B > f+D, qcb+C / dp+C''' |
| : Main jump-in confirm and punish route, great carry. You need to delay dp+C to get both hits. If point-blank, preferably without a jump-in, you can use cl.C(2), f+A. End with qcb+C for less carry and damage but hard knockdown and more safety, preferred. | | : Main jump-in confirm and punish route, great carry. You need to delay dp+C to get both hits. Near point-blank you can use cl.C(2) but it's inconsistent, more in specifics. End with qcb+C for less carry and damage but hard knockdown and more safety, preferred. |
| | |-| |
| | Specifics= |
| | : If you use both cl.C hits, qcb+B will whiff on crouching Jhun while f+D won't combo on standing(Kyo, Kyo-1, Kyo-2, Kusanagi, Nameless, Shingo, Jhun, Shermie) and become inconsistent on standing Bao. |
| | : On other characters, you can use it if you're point-blank, no jump-in. Do keep in mind that if you haven't reached the corner by f+D, qcb+C then becomes harder to land and it's more important to delay dp+C. If you'd rather qcb+C's hard knockdown over dp+C's damage and carry, stick to cl.C(1). |
| | </tabber> |
|
| |
|
| ''Corner'' | | ''Corner'' |
|
| |
|
| ★ '''cl.C(1), f+A, qcf+A, qcb+B, dp+C''' | | ★ '''cl.C(1), f+A, qcf+A, qcb+B, dp+C''' |
| : Corner variant of the jump-in confirm with slightly better damage. | | : Corner variant of the jump-in confirm with slightly better damage. You can use cl.C(2) point-blank but it gets harder and inconsistent to add a jump-in. |
|
| |
|
| * cl.C(1), f+A, qcf+A, delay qcb+B > f+B, qcb+C / dp+C | | * cl.C(1), f+A, qcf+A, delay qcb+B > f+B, qcb+C / dp+C |
| : Better optimized version of the previous route. No need to delay qcb+B against Yamazaki. End with qcb+C for less carry and damage but hard knockdown and more safety, preferred. | | : Better optimized version of the previous route. No need to delay qcb+B against Yamazaki. End with qcb+C for less carry and damage but hard knockdown and more safety, preferred. |
| | |
| | * cl.C(1), f+A, qcf+A, delay qcb+D, cr.C |
| | : Corner reset with lower damage but decent frame advantage. You don't have to delay qcb+D if you use cl.C(2) but it gets harder and inconsistent to add a jump-in. |
|
| |
|
| ★ '''cl.C(2), f+A, qcf+A, qcb+B > f+B, [qcb+C or (qcb+B, dp+C)]''' | | ★ '''cl.C(2), f+A, qcf+A, qcb+B > f+B, [qcb+C or (qcb+B, dp+C)]''' |
| : Optimal corner conversion for a point-blank punish. Use qcb+C for hard knockdown and better oki compared to dp's better damage. You can get the second qcb+B's f+B follow-up if you delay it. Stick to cl.C(1) on Yamazaki. Doesn't work on crouching Bao. | | : Optimal corner conversion for a point-blank punish. Use qcb+C for hard knockdown and better oki compared to dp's better damage. Stick to cl.C(1) on Yamazaki. Doesn't work on crouching Bao. |
|
| |
|
| | * cl.C(2), f+A, qcf+A, qcb+B > f+B, delay qcb+B > f+B, qcb+C / dp+C |
| | : A bit more optimized version of the previous corner route. The timing to delay qcb+B is fairly peculiar so the previous version is preferred. Delay dp+C to properly connect. Use qcb+C for hard knockdown and better oki compared to dp's better damage. Stick to cl.C(1) on Yamazaki. Doesn't work on crouching Bao. |
|
| |
|
| ====1 Stock====
| | |
| | ===1 Stock=== |
|
| |
|
| ''Anywhere'' | | ''Anywhere'' |
| Line 284: |
Line 301: |
|
| |
|
|
| |
|
| ====2 Stocks====
| | ===2 Stocks=== |
|
| |
|
| ''Anywhere'' | | ''Anywhere'' |
|
| |
|
| ★ '''cr.B×1~3, cr.B/st.B, dp+C(1) (SC) qcfx2+P''' | | ★ '''cr.B×1~3, cr.B/st.B, dp+C(1) (SC) qcfx2+P''' |
| : The best combo to spend meter on. cr.B's hitconfirm ability and rancge makes this very practical and canceling dp+C early means you don't have to worry about whiffing the 2nd hit. You can do the super cancel as ''f,qcf+C(1) (SC) qcf+P''. | | : The best combo to spend meter on. cr.B's hitconfirm ability and range makes this very practical and canceling dp+C early means you don't have to worry about whiffing the 2nd hit. You can do the super cancel as ''f,qcf+C(1) (SC) qcf+P''. |
|
| |
|
| * cl.C(1), f+A, dp+C(1) (SC) qcfx2+P | | * cl.C(1), f+A, dp+C(1) (SC) qcfx2+P |
| Line 306: |
Line 323: |
|
| |
|
|
| |
|
| ====3 Stocks====
| | ===3 Stocks=== |
|
| |
|
| ''Anywhere'' | | ''Anywhere'' |
| Line 342: |
Line 359: |
| : Low starter for the converson. | | : Low starter for the converson. |
|
| |
|
| ====Combo Animations====
| | |
| | ===Combo Animations=== |
|
| |
|
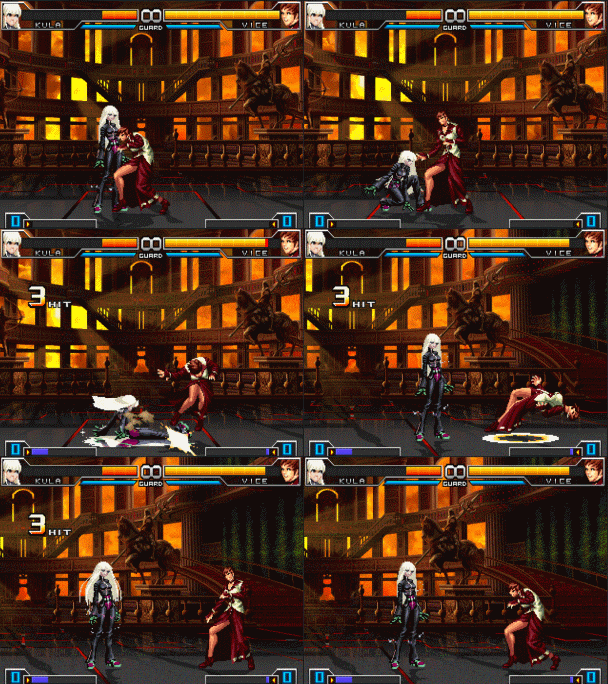
| [[File:Kulacombotest.gif]] | | [[File:Kulacombotest.gif]] |
| * cr.B, cr.B, df+B | | * cr.B, cr.B, df+B |
|
| |
| ---
| |
|
| |
|
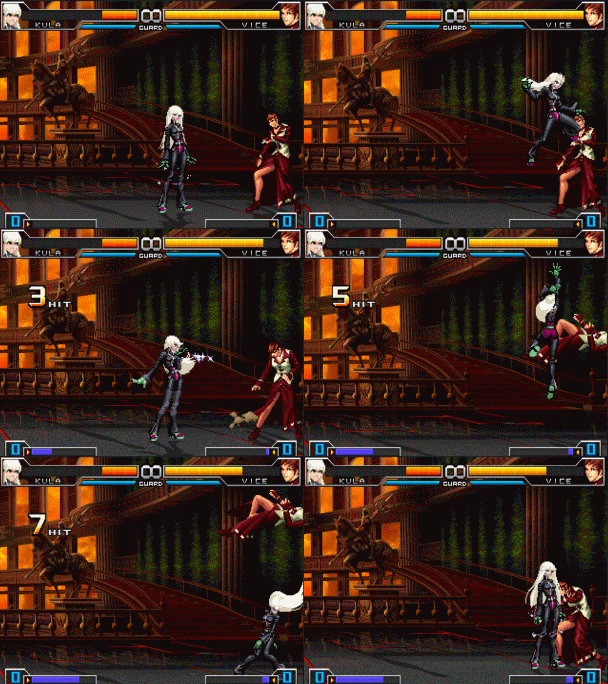
| [[File:Kulacombo2.gif]] | | [[File:Kulacombo2.gif]] |
| Line 362: |
Line 378: |
|
| |
|
| Specials | | Specials |
| * DP + C now has a huge counter hit window. This move gets affected by the same universal change other uppercuts have. | | * DP + C now has a huge counter hit window. Universal change across all dp's. |
| * QCB + K does not have startup invincibility. | | * QCB + K does not have startup invincibility. |
|
| |
|


