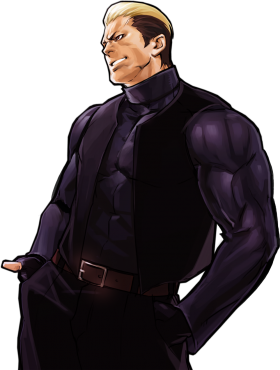
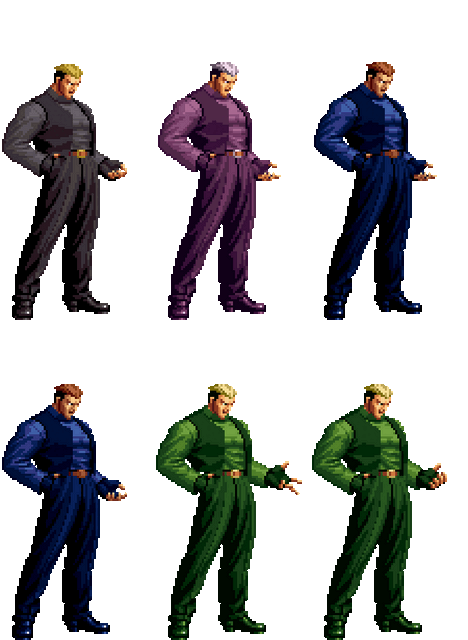
The King of Fighters 2002 UM/Ryuji Yamazaki
Movelist
Throws
Command Move
Special Moves
Serpent Slash Hold - ![]() + Hold
+ Hold ![]() /
/ ![]() /
/ ![]()
Desperation Moves
Drill - ![]()
![]() +
+ ![]() /
/ ![]() (Mash for more hits)
(Mash for more hits)
Super Desperation Moves
Drill - ![]()
![]() +
+ ![]()
![]() (Mash for more hits)
(Mash for more hits)
Hidden Super Desperation Move
Gameplay Overview
Normals
Close
- cl.A is a cancel-able short gut punch
- cl.B is a cancel-able shin kick that hits low
- cl.C is a cancel-able hook punch that is good to use in combos
- cl.D is a cancel-able high round kick that is good to use in combos and can hit opponents trying to jump out of the corner
Standing
- Far A is a standing jab that can be used to stop incoming hops
- Far B is a thrust kick that can used a close range poke
- Far C is a wide hook punch that moves Yamazaki forward
- Far D is a very good long ranged horizontal kick that be used as a poke in mid-range
Crouching
- Crouch A is a cancel-able crouching jab that can be used a mid to close range poke
- Crouch B is a cancel-able crouching low kick that has a good horizontal range
- Crouch C is a cancel-able backhand punch
- Crouch D is a long ranged sweep that is not cancel-able
Jumping
- Jump A is a downward angle punch that can be used as an instant overhead
- Jump B is a good ranged kick that can be used for air-to-ground approaches or jump aways
- Jump C is a jumping uppercut that can be used from ground-to-air, it might whiff on some crouching opponents
- Jump D is a strange looking downward angle good that can be used as an instant overhead
- Neutral jump B has a steep angle than his jumping B which can be used as an instant overhead
- Neutral jump C is similar to jump A but has more range
- Neutral jump D has a long horizontal range that can be used as an air-to-air
Blowback
- Standing CD is a long ranged headbutt that is cancel-able
- Jump CD is a swinging double hammer attack that is good to use for air-to-air
Throws
Choke Hold - (close, b/f + C)
- Yamazaki grabs the opponent by the scruff of their neck and slams them face first into the ground
- causes hard knockdown
- throws the opponent almost full screen away from Yamazaki
Whackdown Wallop - (close, b/f + D)
- Yamazaki grabs the opponent and flings them face down behind him
- causes hard knockdown
- the throw leaves the opponent pretty close to Yamazaki leaving him to have a variety of options to mixup during okizeme
Command Move
Eviscerator - (f + A)
- Yamazaki punches in a downward diagonal angle toward the opponent
- can be comboed into and if comboed into can cancel into a special move (ex: s.C, f+A, qcb+c)
- from close range the move has two hits, from further than about two character distances away it will only hit once
- both hits count as overheads if done raw, it loses that property if comboed into
- on hit or guard the move pushes the opponent back a considerable amount
- the move is negative on block slightly, but the pushback makes it hard for opponents to punish it well
- Can be cancelled in Max Mode
Special Moves
Sadomaso - (hcf + K)
- Yamazaki leans forward with his tongue out, daring the opponent to strike
- counters mids and highs while the animation is active
- if the counter lands Yamazaki immediately hits with his own upper cut that can be super cancelled
- the move is beat out by most lows in the game, however it is hitbox dependent and some higher angled lows can be caught with it (ex: Seth & Vice's sweeps can be countered, but not Bao's).
- it will counter a hit even from behind on Yamazaki, he will still send his uppercut in the same direction started.
- the uppercut counter causes soft knockdown
Serpent Slash (Upper) * - (qcb + A, hold to delay)
- Yamazaki's arm hangs limp at his side then strikes out with a whip-like limb
- A version strikes in an upward diagonal arc
- will hit an aerial opponent about 1/3 a screen away, a standing opponent a character length away and will whiff on crouching opponents.
- it will whiff even point blank on standing smaller character like Chin. Bao etc.
- on aerial opponents it will hit for 2 or 1 hits depending on spacing and cause soft knockdown
- great anti-air tool
- very negative on block
Serpent Slash (Middle) * - (qcb + B, hold to delay)
- B version strikes out in a horizontal area in front of him
- depending on spacing it will land 2 or 1 hits
- hits mid
- good spacing tool
Serpent Slash (Lower) * - (qcb + C, hold to delay)
- C version strikes out in a downward angle
- depending on spacing hits for 2 or 1 hits
- though it strikes downward it actually hits mid and can be blocked by either standing or crouching opponents
- depending on character specific wake up time this can be used as an OTG follow up (ex: dp+b, qcb+c)
Serpent Slash Cancel - (D while holding Serpent Slash)
- while charging any version of the Serpent Slash you can press D and cancel it into Yamazaki's neutral stance
Screw Blow - (rdp + A/C)
- Yamazaki winds up and unleashes a devilish liver punch
- both versions hit mid and cause hard knockdown
- both versions are safe on block
- both versions hit from about a full character distance away
- neither version has invulnerability and Yamazaki can be hit out of it easily
- during the windup, since Yamazaki moves back a little, you might bait a poorly space move and get the hit
- A version has a quicker windup
- A version cause about 1/3 guard damage
- C version has a considerably longer windup
- C version does 100% guard damage and Guard Crashes on block
Bombshell Badda-Bing - (close, hcb, f + A/C)
- Yamazaki reaches out and grabs the opponent, head-butting them into the ground
- unblockable command grab
- causes hard knockdown
- can be comboed into
- despite the range of the whiff animation you need to be toe-to-toe with the opponent for the grab to land
Judgement Dagger - (dp + A/C)
- Yamazaki pulls a dagger from his pocket and proceeds to slash forward in fury
- both versions hit mid and cause soft knockdown
- super cancellable
- solid combo filler tool
- A version hits twice and will move Yamazaki about 1/2 the screen
- A version is slightly negative on block
- C version hits four times and moves Yamazaki 2/3 the screen
- C version is pretty negative on block
Double Return - (qcf + A/C)
- Yamazaki flings his hand up absorbing or reflecting projectiles
- although the move is made for blocking/reflecting projectiles both versions will land two hits on the opponent and can be comboed into
Fight of Tempering - (dp + B)
- Yamazaki kicks up his leg and crashes it down on the opponent
- the first hit counts as a mid, but the second counts as an overhead
- causes hard knockdown
- can be comboed into
- very negative on block
- the move makes Yamazaki move forward quite a bit and the hitbox for the first hit is deceptively large
- if the second hit lands and Yamazaki knocks down the opponent he can follow up with an OTG qcb+C
Spray Sand - (dp + D)
- Yamazaki kicks a cloud of sand up in air toward the opponent
- hits mid
- can be comboed into and out of (ex: cl.C, dp+D, qcb+B)
- can be used as a situational anti-air
- negative on block
Desperation Moves
Insanity From Nightmare - (qcf + A + B + C + D)
- Yamazaki runs towards the opponent, stabs them, then stomps them repeatedly then kicks them across the screen.
- If Yamazaki misses contact with the opponent, Yamazaki stop running and shake his head
- An unblockable command throw
- Hard knockdown
Guillotine - (qcf, qcf + A/C)
- Yamazaki uppercuts the opponent, grabs them by the face, then drags them across ground to kick them across the screen
- Can be used as an anti-air or reversal
- Has a small amount of invincibility at the start
- Hard knockdown
Drill - close, (hcb, hcb + A/C) repeatedly (up to 4 levels)
- A command throw that has 4 levels of damage depending on how fast you mash the punch buttons
- Hard knockdown
Super Desperation Move
Guillotine - (qcf, qcf + A + C)
- A stronger version of his Guillotine DM. Has the same amount of speed at the start
- Hard knockdown
Drill - close (hcb, hcb + A + C) multiple times (up to 4 levels)
- A stronger version of his Drill DM
- Hard knockdown
Hidden Super Desperation Move
...!! - close (hcb, hcb + B + D)
- Yamazaki grabs the opponent, slams them to the ground, then slashes them multiple times with his arms. Then he grabs them with his teeth and slams them down behind him
- an 18F command throw that has invincibility
- Inflicts 450 damage
- Hard knockdown
Combos
0 Stock
- cl.C, f+A, qcb+B/C
- cl.C, dp+D, qcb+B/C
- cl.C, dp+D, feint qcb+X, qcb+B/C
- A tricky combo, not really important but may be preferred by some players. You do qcb+A/B/C and hold the button while pressing D to feint the snake arm special. Then afterwards you do qcb+B/C. Builds a tiniest bit more of meter than route above.
- j.D, cl.C, dp+C/dp+B~qcb+C
- cr.B/Far B/cl.B×1~2, cr.A, qcb+B
- cl.B×1~2, hcb~f+P
- cr.B/cl.B, cr.A, qcfx2+P
2 Stocks
- cl. C [BC] dash, cl. C, dp+B (1 hit), dp+D, dp+B (1hit), dp+D, dp+C
- cl.C [BC] dash cl.C, dp+B(1), dp+D, qcb+B~D, dp+B(1), dp+A, dp+B(1), dp+D, qcb+B~D, hcb+f B(1), hcb + A/C
3 Stocks
- cl.C [BC] dash cl.C, dp+B(1), dp+D, qcb+B~D, dp+B(1), dp+A, dp+B(1), dp+D, qcb+B~D, hcb+f B(1), hcb + AC
4 Stocks
- cl.C [BC] dash cl.C, dp+A(1), dp+B(1), dp+D, qcb+B~D, dp+B(1), dp+A(1), dp+B(1), dp+D, qcb+B~D, dash [2 stock combo]
5 Stocks
- cl.C [BC] dash cl.C, dp+A(1), dp+B(1), dp+D, qcb+B~D, dp+B(1), dp+A(1), dp+B(1), dp+D, qcb+B~D, dash [3 stock combo]
Videos
External Links
Check Ryuji Yamazaki's frame data
Discuss at 02UM Discord server
Discuss at Dream Cancel


